My search for a shifter, or "more than you ever wanted to know"
Note: this story covers approximately 20+ years of trial and error.
Version 0
July 1991
Before I owned this car, someone had done a hack job on the floor to make room for a shifter of some sort. They cut a big hole in the floor, and cut off the mounting brackets for the stock SS shifter console.
Years ago I made some crude patches for the hole in the floor, and a friend of mine brazed them in for me. That took care of the flintstones effect, but I was left with the worn-out ratchet shifter that came with the car. The shifter was attached to a piece of steel strap that was attached with screws to the seat brackets. It was a pretty rickety setup. Without the console, it let me at least drive the car, but it was a horrible setup. I think that shifter was originally a B&M Pro-Matic, but there wasn't really enough left of it to tell. It was just the bare mechanism and the cable, and it was pretty beat up.
I got the front part of the SS console with the car, but it was not installed because of the missing brackets. I ran it that way with no console (and no carpet) for about 10 years. It just barely worked for me to get PRND, and that was enough for the time.
Version 1
June 2003
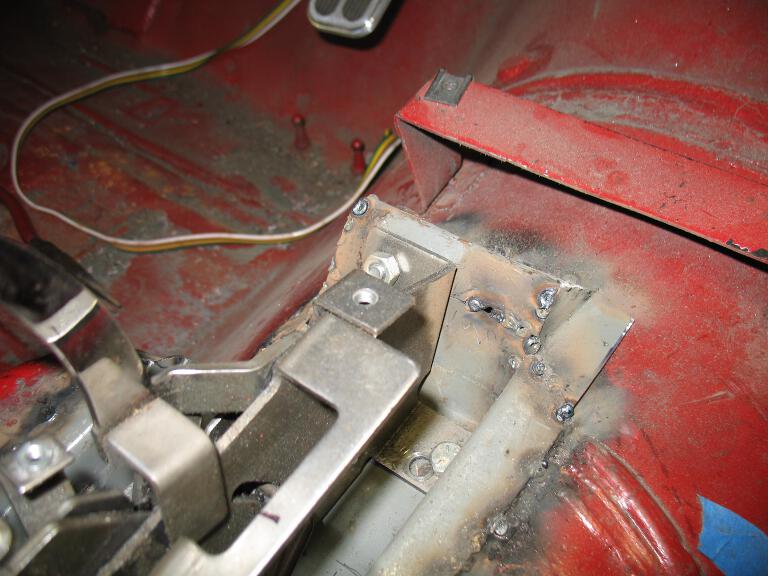
I didn't have the original Powerglide shifter setup, so I went with a Hurst Quarter Stick shifter...but I wanted it to fit in the original console. The only way that it would fit under the console was for it to be recessed into the floor slightly. I had the shifter for several years until I decided to try to install it. By then I had purchased a back half for the console, and had some ideas on how to proceed. The first step was getting the brackets I needed to mount the console. Only the middle bracket was still on the car, so I attached it there and started making the missing brackets.
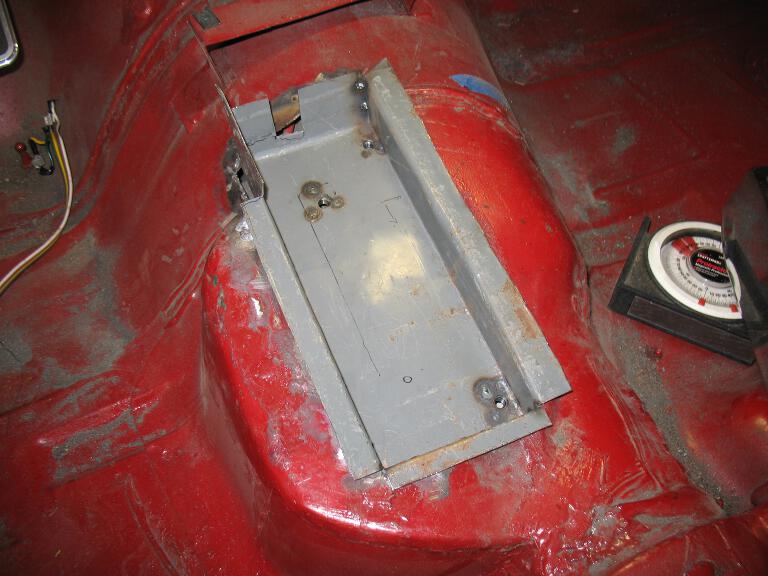
Here is the console where it should be:
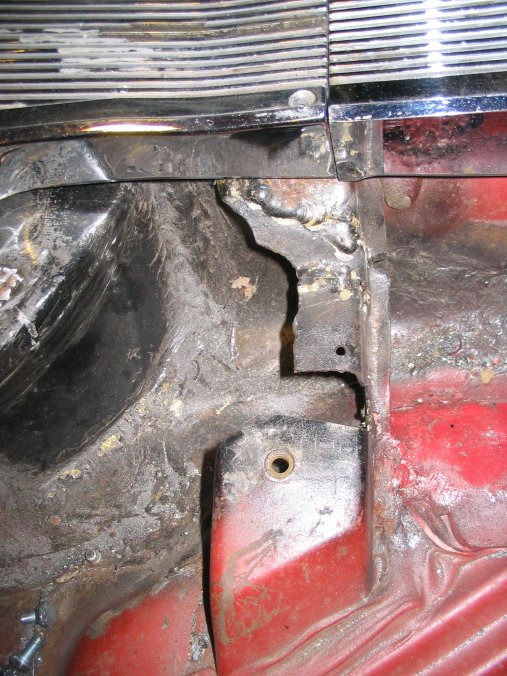
The replacement for the frontmost bracket. The holes in the floor
just ahead of the bracket are for the condensation drain tubes that
were part of the AC unit that was originally on the car. That was long
gone by the time I got it.
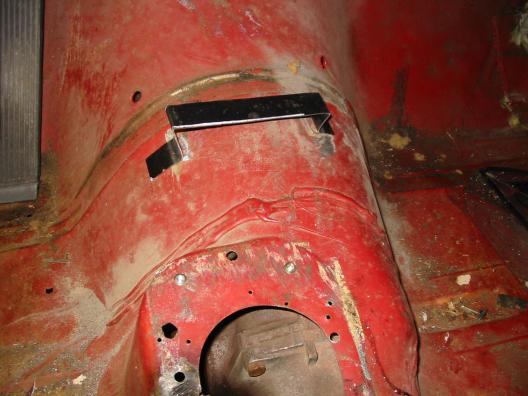
The rearmost bracket is missing also
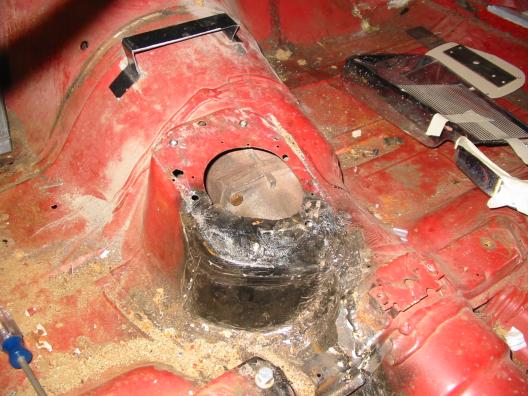
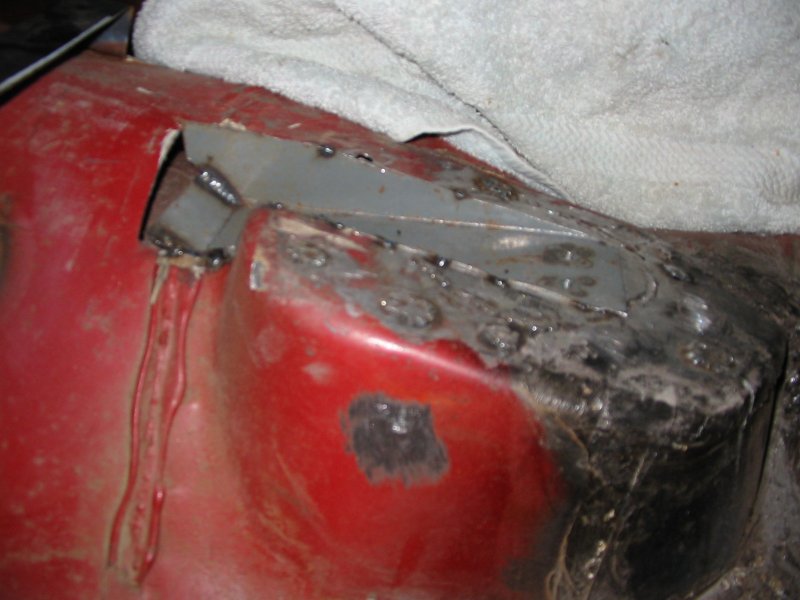
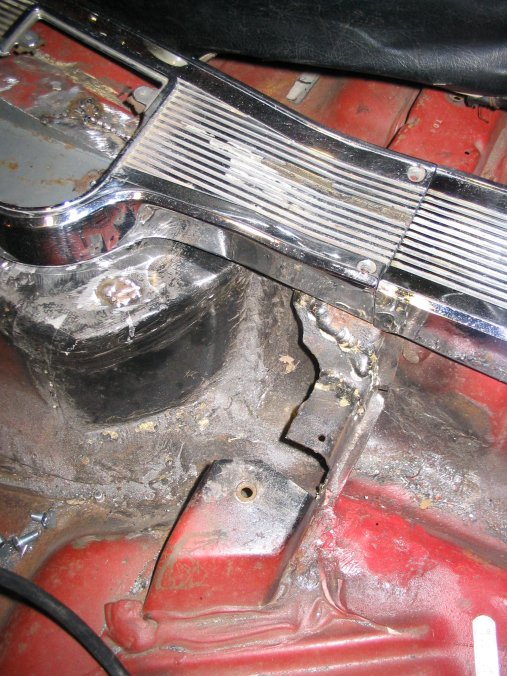
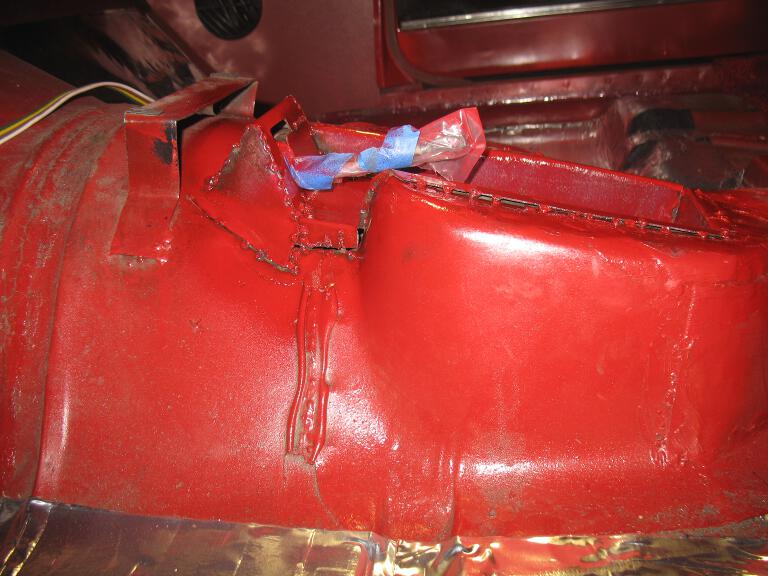
Someone hacked up part of the shifter hump, I repaired this a few
years ago. Not pretty, but much better than the ragged torched hole
that was there previously.
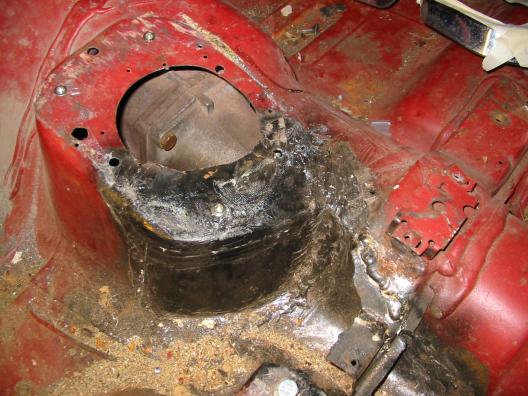
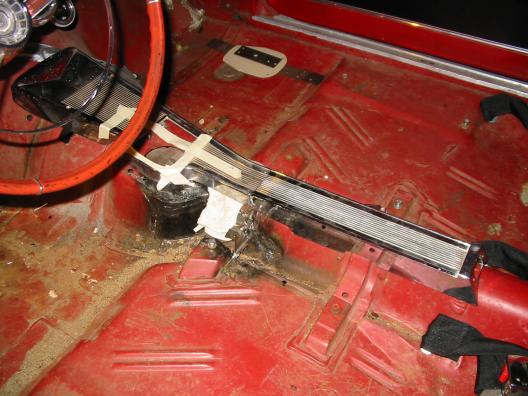
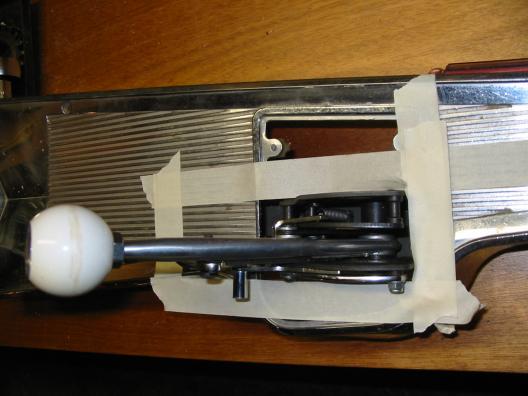
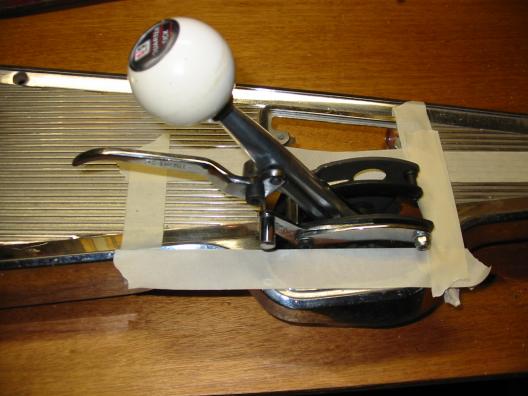
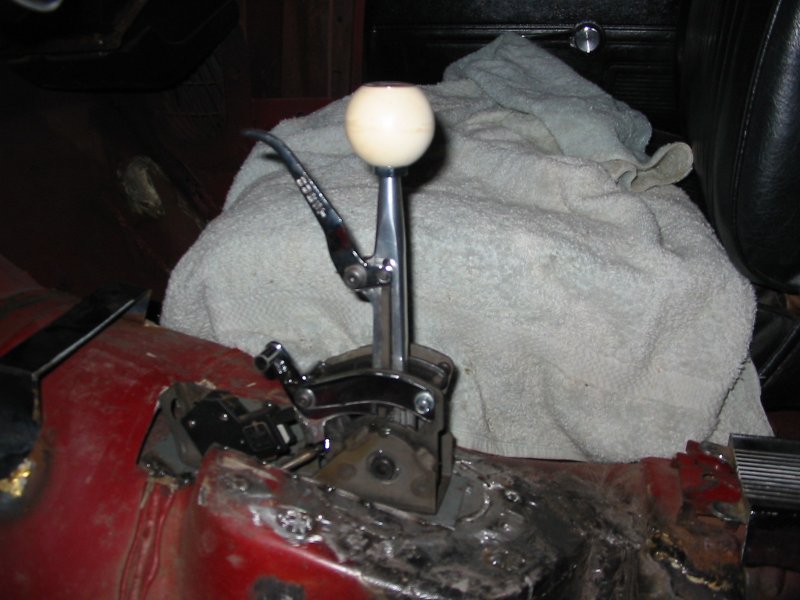
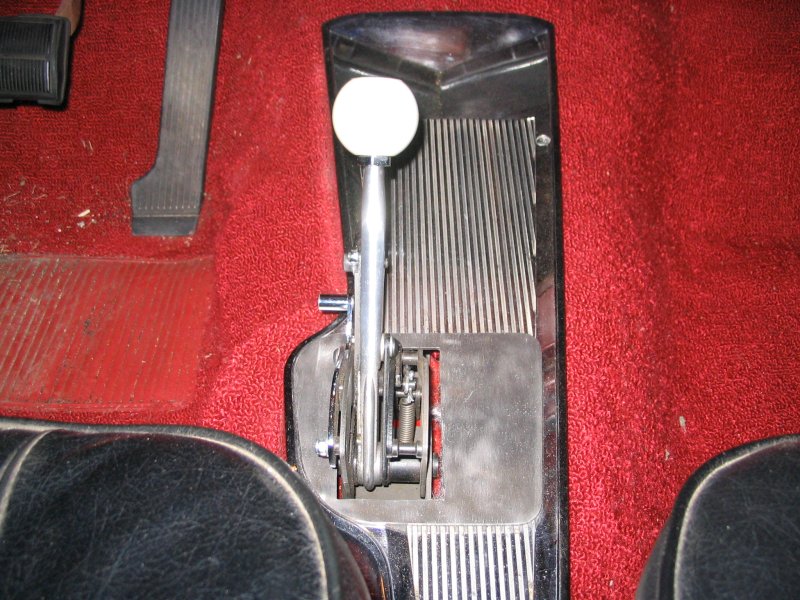
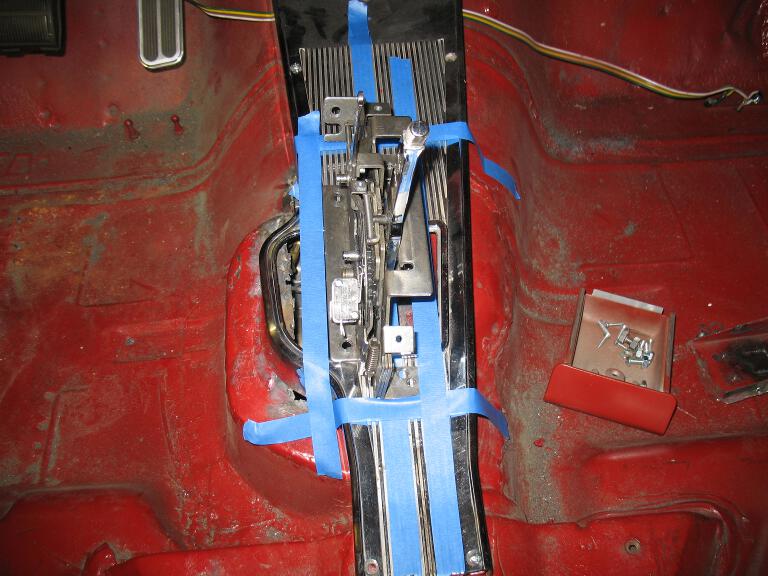
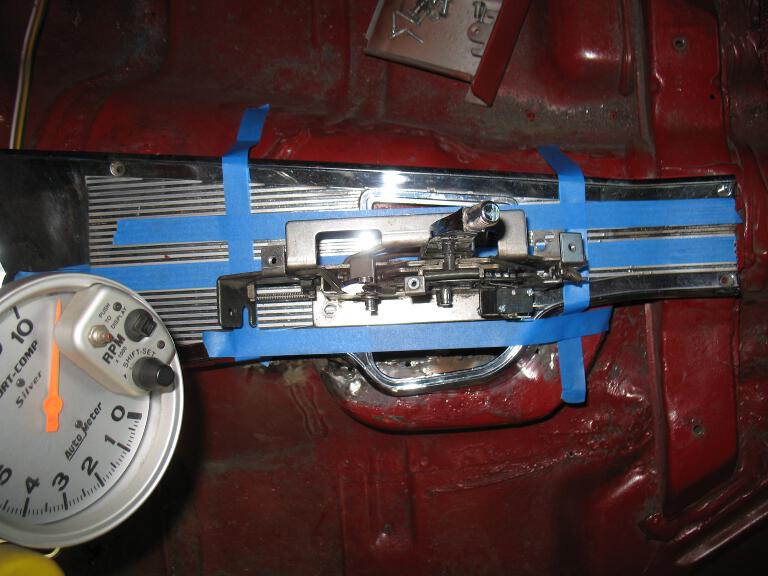
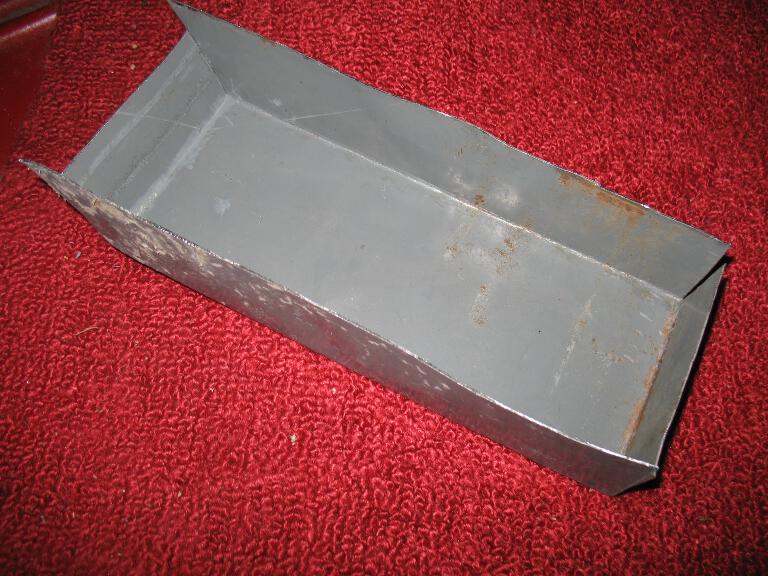
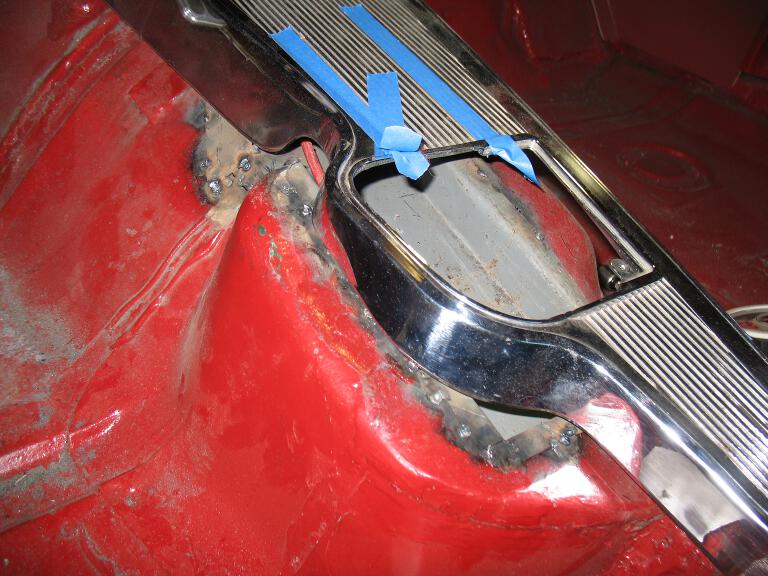
This is where I want the new Quarter Stick to be in the console. The
tape is to mark where the shifter mechanism is. I will need to make a
box underneath the console with those dimensions for the shifter to fit
into.

I
didn't have a welder, and my friend with the brazing setup was long
gone, so I got a small brazing setup at Sears. I managed to braze the
new front bracket into place without setting anything on fire. I'm not
very good with it, and I was going through the disposable bottles of
oxygen and fuel pretty quickly. Not a great plan.

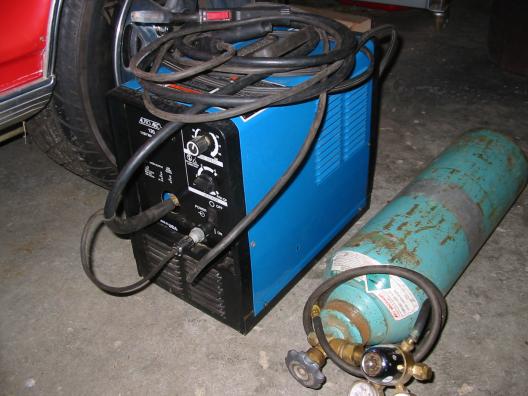
After watching the classified ads, I found a used Miller MIG welder. This ought to make the project easier!
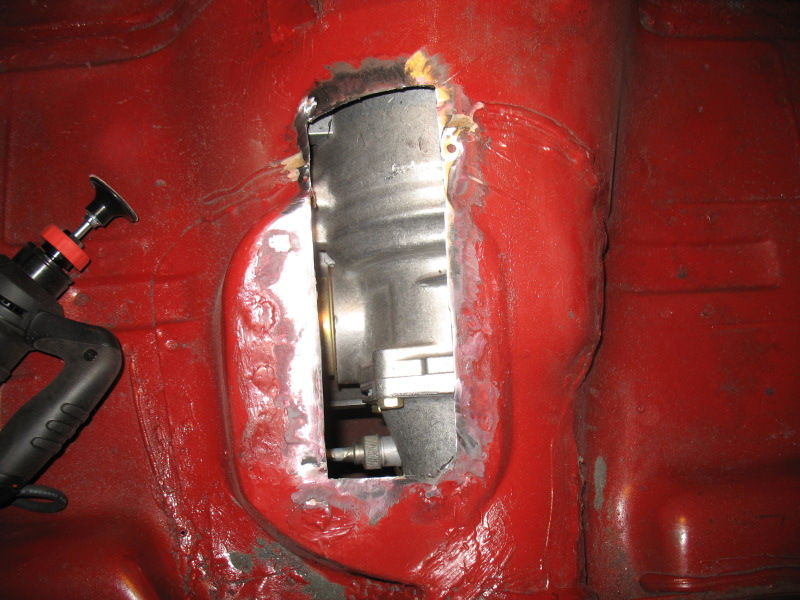
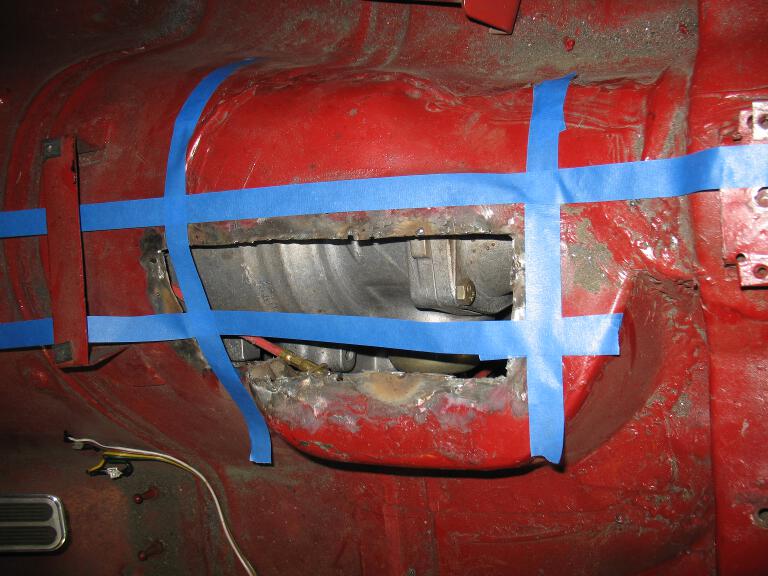
More mock-ups. I cut a rectangular opening a little larger than the
Quarter Stick base into the front of the shifter hump. Then I made a
pattern from some thin cardboard, and then transferred that to some
thin metal that was easy to bend. The mockups were done with the thin
metal bracket to make sure everything cleared the way I wanted it to. I
centered the shifter in the console hole, and then checked the fit with
the seat. It came too close to the seat when the shifter was all the
way back, and the front of the shifter hit the bottom of the console.
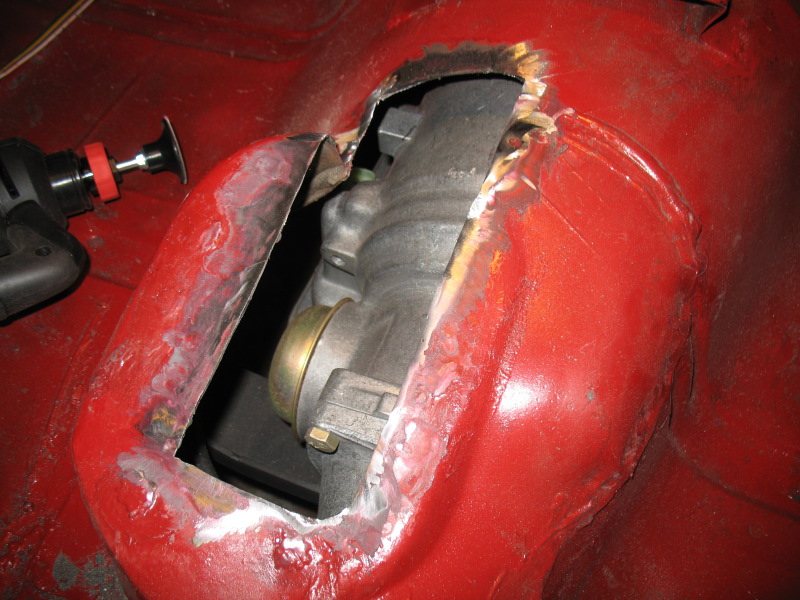
To correct both problems, I angled the floor of the bracket downhill so
that the front edge was lower than the rear edge. That solved the seat
to shifter clearance, and got the shifter body down below the console.
The front of the bracket was now hitting the transmission though. I had
to bend the front edge of the bracket up to clear the transmission
tailshaft.


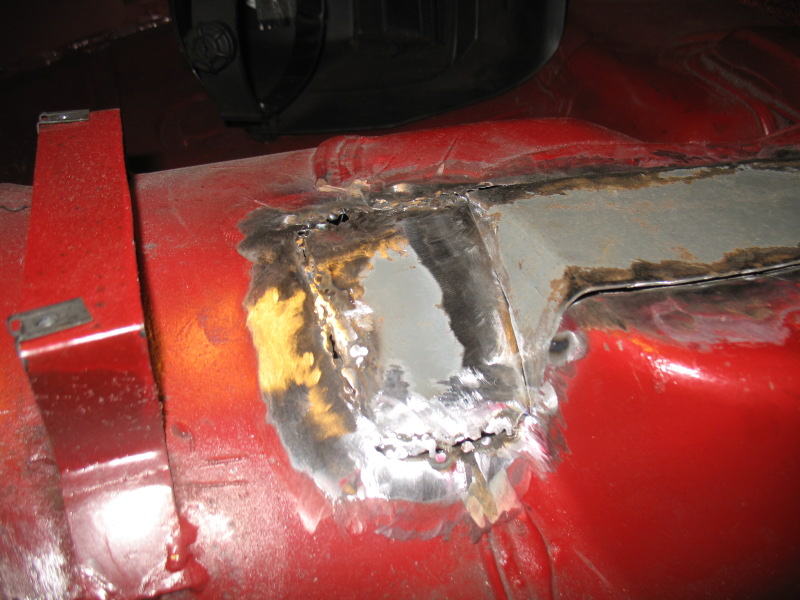
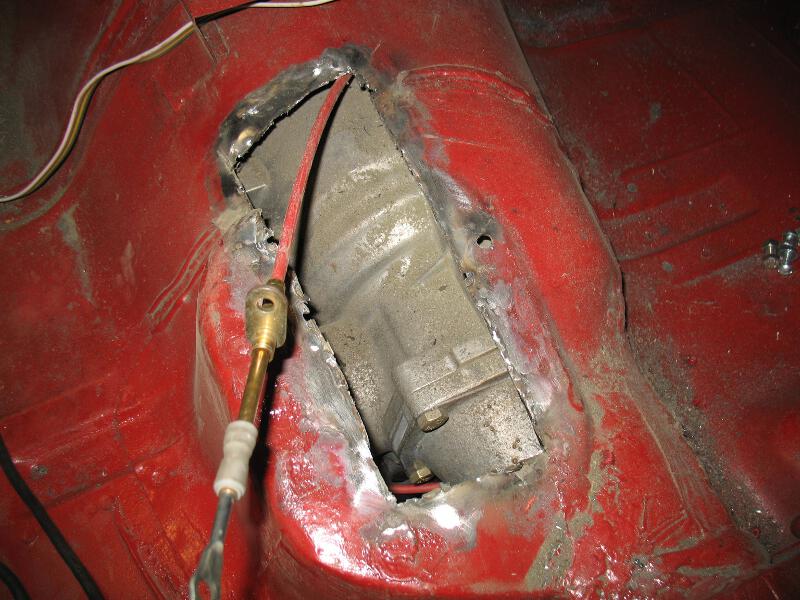
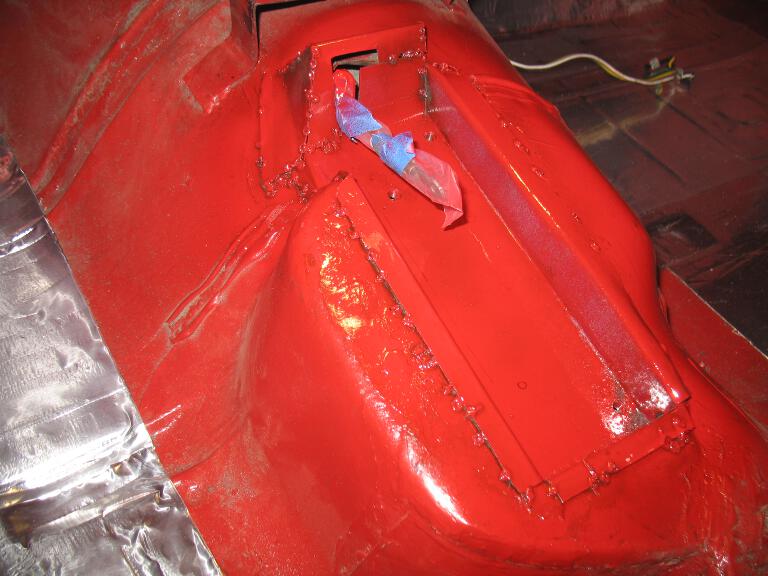
×Finally...some
progress! This view is looking down from directly above the shifter
hump. The next step was to fill in the original shifter hump opening
with a 'C' shaped patch that lined up with the rest of the rectangular
opening.
Once I
was happy with the thin metal bracket, I flattened it back out and
transferred it to some heavier sheetmetal. I also added some nuts
underneath to attach the shifter to
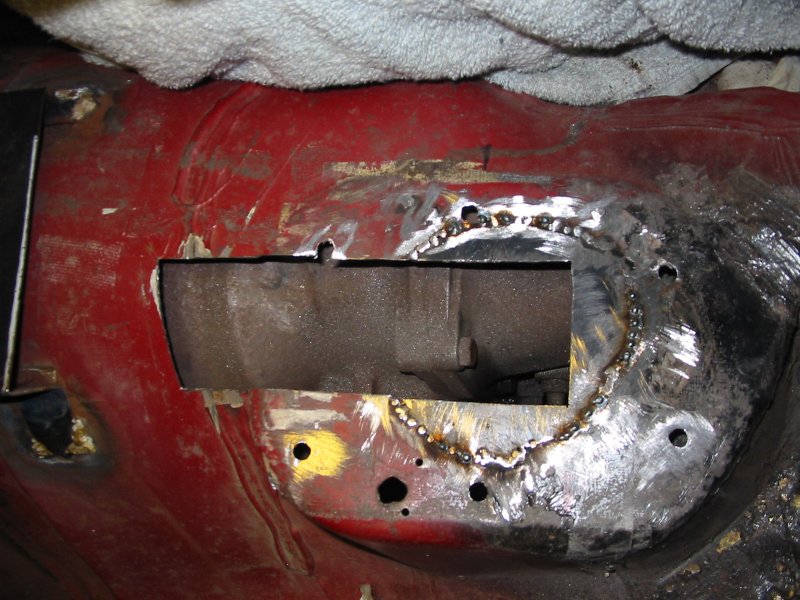
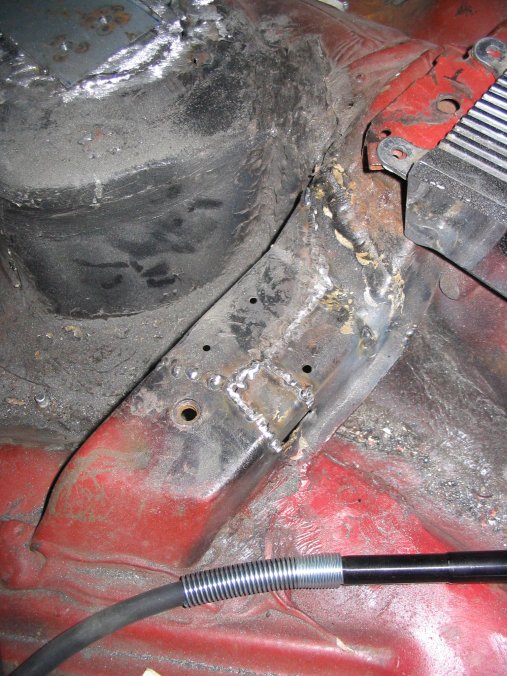
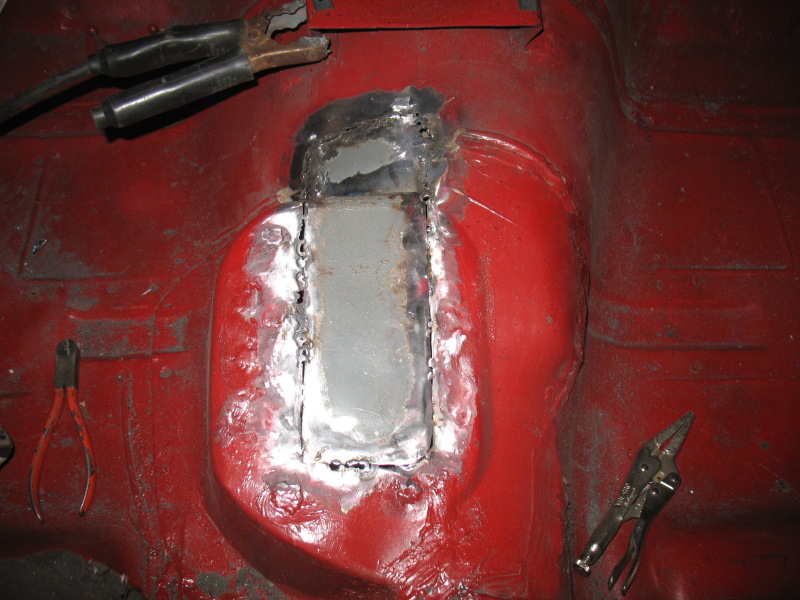
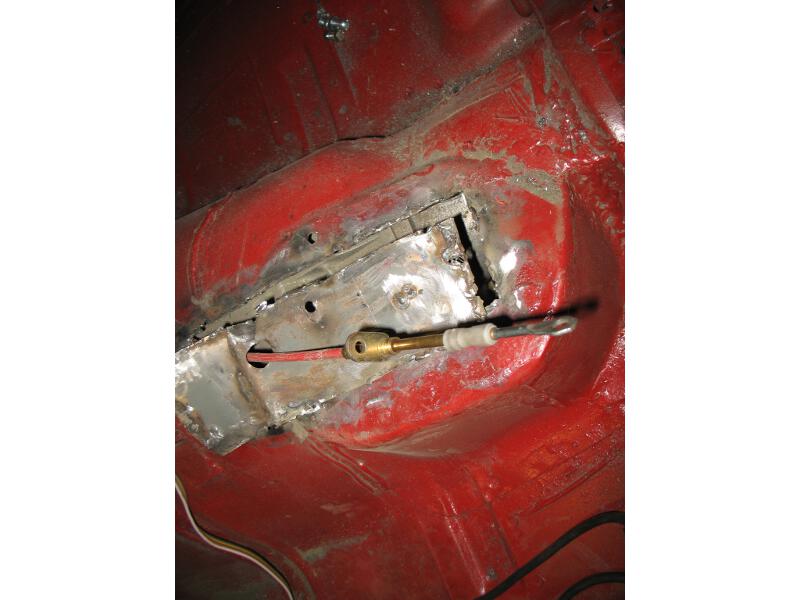
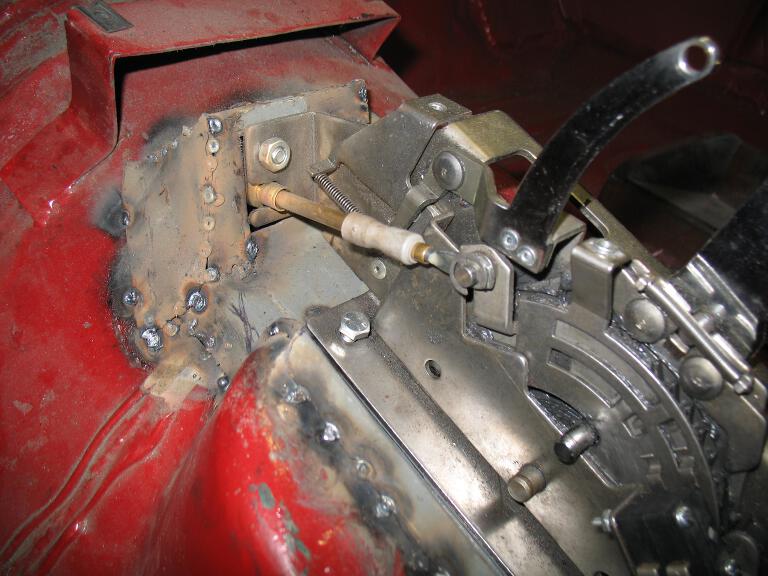
Then I
tacked the new bracket in. The rear edge of the bracket is flush with
the original shifter hump surface. The front edge cuts down into the
transmission tunnel a bit, but ends up leaving a nice opening that I'll
put the shifter cable through.
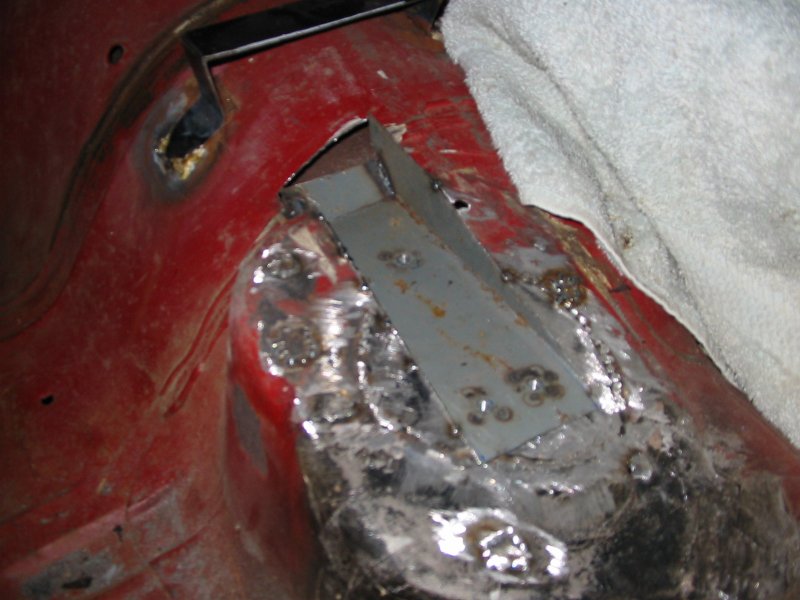
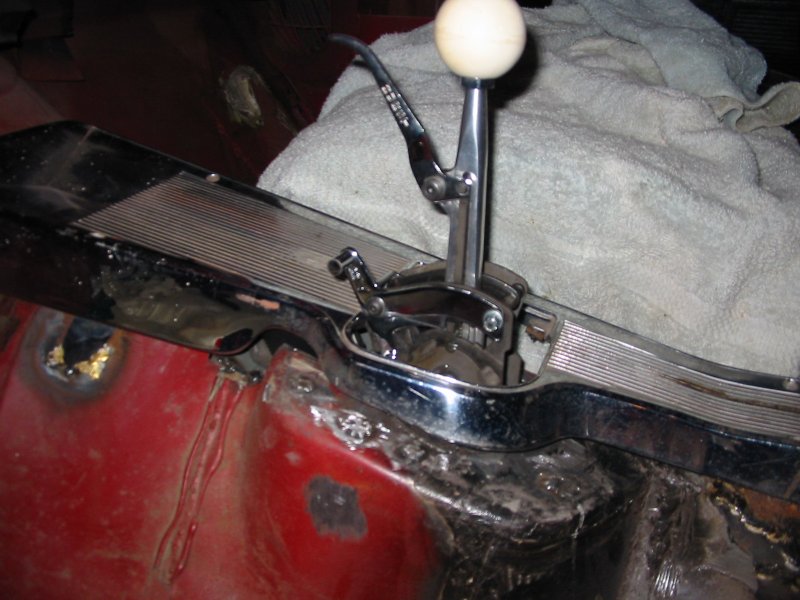
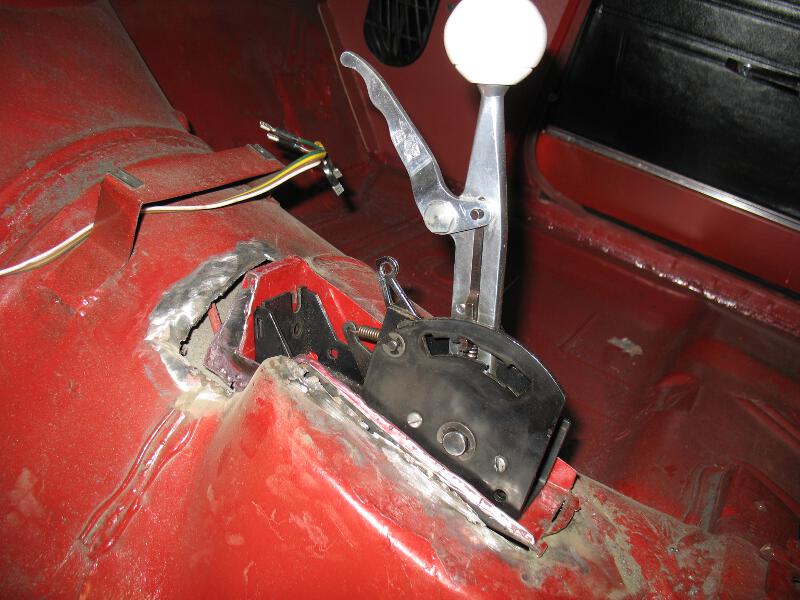
Here's what it looks like with the shifter bolted in place...
...and with the console installed...
I built a new rear console bracket and welded that in to support the
back part of the console.

×More progress...rebuilding the seat bracket that a previous owner cut up for shifter clearance (along with the floor...) Some of it was cut and removed, but luckily some of it was just cut and bent out of the way. I bent what was left of the bracket back into place, and a friend of mine brazed it back together when he brazed in the floor paches for me. Those repairs helped, but there was still a lot of metal missing from the original bracket:
And here is what it looks like now that I've added some
patches. I still have some more work to do, but it's a whole lot better
than what I started with!

×Some
more welding and grinding...a bit of paint...and:
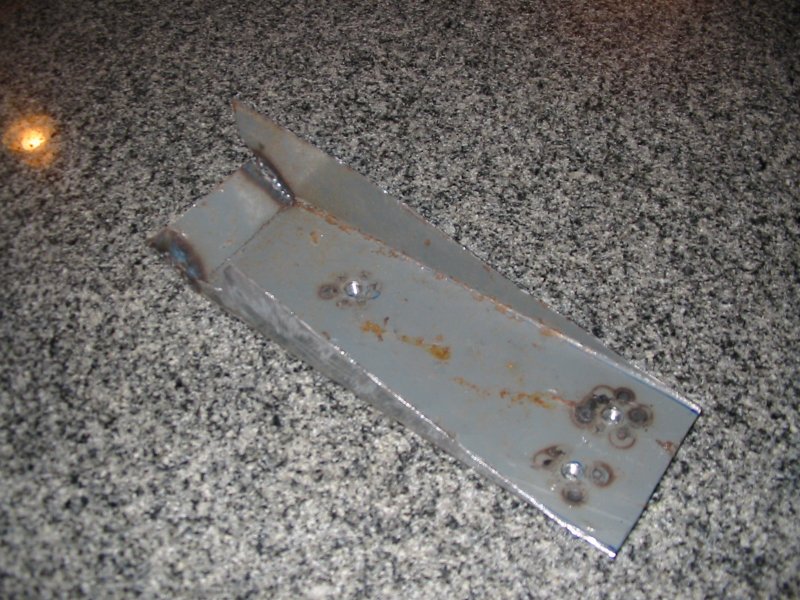
I decided that the metal bracket that I made was too thin...so I
made a new one:

If you are going to try this yourself, here are some things to watch out for:
- Front/rear positioning - The opening in the console pretty much matches the size of the shifter, so there isn't much room to move it. Too far forward, and the rigid end of the shifter cable will rub on the bottom edge of the console opening. Too far back, and the shifter will hit the seat before you get all the way back to 1st gear. It doesn't help that I'm short, and need the seat up most of the way
- Left/right positioning - There is more room to work with side to side, but if you get too far towards the right, you start to run into the transmission tailshaft. Too far to the left, and the shifter hits the seat in the low gears.
- Angle - This is probably the trickiest one to get right. I got some additional clearance with the seat by angling the nose of the shifter down. You need to angle it enough so the rigid part of the cable doesn't hit the console, but not too much or you'll run into the tailshaft.
To do this right, you need to make a bracket, tack it into place, connect the shifter cable, mount the console and the driver's seat, and make sure it doesn't hit anything. Then you take it all apart, tweak the bracket placement, reassemble, and try again...and again...and again. In the picture above, I didn't have the shifter cable hooked up...that was a mistake, I did end up with some interference betweent the cable and the console.
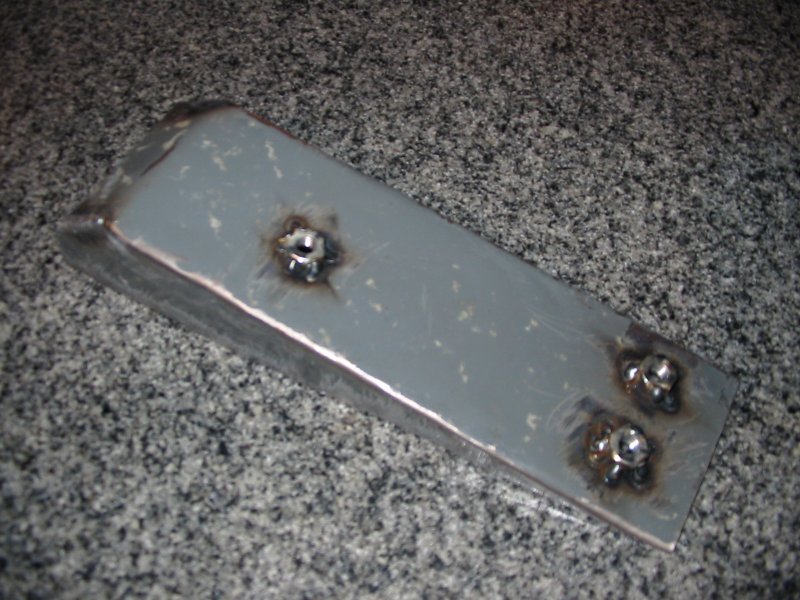
In the picture below, you can see the final bracket. What looks like a wrinkle
in the front right corner is actually intentional. I cut off the corner and
filled it in with an exact fit to the shifter base. That bought me a bit more
clerance with the transmission, so I could tilt the shifter down just that little
bit more.
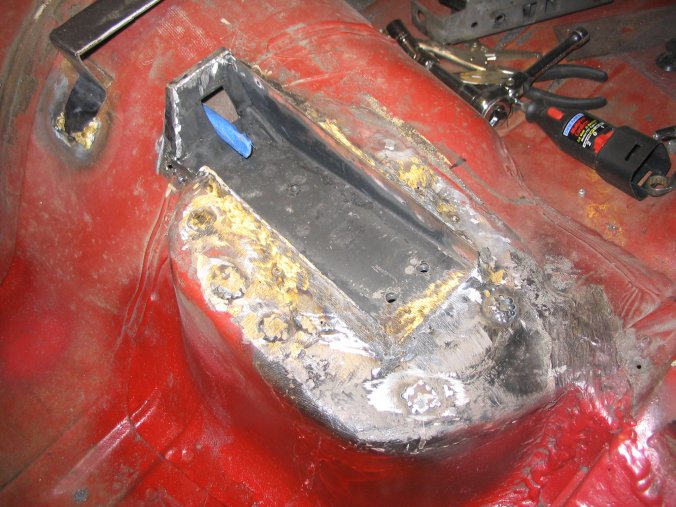
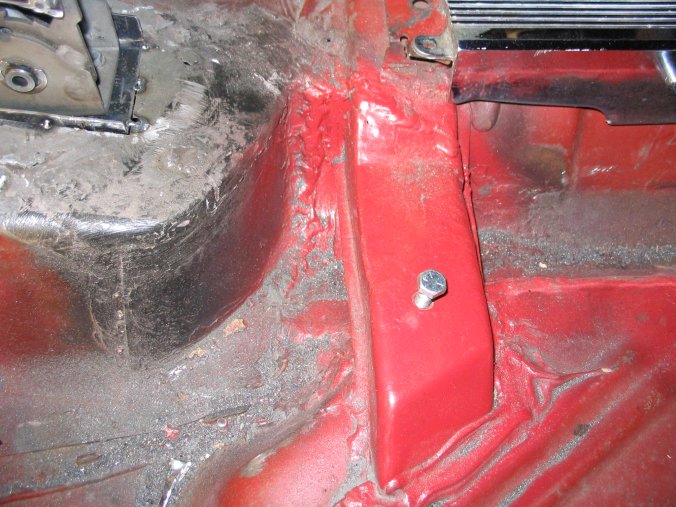
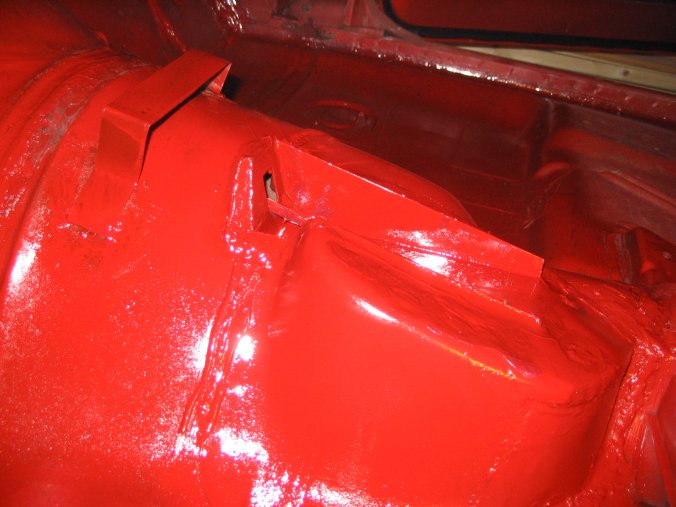
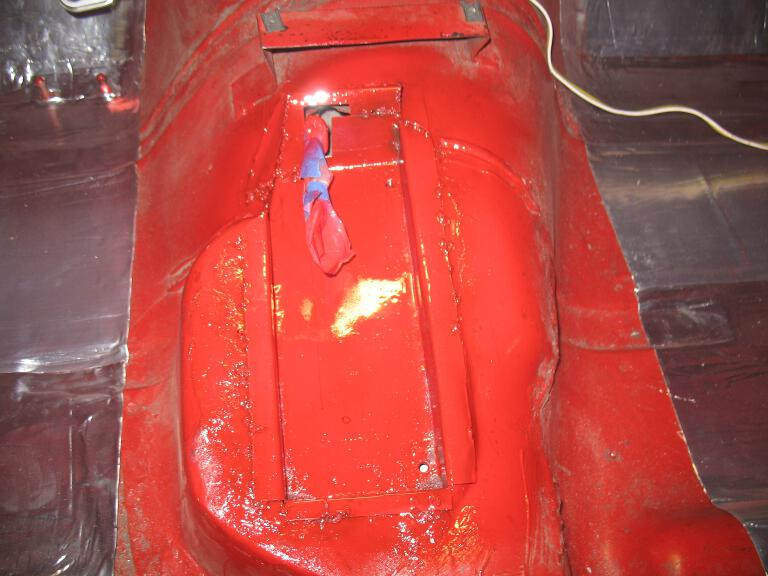
Finally it gets some paint, and starts to blend in...

Rear floor area, seams waiting to be cleaned. No rust though!
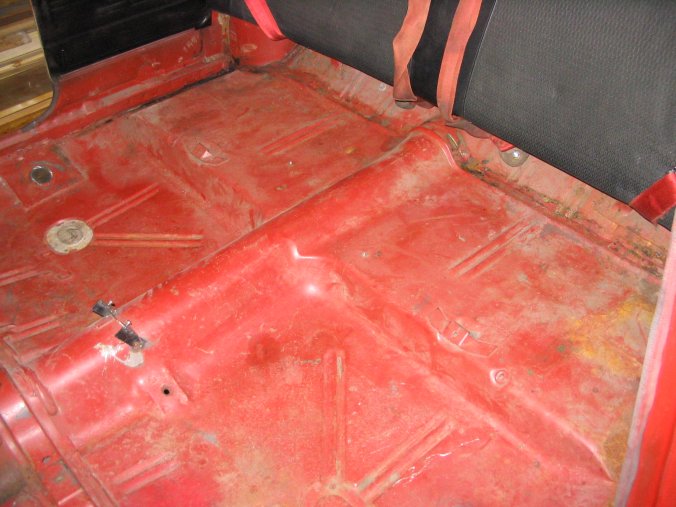
Seam sealer is good stuff!

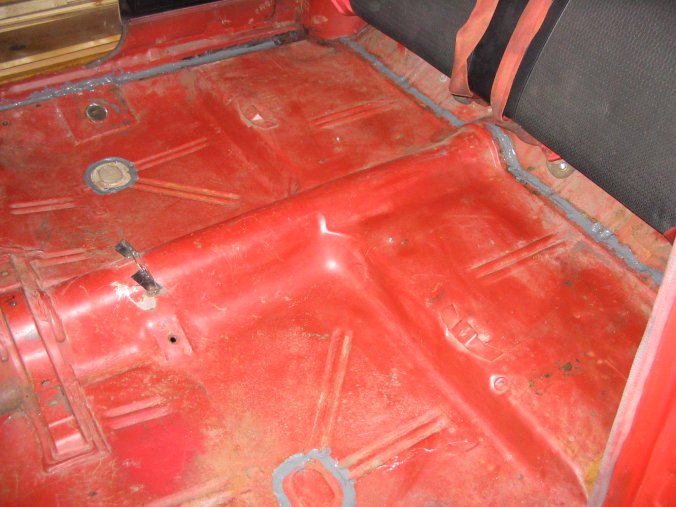
Sealed up all the seams
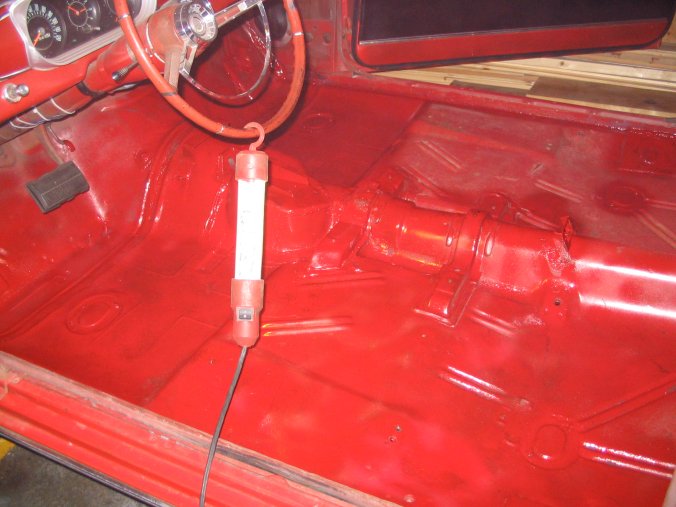
One can of spraypaint later:
The finished bracket...a bit tough to see the details though.
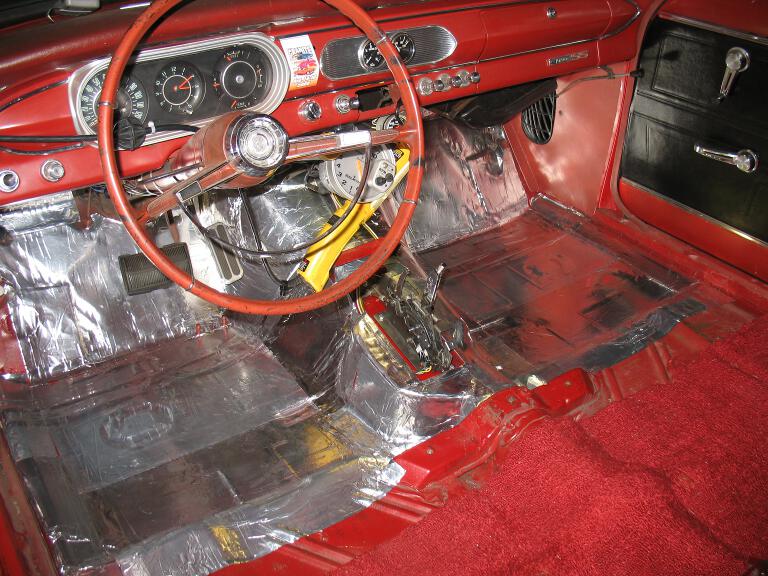
Carpeting and the console installed
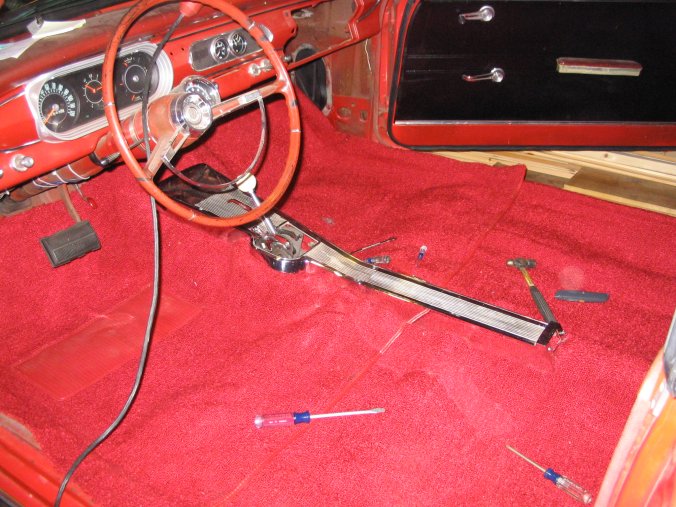
Seats too!

Version 2:
June 2008
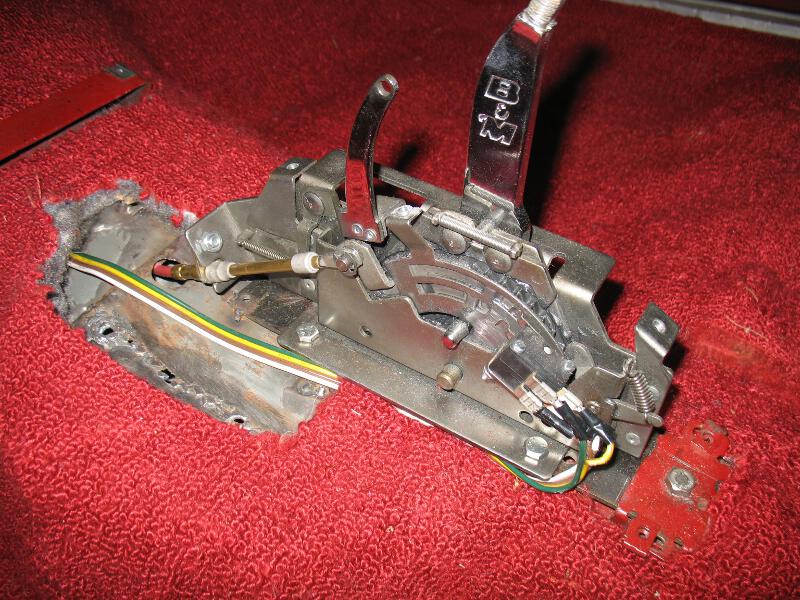
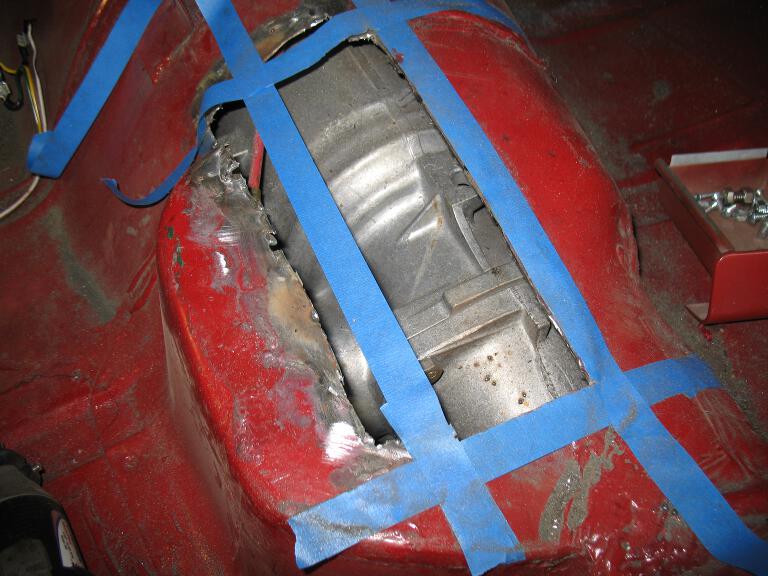
This all worked out fine until I got a 700R4 transmission. It was slightly larger than the TH350 that it replaced, and it hit the box that I had built for the shifter. So...out it came.


Yes, my welding skills suck, but in my defense, I'm self-taught, so I only have me to blame. Besides, my regulator broke at some point during this, and I switched to flux core wire.
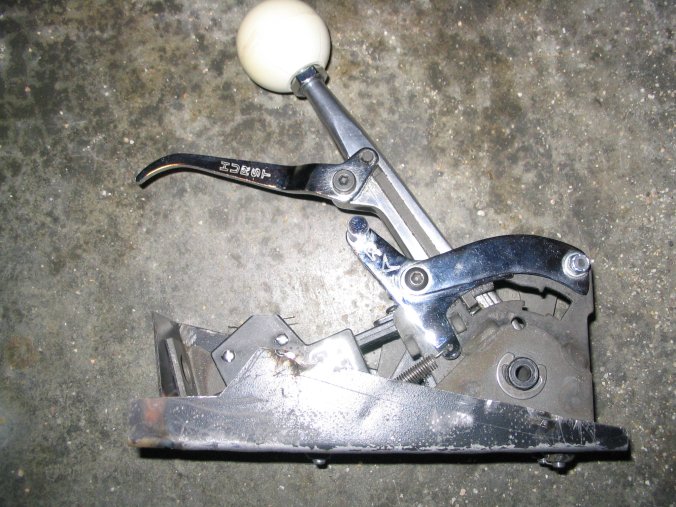
The other problem was that the Q-stick was designed only for the Th350 3-speed forward pattern. I bought a B&M Pro-Ratchet shifter to replace the Q-stick. The Pro-Ratchet is configurable for different transmissions, including the 700R4. The ratchet action is nice, since it only allows you to shift one gear at a time.
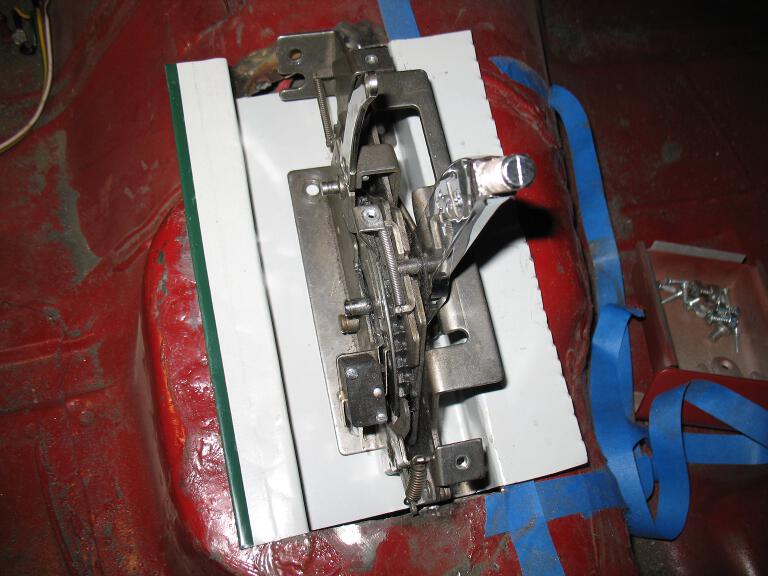
I tried a pedestal mount for the new shifter. Here's a mockup:
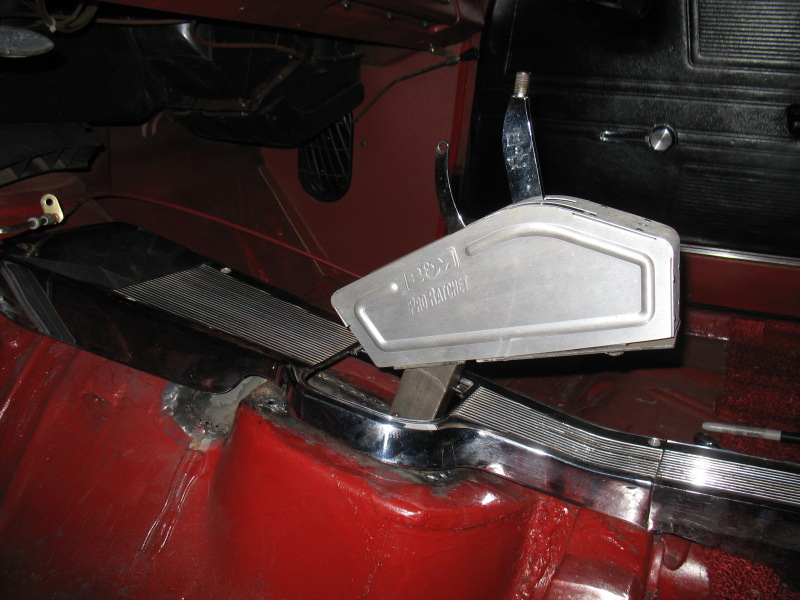

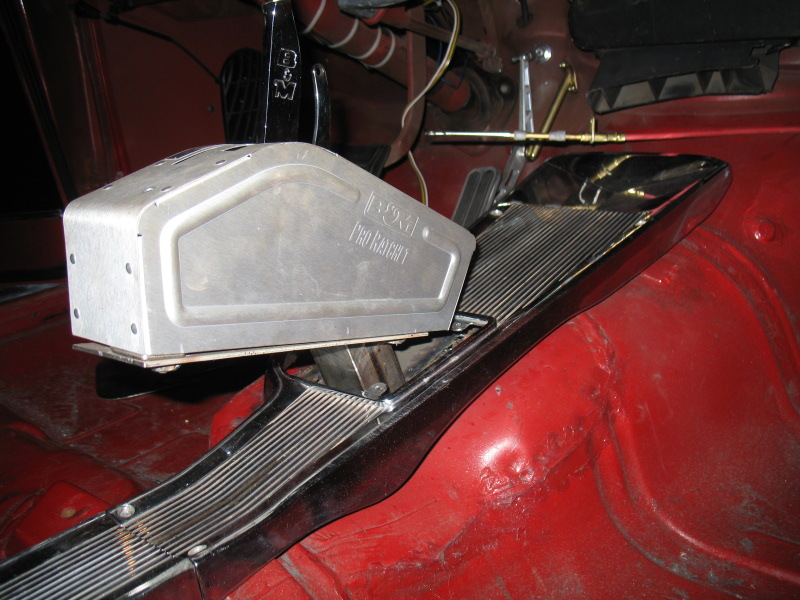

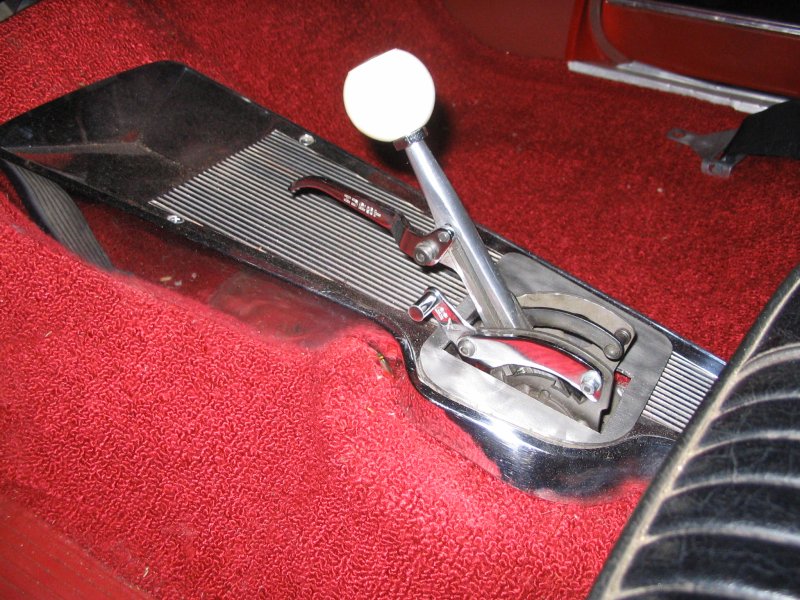
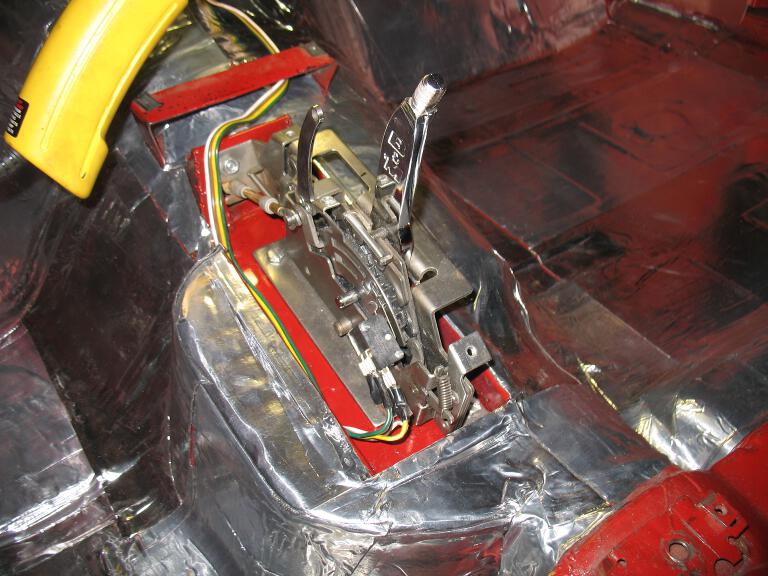
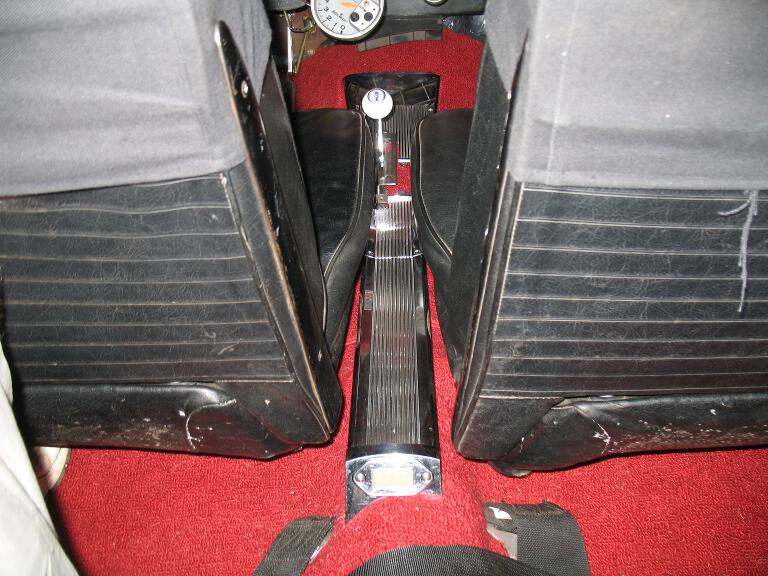
Unfortunately, I couldn't figure out a way to get it to fit underneath the stock console, and I didn't like the pedestal idea. In the end, I just mounted it on the floor and left the front half of the console off. Worked great...looked awful:
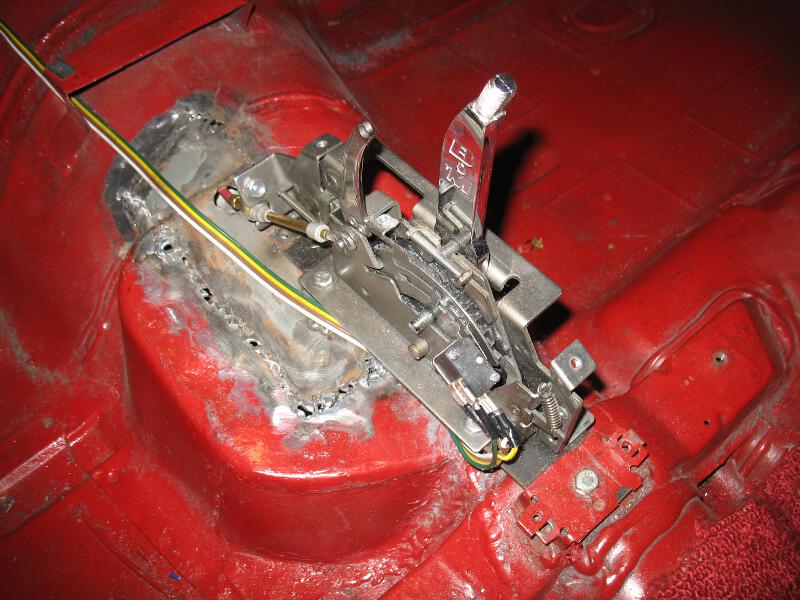
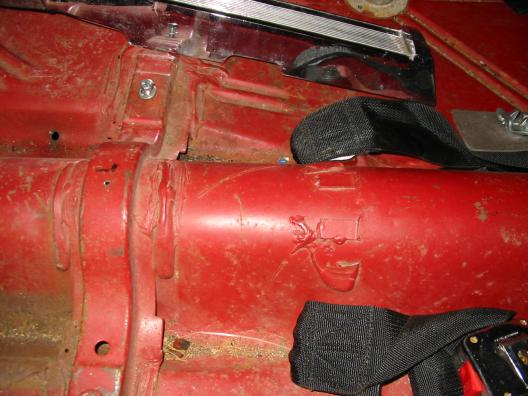
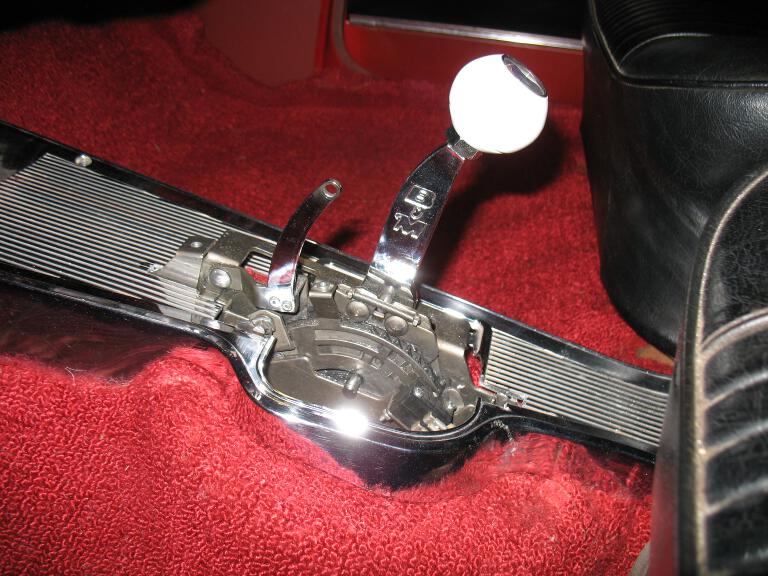
For those paying attention, the steel strap under the shifter in the picture below is actually the same one that was in the car under the no-name shifter that was in the car when I bought it. Notice that I've upgraded the attachment to the console bracket to a nut and bolt from the original sheetmetal screws. Woohoo.
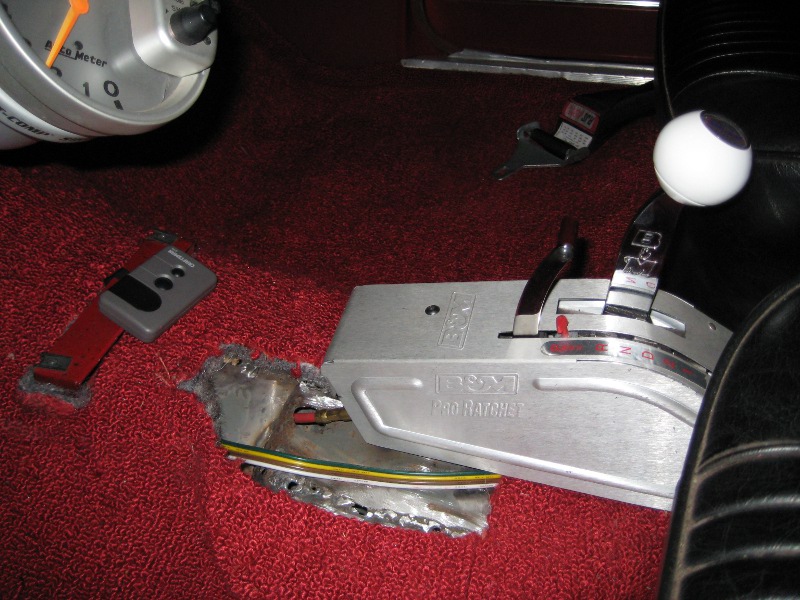
I wasn't happy with this setup, so I didn't really do much to make it look nice. The shifter was really nice, but I hated the mounting and the lack of the console.
Version 3:
September 2009
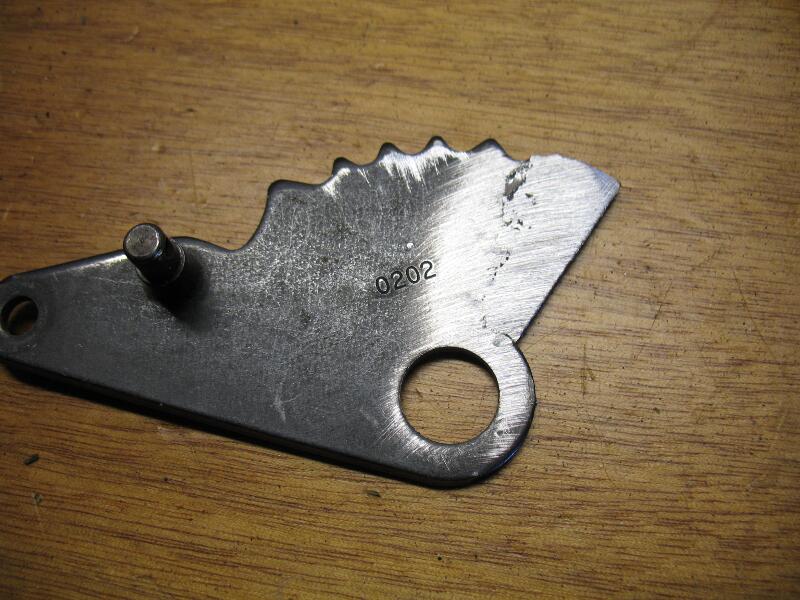
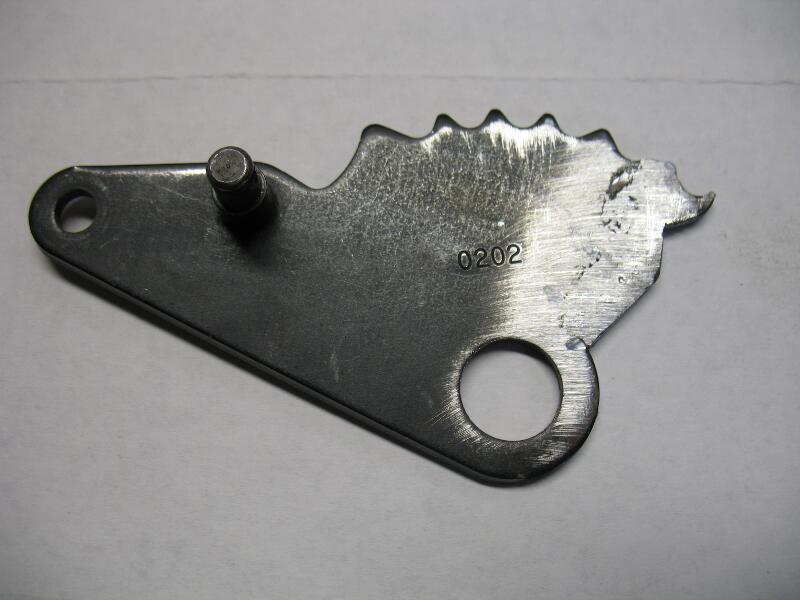
Hurst does make a 4sp version of the Q-stick. It wasn't in the budget. I bought what I *thought* was a 4sp Q-stick on eBay. Unfortunately for me, the seller didn't know what they had, and it turned out to be a 3sp. I decided to try to modify it to add another detent position and make it into a 4sp shifter.
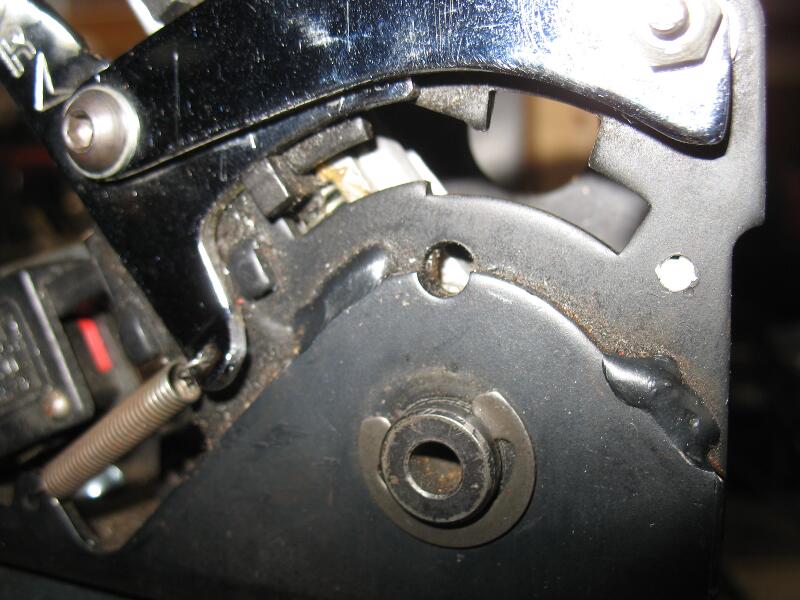
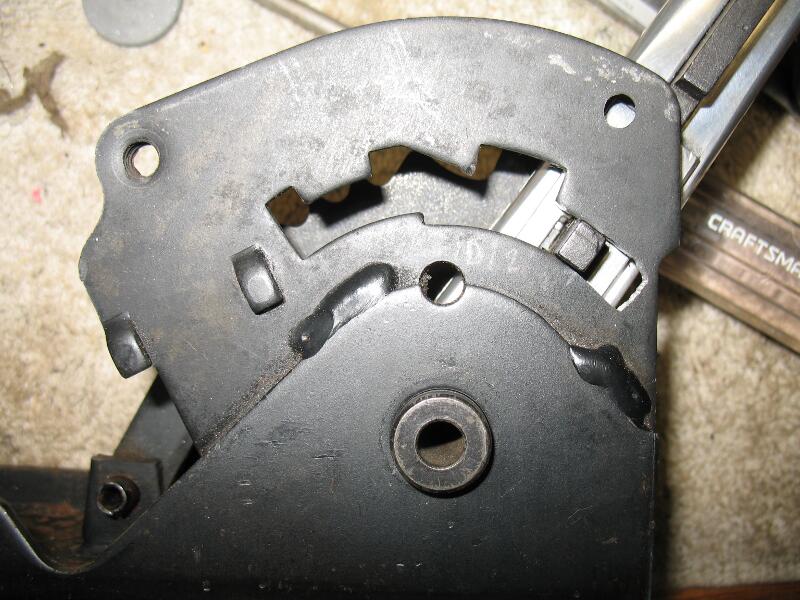
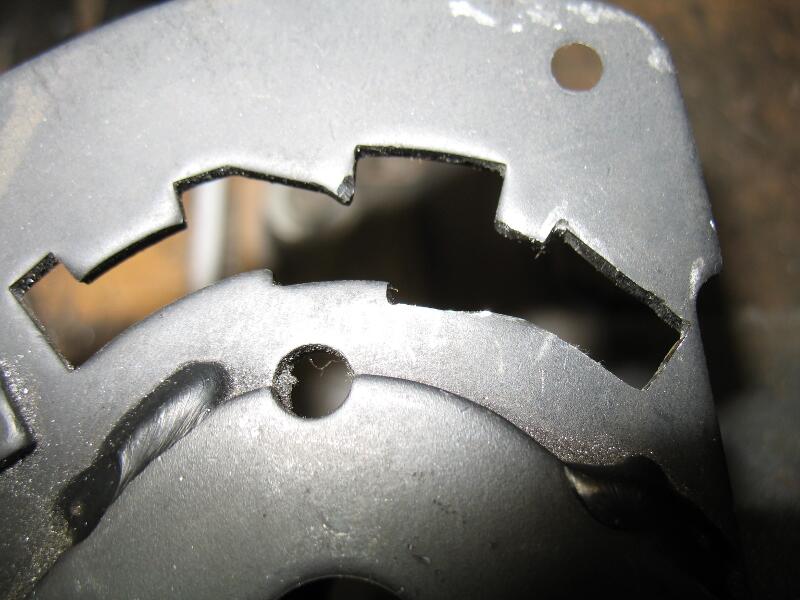
There's two things that need to be modified. The slot in the gate needs to be elongated, and there needs to be another notch in the detent plate.
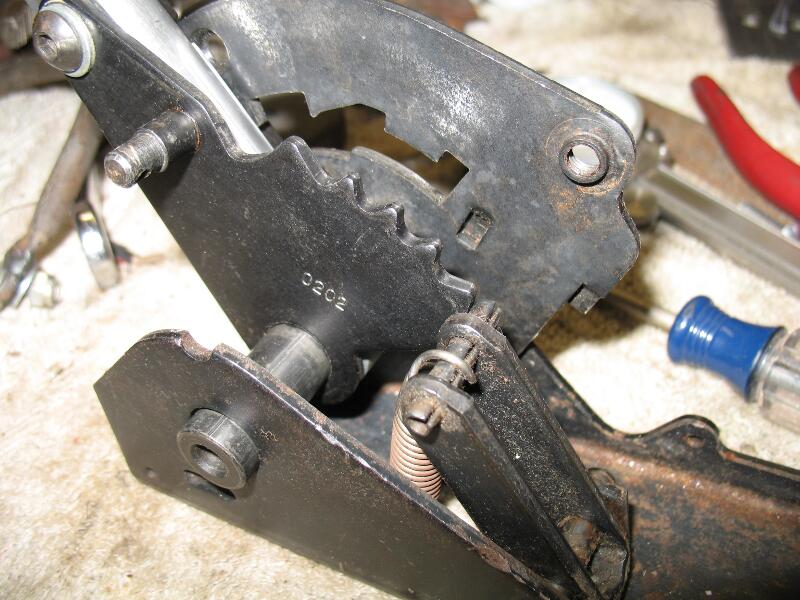
The detent plate needed to be extended to make room for the new position.
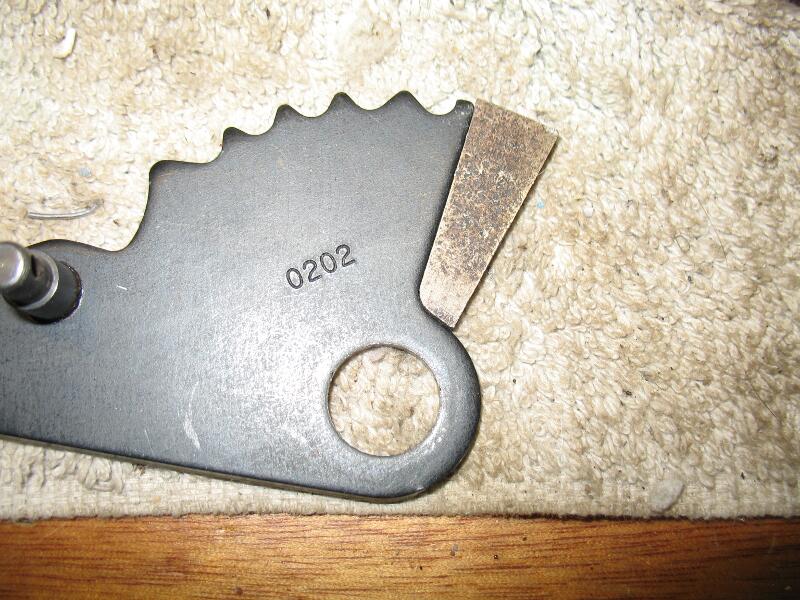
extension tacked in place
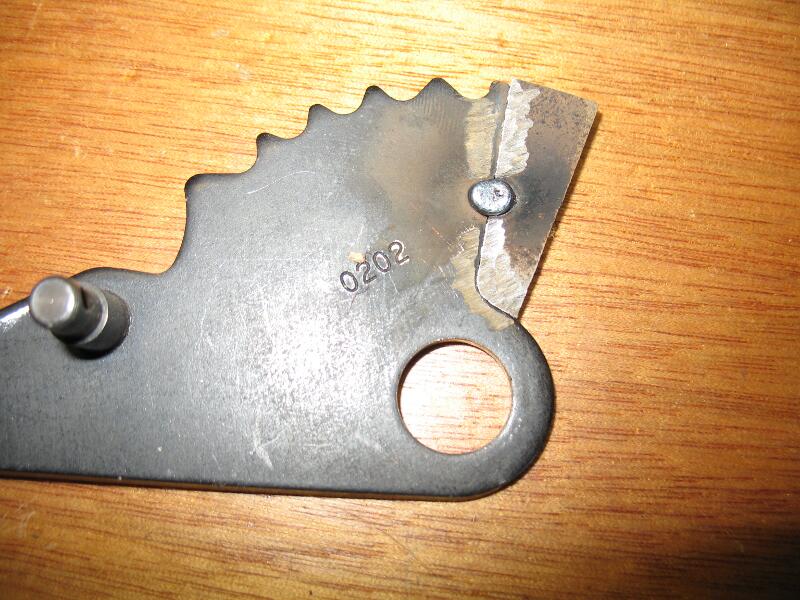
more welds, and some grinding...
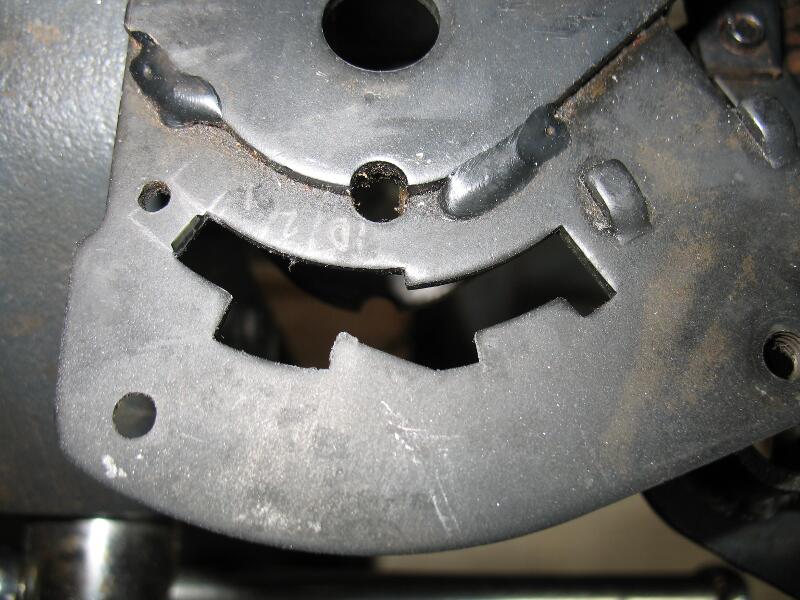
Shift gate slot elongated:
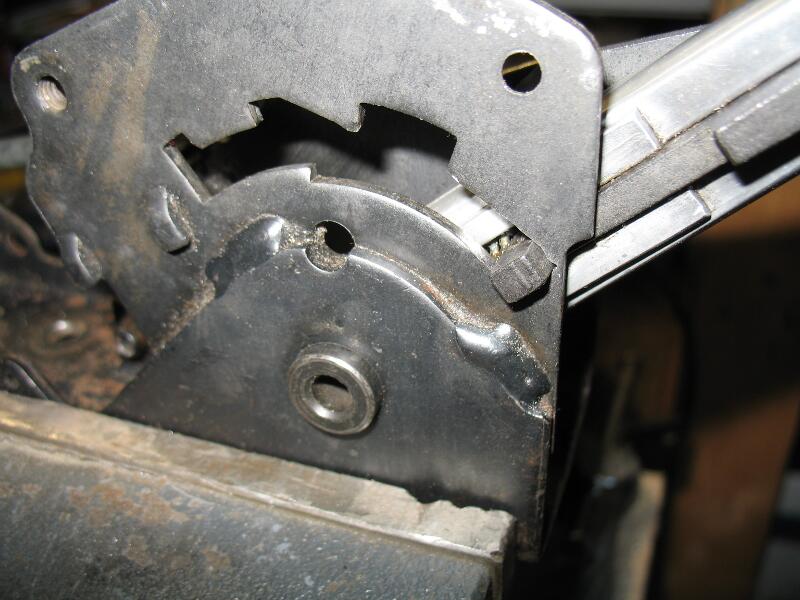
The detent plate has a new notch...but now that it's bigger, it was too big to fit into the shifter housing. Added a porthole so it would have somewhere to go.
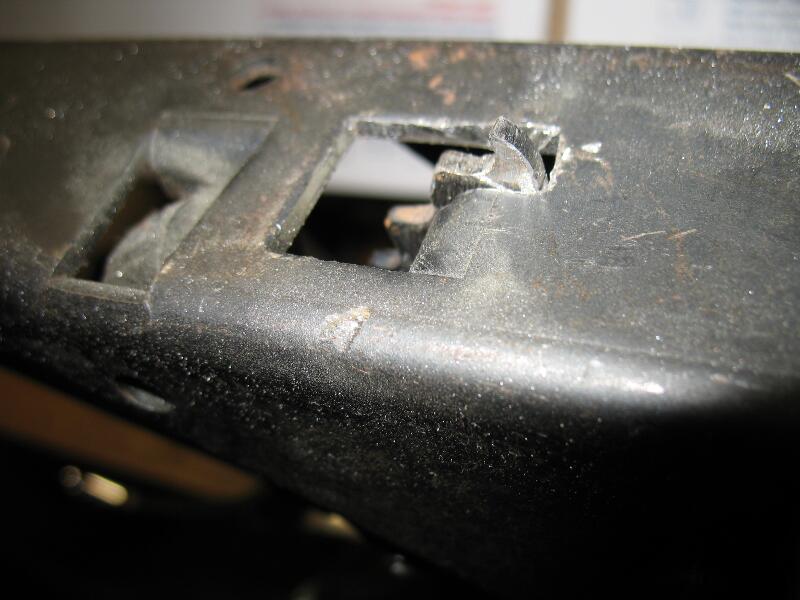
Up top, there is a spacer and rivet that holds the top part of the shifter frame together. With the extra travel of the added detent notch, that interfered with the arm, and needed to be cut out.

A new piece was added to replace the spacer that was removed

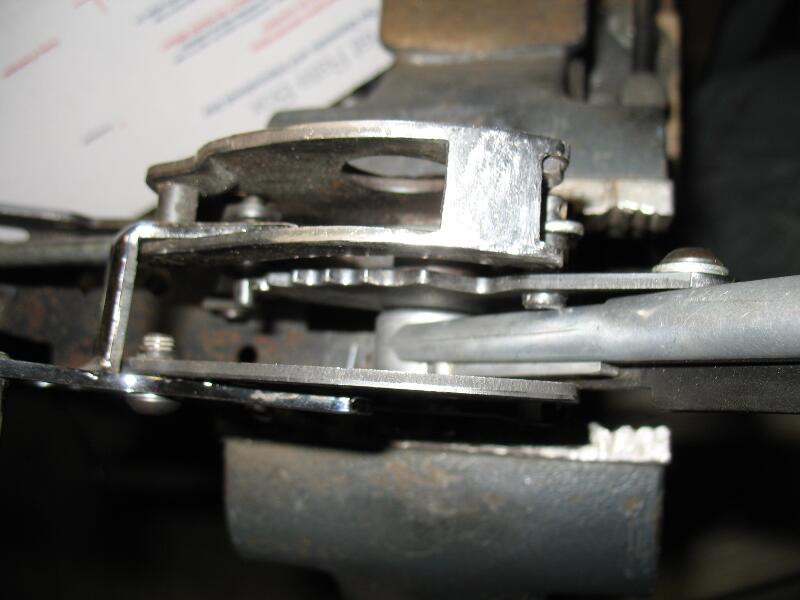

I kept the bracket that I made for version 2. With the detent plate poking out, a similar window needed to be added to the bracket.

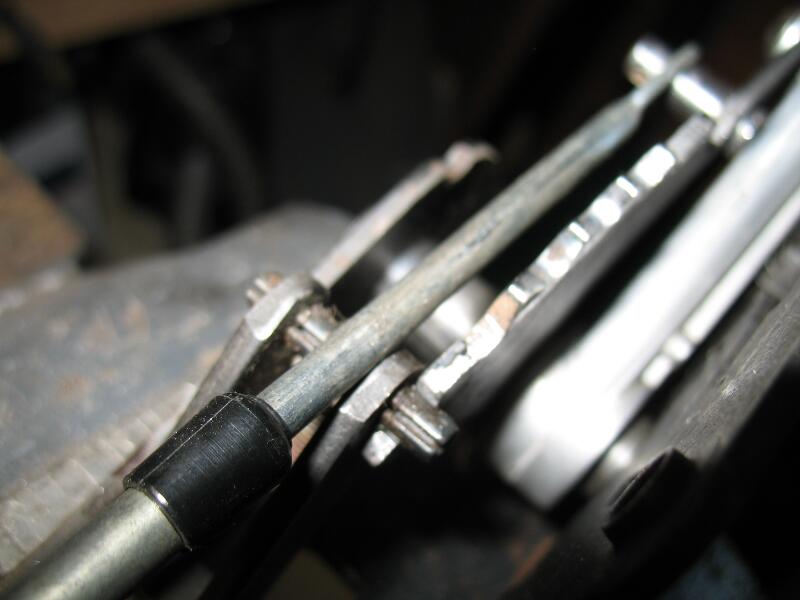
Around this time I started measuring the throw of the modified Q-stick against the Pro-Ratchet, and found they were different...and that the 1-2 detent width wasn't adding up right. To fix that I'd have to get a different length arm on the transmission end of the cable, and rework the detent spot to correct the throw. Also, although I had lengthened the gate pattern, the original pattern wasn't a 3sp forward configuration, so that made the shifter operation kind of odd. So...I shelved it.
Version 4:
November 2010
I wasn't happy with the way the modified shifter worked it had a strange pattern to it, and the operation was confusing. I decided to buy the B&M version of the shifter, called the Pro-Stick. This one (like the Pro-Ratchet) is configurable for different patterns. It was pretty close to the size of the Q-stick though, so I dug out the bracket that I had cut out that I made for the original Q-stick, and...it fit with minor modifications.
I cut out the flat patches I had installed with the Pro-Ratchet, and got the bracket tacked back in. It fit, but...the design of the pro-stick that allows the shifter plate to be changed for different configurations meant that there was more to the shifter on the left side, so it wouldn't fit through the stock console opening without modifying the console.
Cutting out the bracket...again...
Back to where I was before, just a big hole.
The version 2 bracket pressed into service...again. I closed up the window in the bottom again.

First test fit:

I put the console on, and discovered that the removable shift gate on the LH side of the shifter was much larger than the Q-stick shifter was at that point. In short...it wouldn't fit without some major rework or cutting the console.
At this point it got too cold to work on it, and I left it for the winter.
Version 5:
July 2011
After thinking about it for the winter, I finally decided two things: 1) I liked the operation of the Pro-Ratchet shifter better than either the Q-stick or the Pro-Stick. 2) If I was going to have to cut the console to make something fit, I might as well get something that I liked shifting. With that, version 5 was born.
This involved making a new mounting box (needed to be wider and longer than the -stick shifters) and cutting the console.
Back to something like version 2, starting over again.
Hole marked out, ready to cut.
Snip, snip...
To make the first pattern, I used some very thin gauge steel. Again. I'm getting good at this part.


basic pattern established, added some cardboard bits to finish it off.
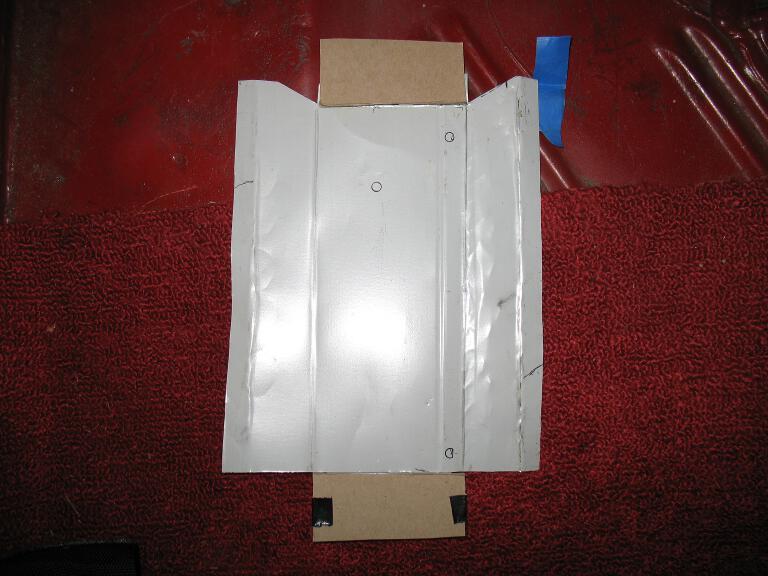
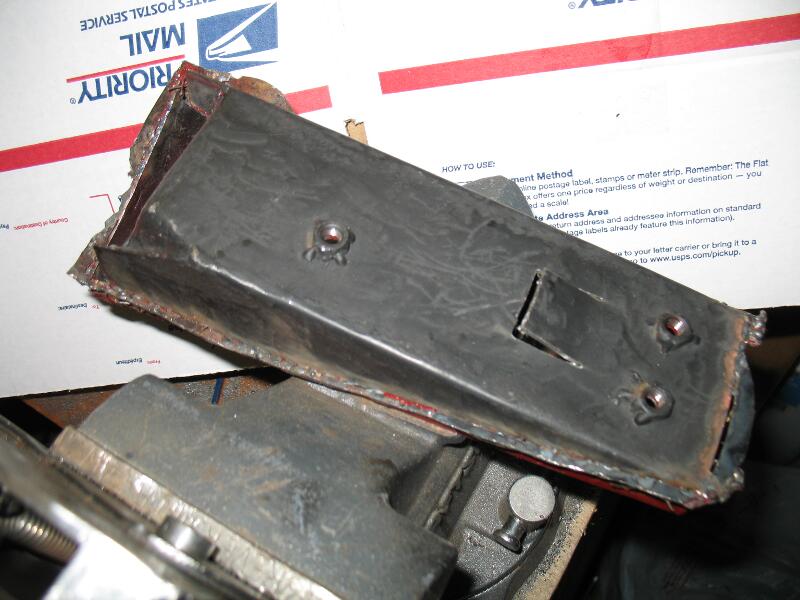
Always use a quality piece of metal for your real bracket...like this door from a filing cabinet that I pulled out of the metal pile at the dump.
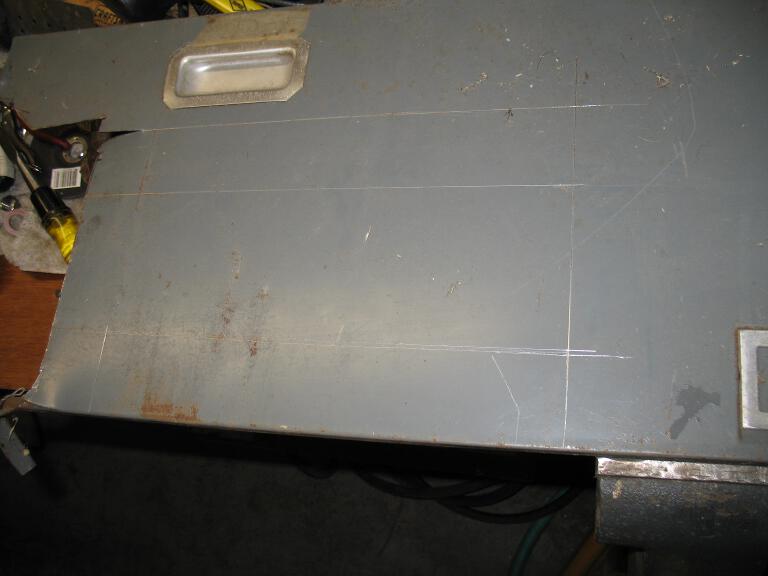
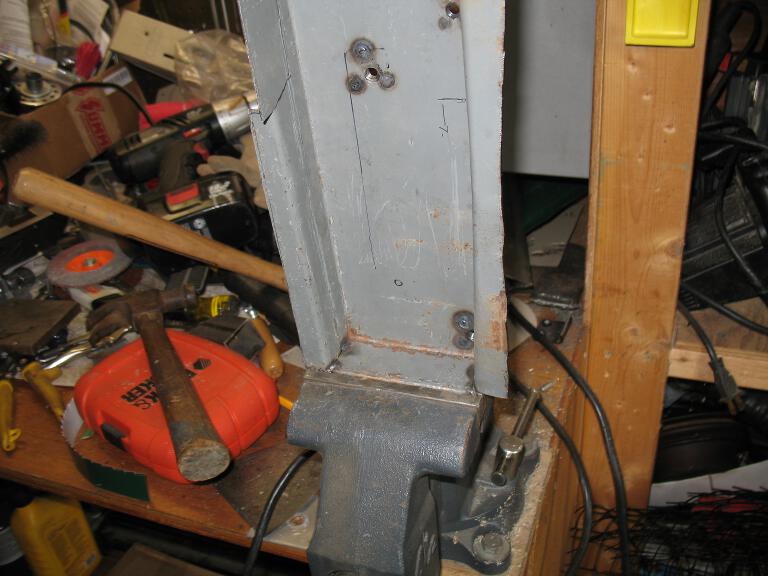
A lot of cutting later
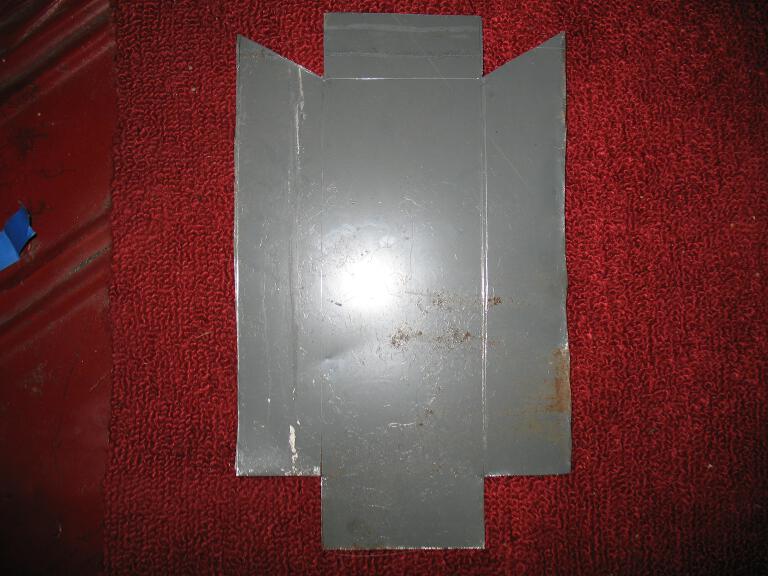
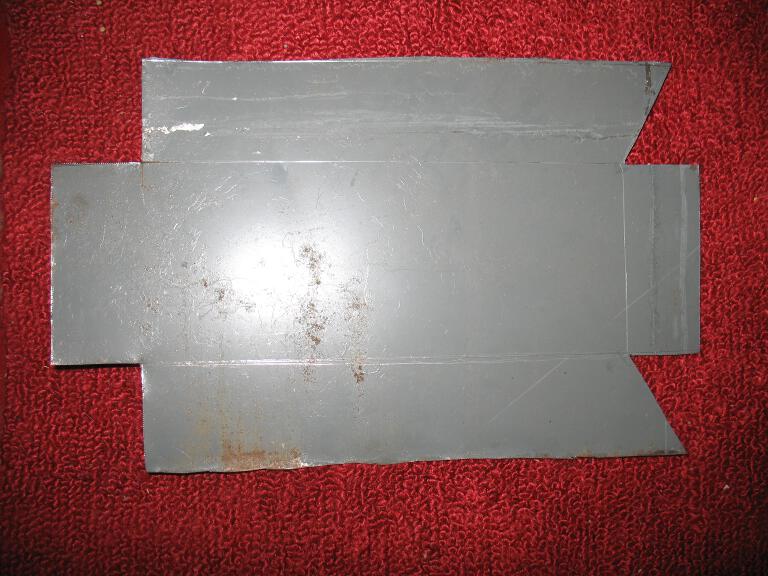
Bent up into the general shape using my vice, a hammer, and anything else that was handy.
My top secret sheetmetal brake. By this point I had also drilled the mounting holes, and welded nuts on the back, first test fit.
several dozen test fits and trimmings later, it fits nicely.
Some tack welds, and a test fit of the shifter. So far, so good.

More tack welds, front part of the hole filled in:
Yes, the welds are still crappy. But at least now I'm getting by with a bunch of OK tacks instead of a whole lot of really awful beads.
Test fit of the console...it fits!
Paint, good to go. As the iterations progress, I'm doing less finish work on these.
While I was at it, I put some damplifier pro (factory seconds...that's why it's silver)
Woo...shiny...
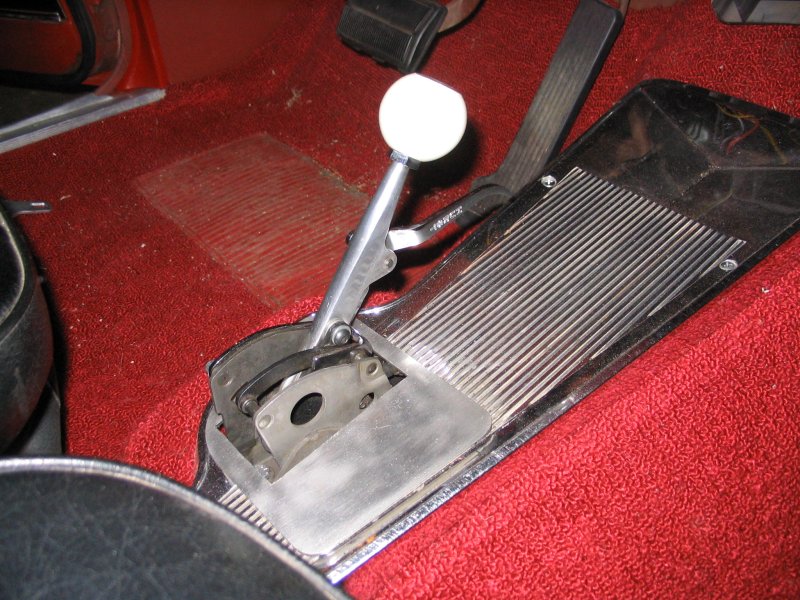
Shifter bolted into place, wires hooked up
Carpet installed, and...after about 100 fit/mark/cut/repeat cycles, I have the cutout correct:
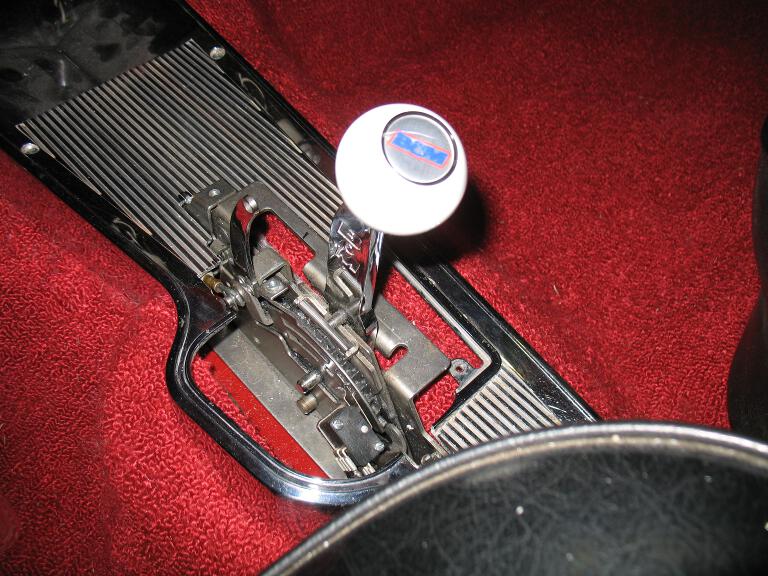

I still have to make a cover for the shifter workings, but...it's in, it shifts great, and the console is back. I'm pleased with the results so far.