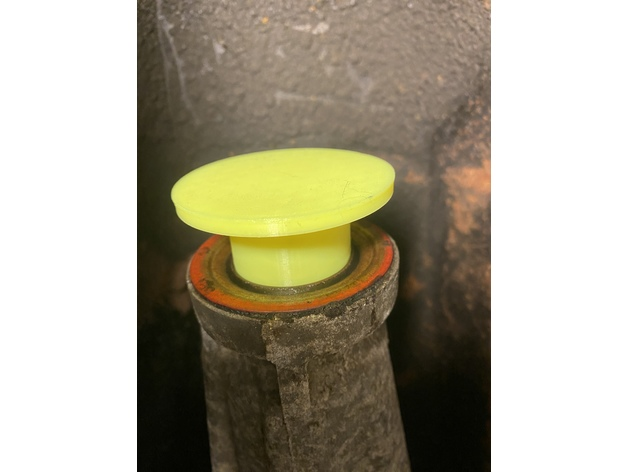
I have the driveshaft out of the Camaro, and wanted to plug the tailshaft to avoid leaking transmission fluid, so I designed and 3D-printed one!
https://www.thingiverse.com/thing:5953645
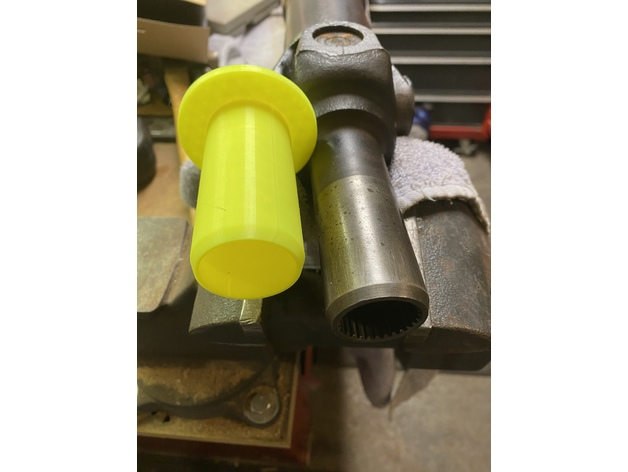
I have the driveshaft out of the Camaro, and wanted to plug the tailshaft to avoid leaking transmission fluid, so I designed and 3D-printed one!
https://www.thingiverse.com/thing:5953645
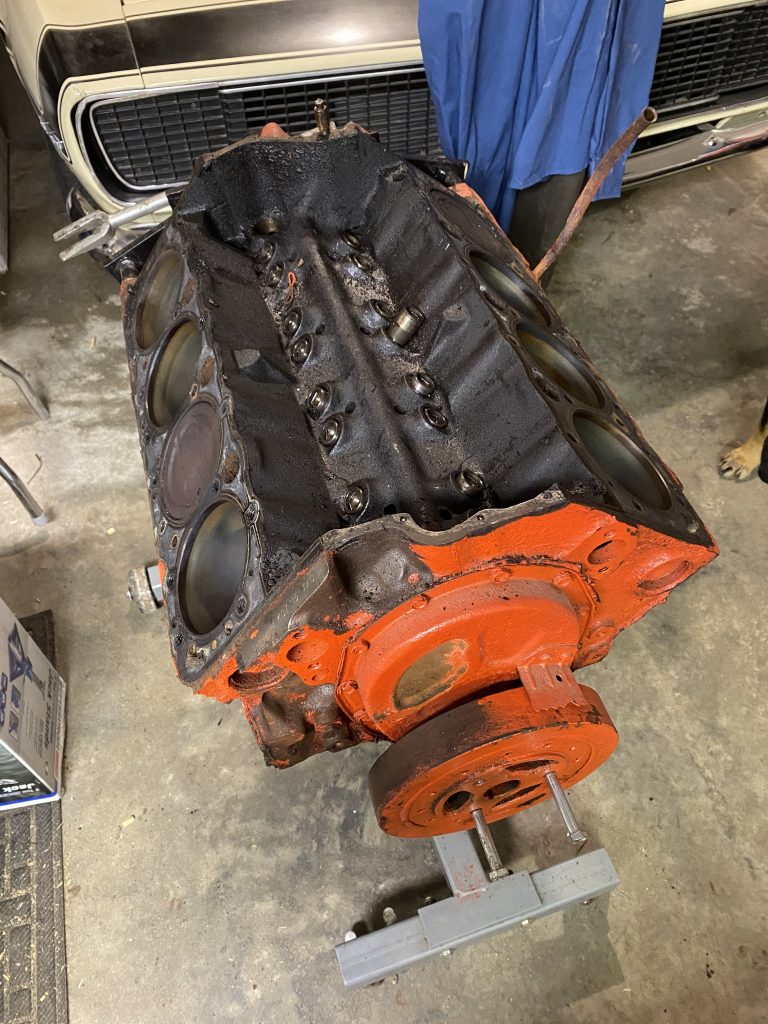
The engine that came with the car is not original, and it’s old and tired. I decided to buy another old and tired engine to rebuild so I have less downtime for the car. I spotted a likely candidate on Craigslist, and picked it up.
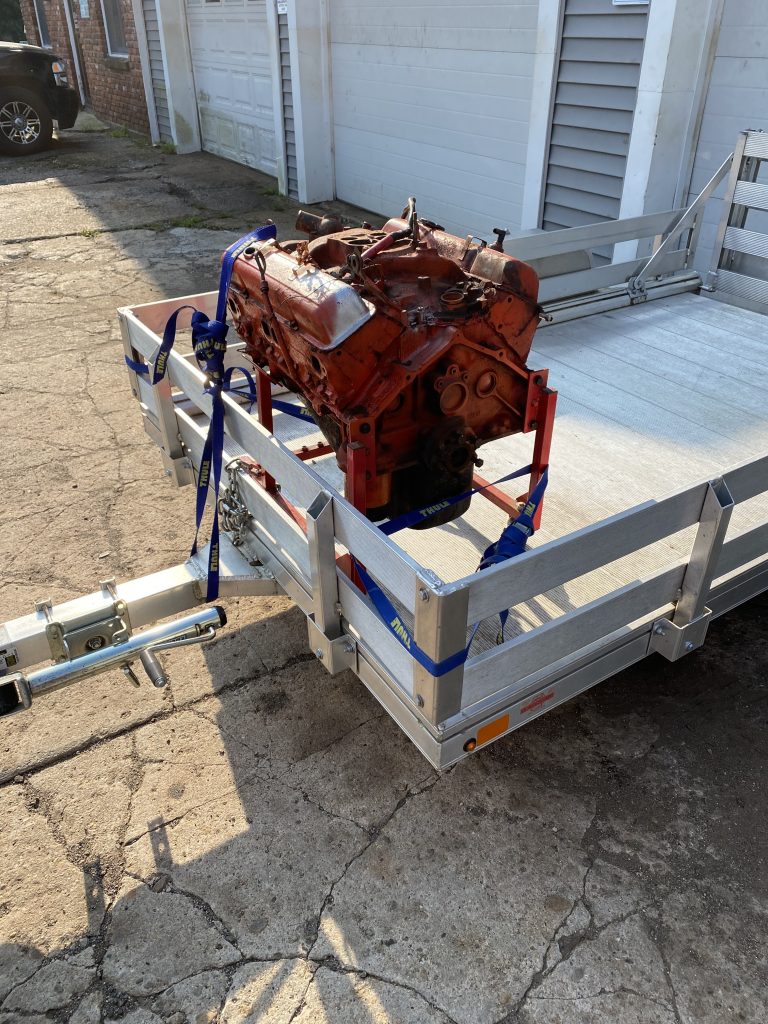
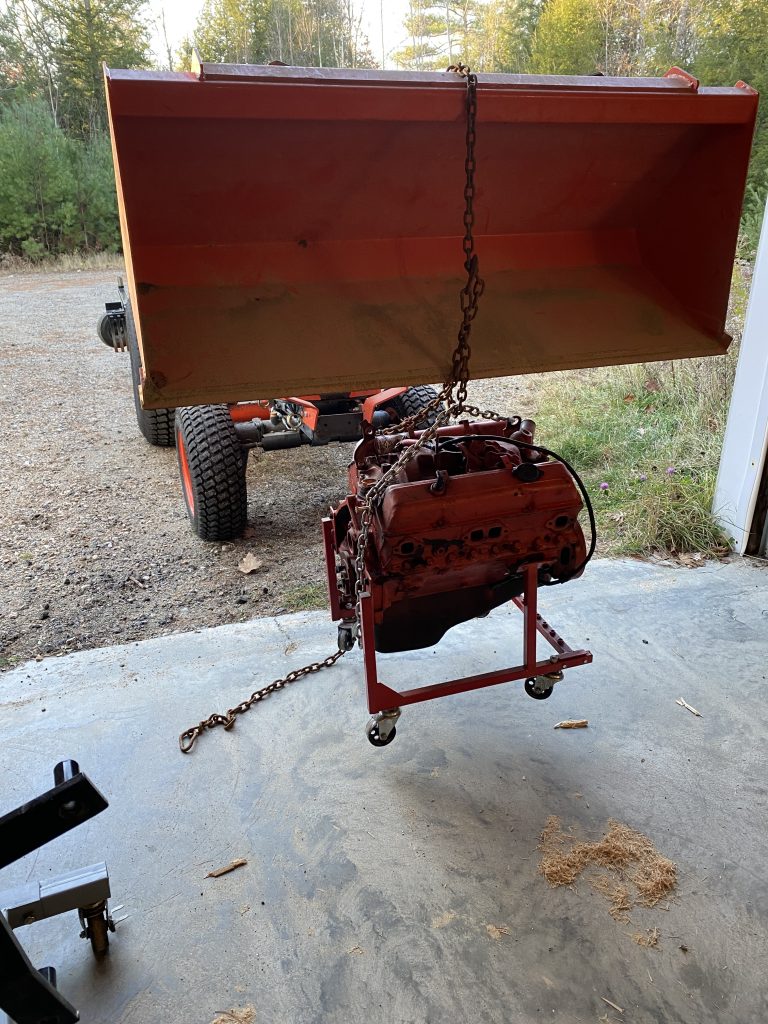
The engine came on a storage dolly, but I needed to attach it to a work stand instead. I didn’t have an engine hoist available, so the tractor got pressed into service to lift the engine so I could put it on the stand.
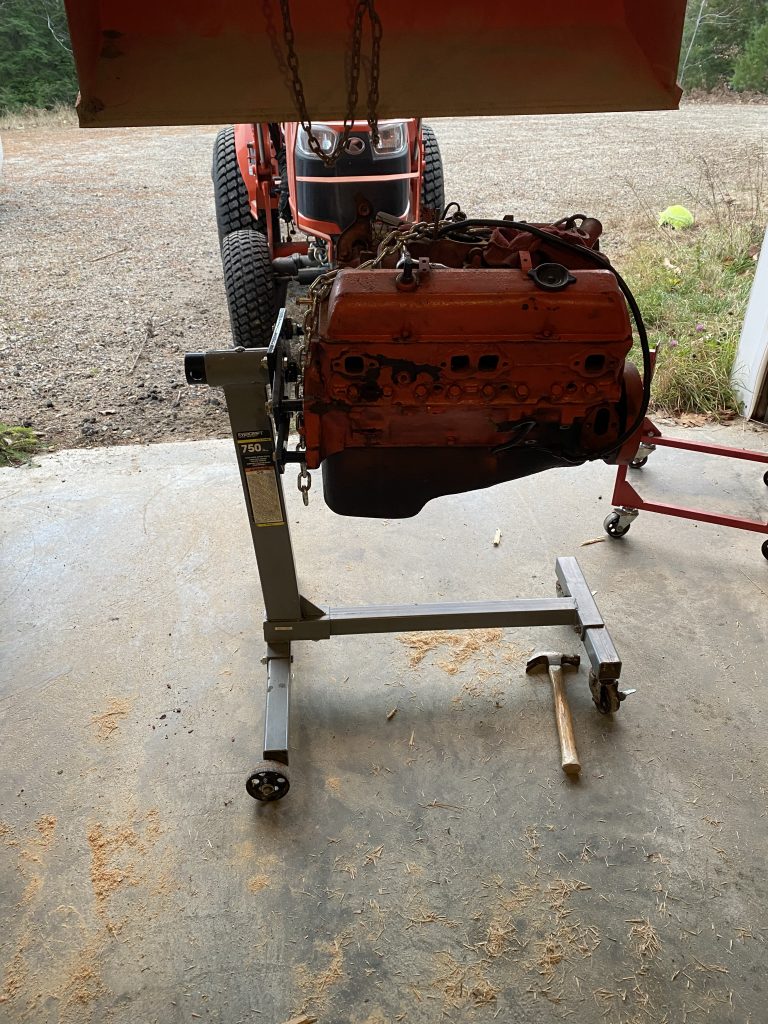
After I got the engine on the stand, I picked up the storage dolly to move it out of the way, and all the ball-bearings fell out of two of the casters. Not the best quality piece, but it held together long enough to get the job done.
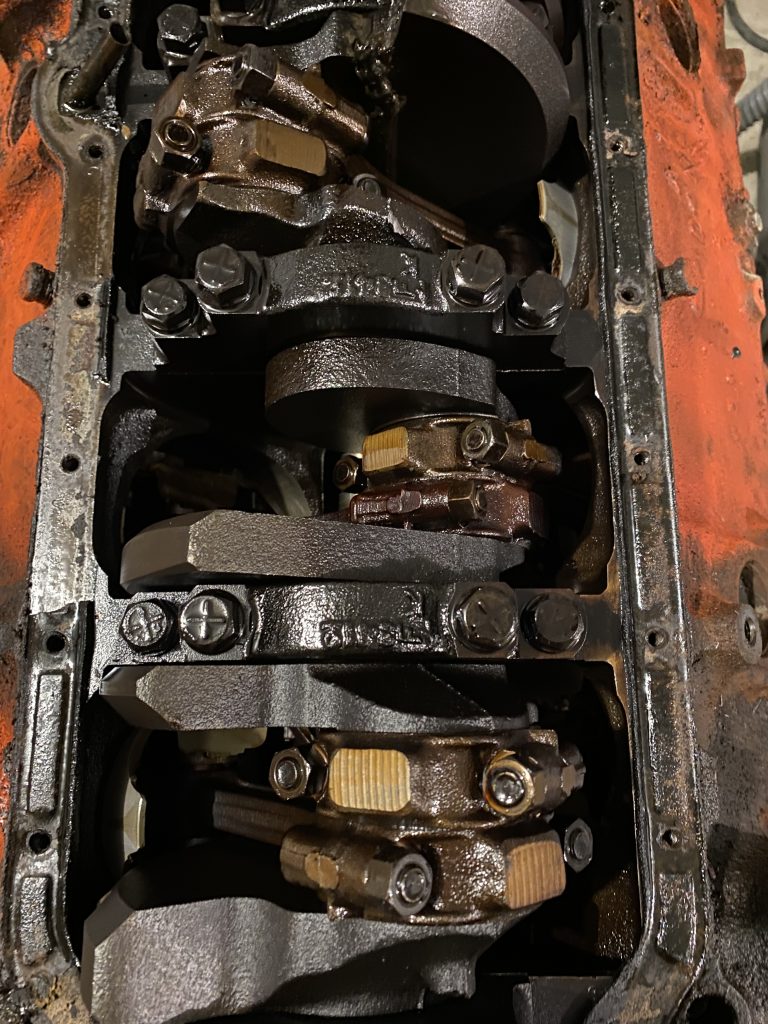
I lucked out, I gambled on this being a decent core to work with, and it turns out it has 4-bolt mains, which is good.
The engine had been given a ‘craigslist rebuild’, a quick shot of orange paint. There is paint in all the exhaust ports and on the valves. One of the pistons even has some orange on it because the spark plugs were out. Looks like someone started to “chrome” the valve covers, but lost interest.
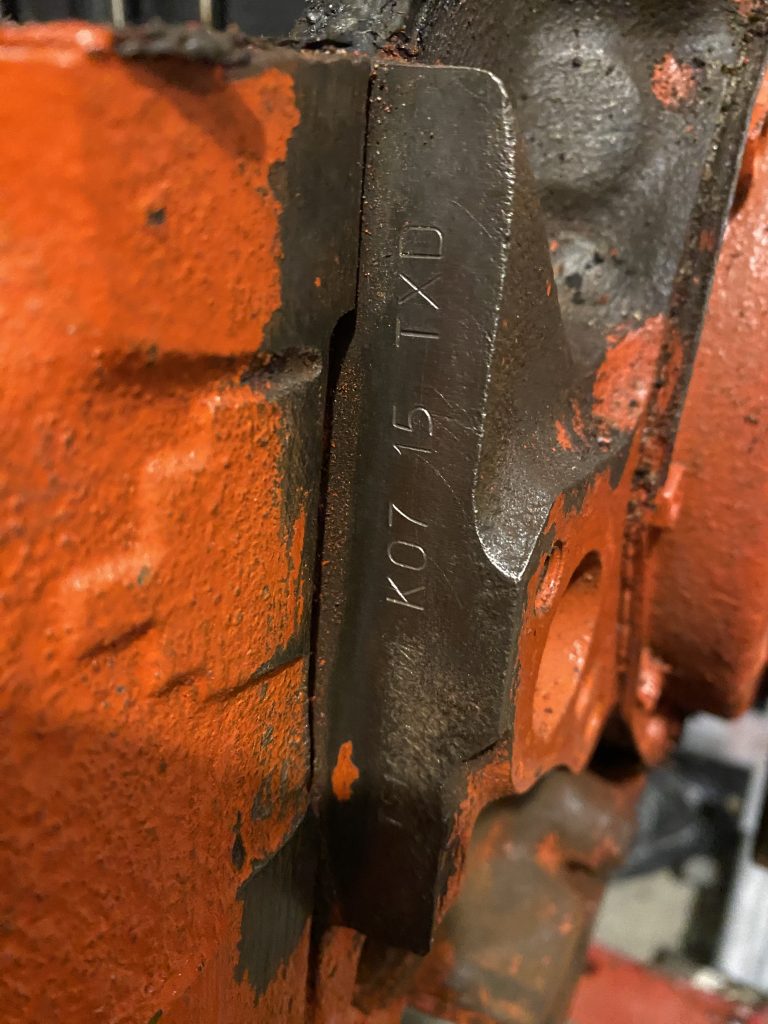
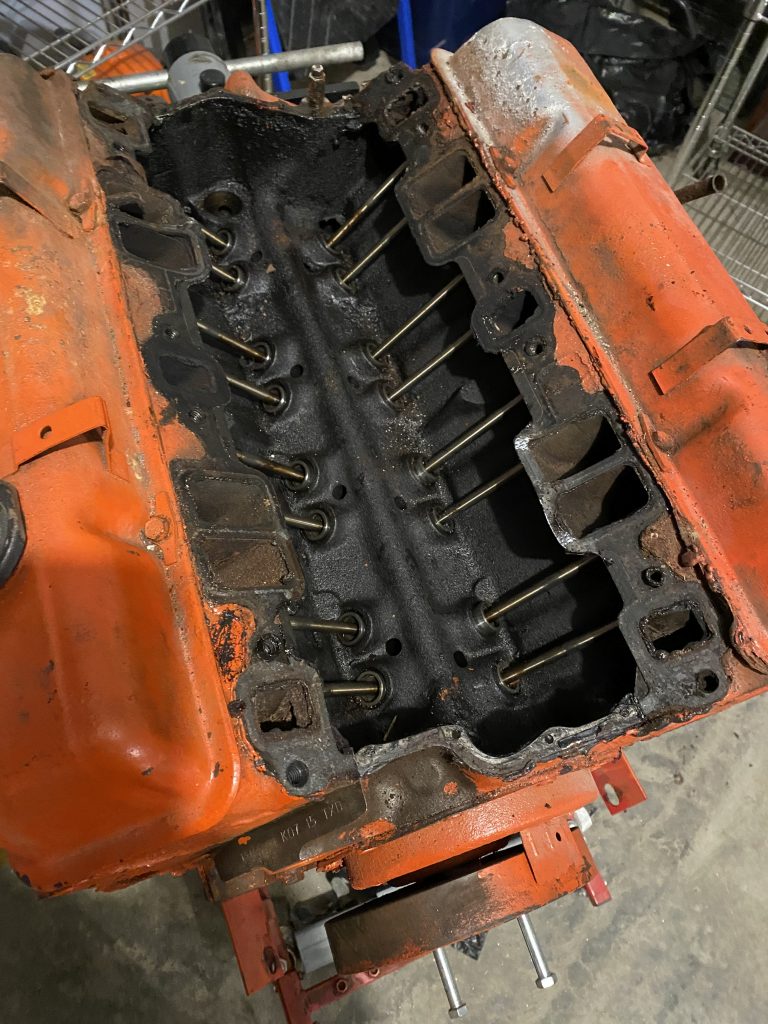
K07 15 TXD works out to:
K – St Catherine’s Ontario Canada assembly plant
07 15 – July 15th
TXD – 1973 350 for a C20 through 3500 truck, 4bbl, originally 165 HP.
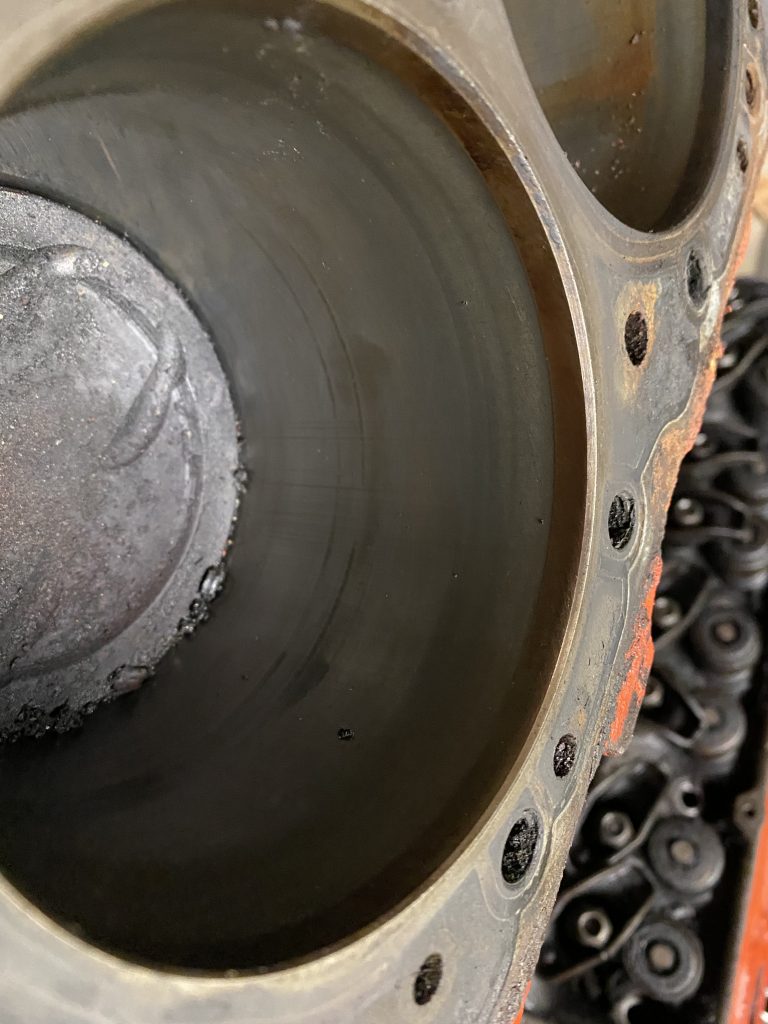
Once the heads were off, it was time to check out the wear ridge at the top of the cylinders
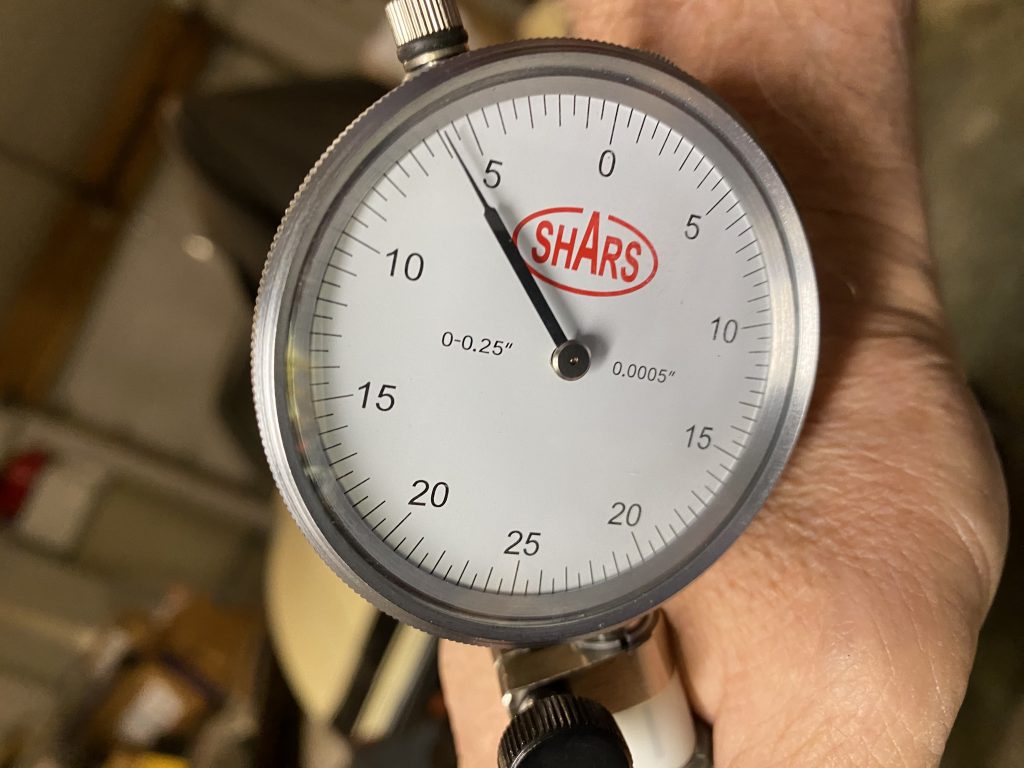
The ridge measures 0.007″ according to my trusty bore indicator, which is right at the edge for a re-ring vs an overbore and a full rebuild.
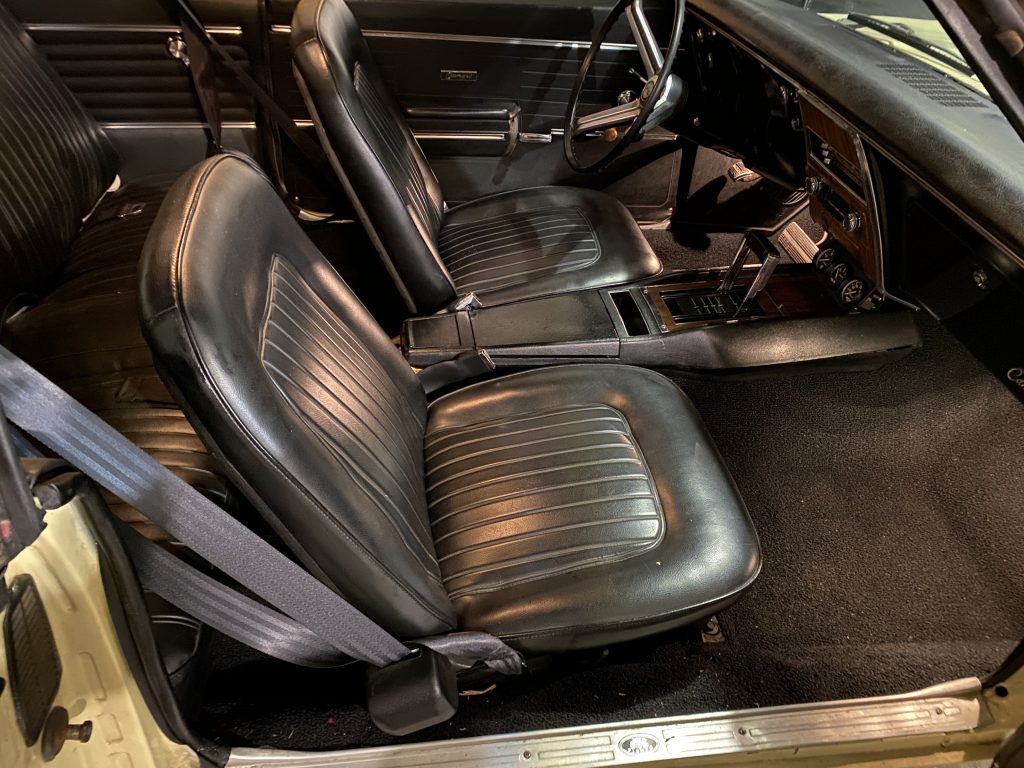
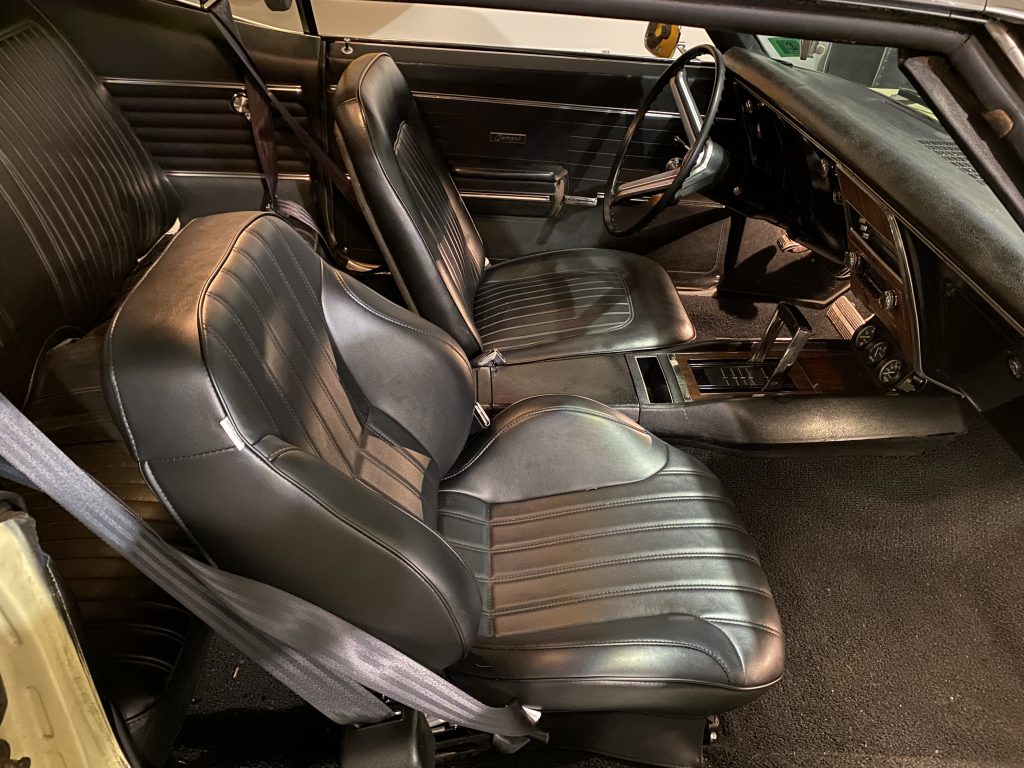
While I like the look of the original seats, they just are not very comfortable. They’re in decent shape…for 50+ year-old seats, but they are worn out. After looking at a bunch of different options, I decided to go with ProCar/Scat Rally seats.
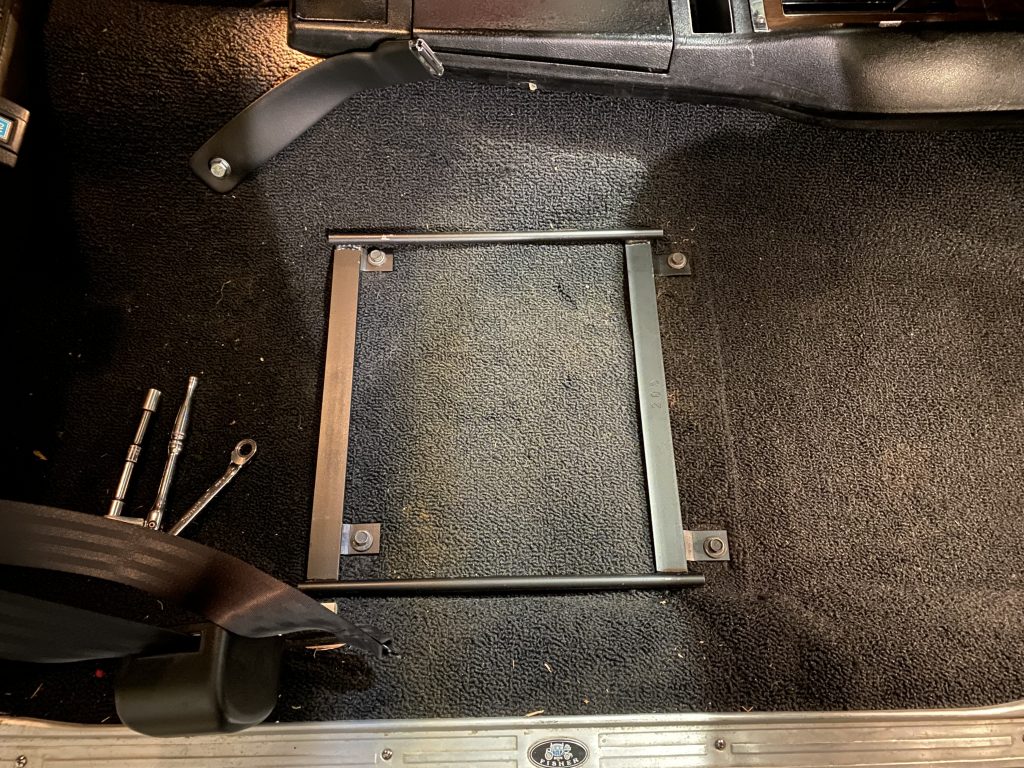
I installed the passenger seat first as there was more room to work without the steering column in the way. The first step is installing the floor bracket to the floor using the original seat bolts.
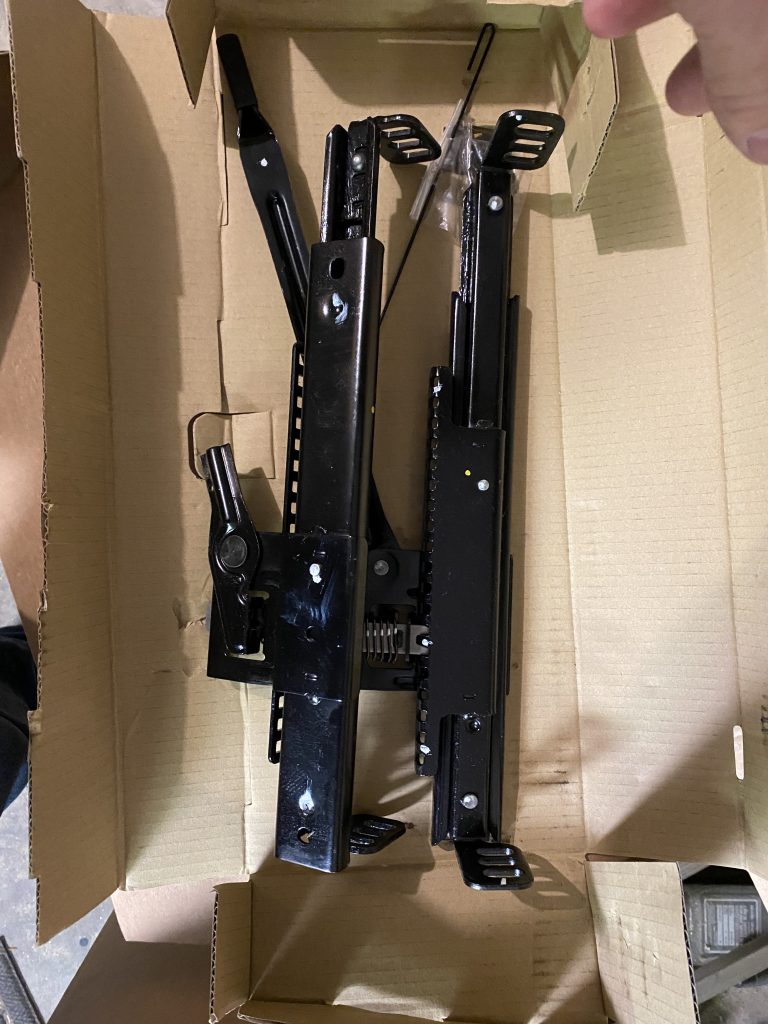
The next step is attaching the sliders onto the seat bottoms. After that, the seat sliders are bolted to the floor brackets.
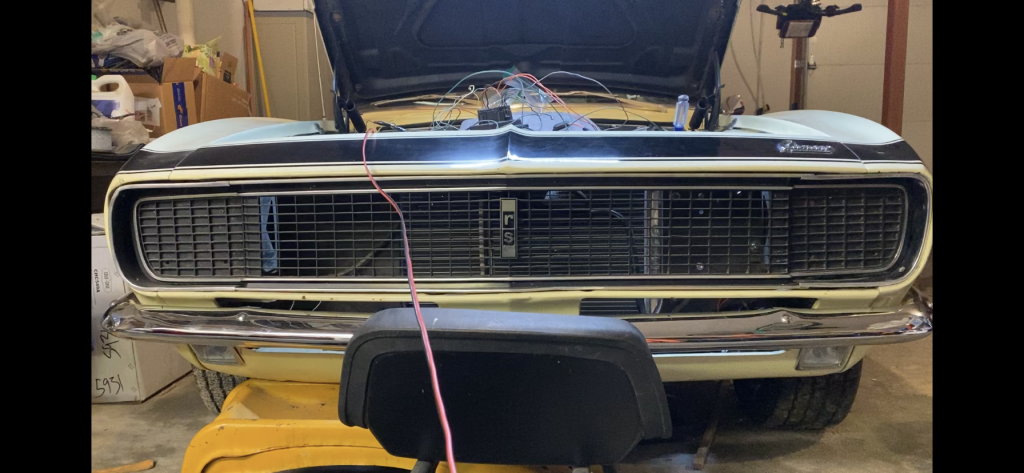
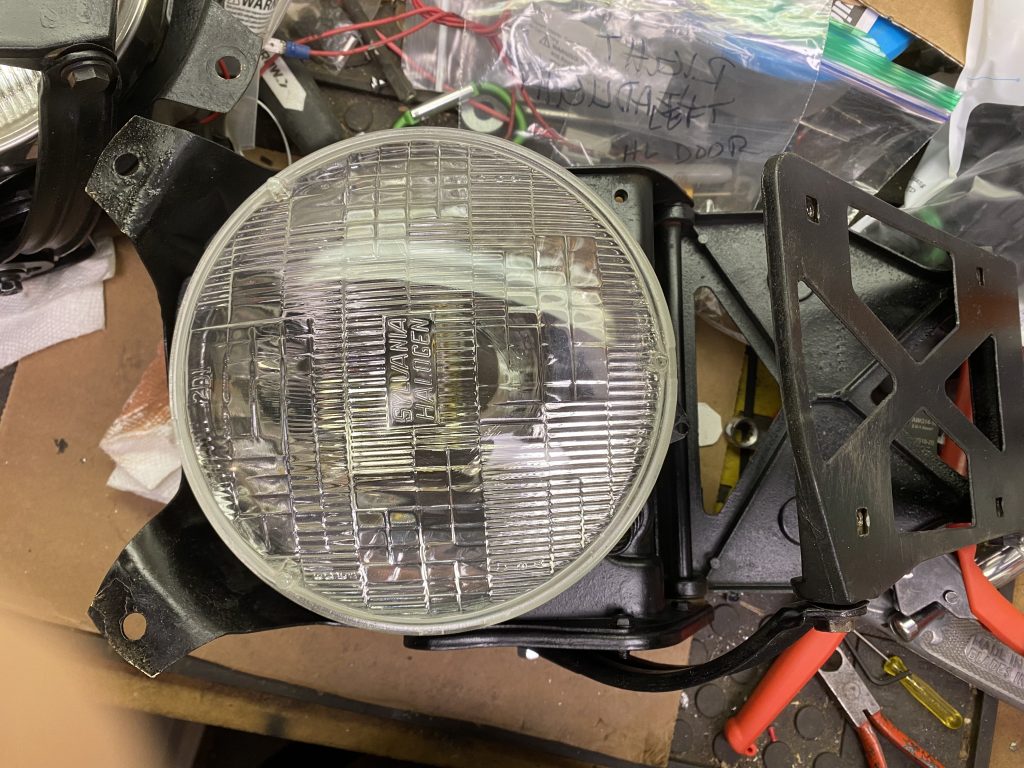
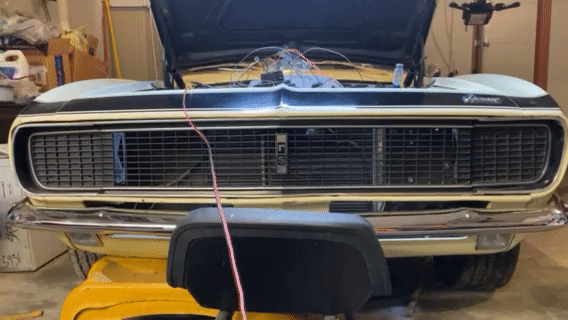
The original RS headlight door setup is complicated, unreliable, and expensive. 1967 was an electric system, 68 and 69 were vacuum-operated. You can purchase aftermarket reproduction parts to re-create those. There are also a couple of aftermarket retrofit kits available.
Here’s a relatively inexpensive retrofit that will operate the doors if you are not concerned about originality.
The core of the retrofit is the controller and motors from a 4th gen (1993-2002) Firebird.
Parts list – 4th gen Firebird:
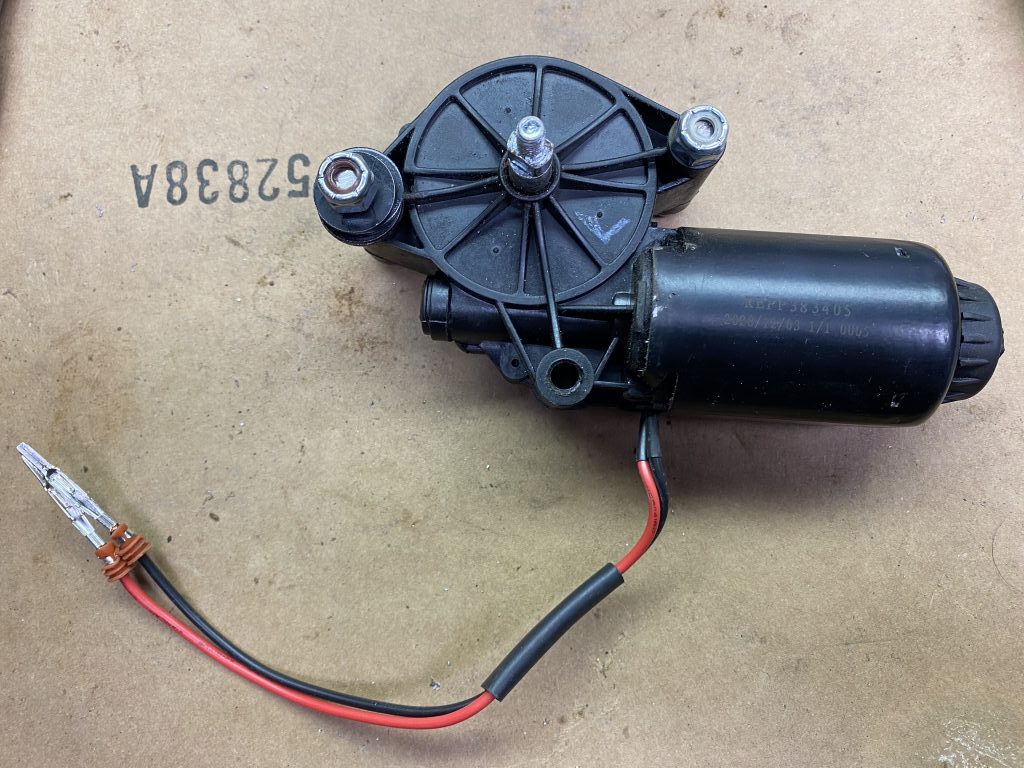
– Pair of new replacement motors – $80
– Used headlight controller module – $70
– Used headlight wiring harness – $35 (optional)
Miscellaneous:
– 3/16″ steel scrap for motor drive adapters
– Nuts, screws, washers for attaching motors
– two 10mm M6/1.5 nuts for motor shafts
– wire + connectors
– two inline fuse adapters with 15A fuses
The replacement motors are easy to find at auto parts stores or eBay. I used the ones for the same model Firebird as the controller just to make sure everything is compatible, but a power window motor or a headlight motor from another vehicle should work also.
The controller module can be purchased new, but they are getting more expensive, and I found a good used one on eBay for much cheaper. The controller works by running the motor until it senses the motor is drawing more current (because it has hit something) and then it will cut the power to the motor. That means there’s no adjustments or timing to figure out, just hook the motor up to the doors and they’ll move until they hit the full open or full closed position.
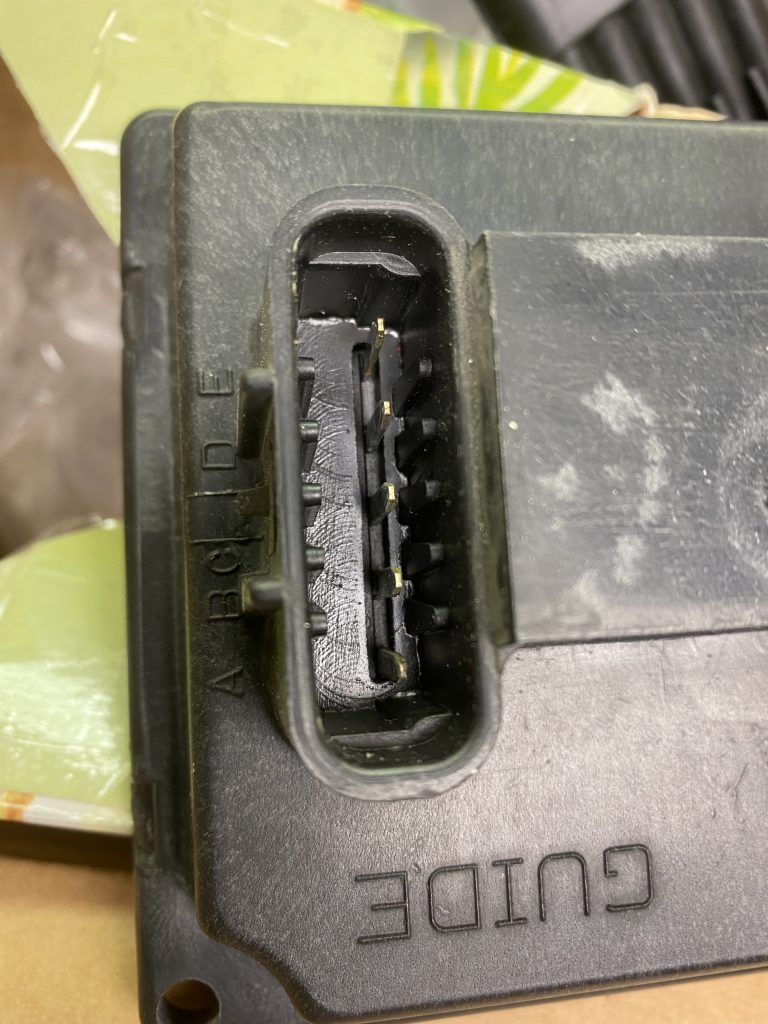
The wiring harness is optional. It was an easy way to get the 4-position and 5-position connectors that plug into the controller module. You can buy them new, they are metripack connectors.
Here’s what the original Firebird schematic for the headlights looks like:
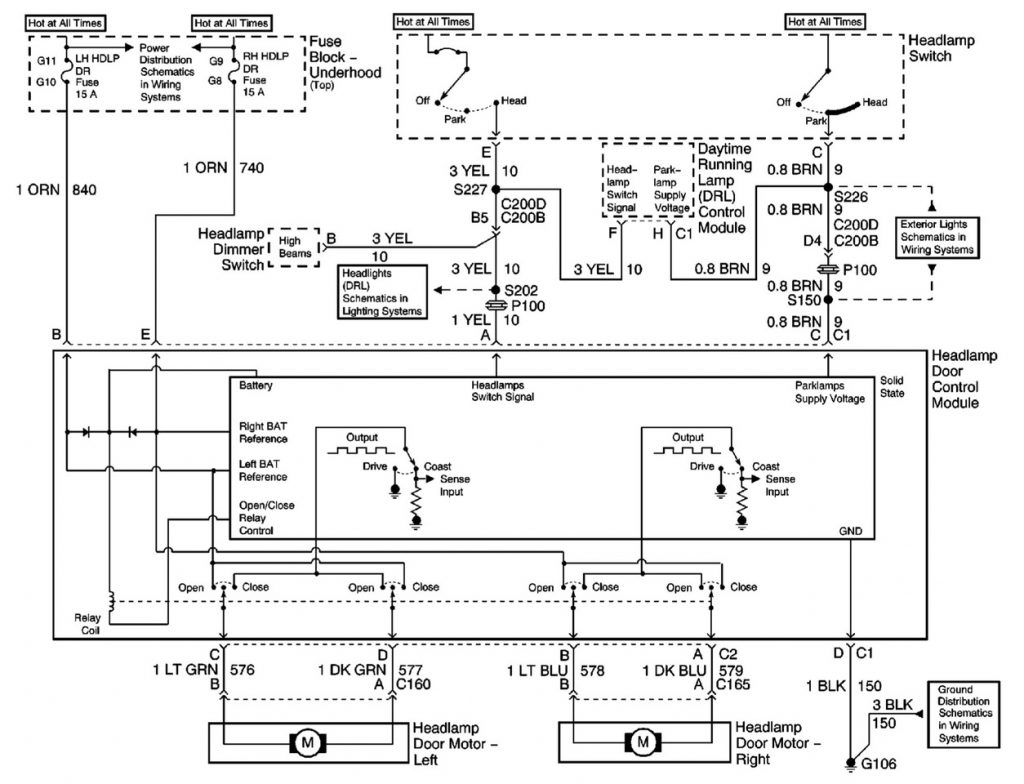
A few things to note from the schematic:
The basic wiring consists of:
5-position connector #1 labeled ABCDE
– A1 – Headlight power signal – light blue wire between headlight and dimmer switches
– B1 and E1 – Always-on power through separate 15A fuses
– C1 -ground for Camaro behavior, connect to parking lights for Firebird behavior.
– D1 – ground
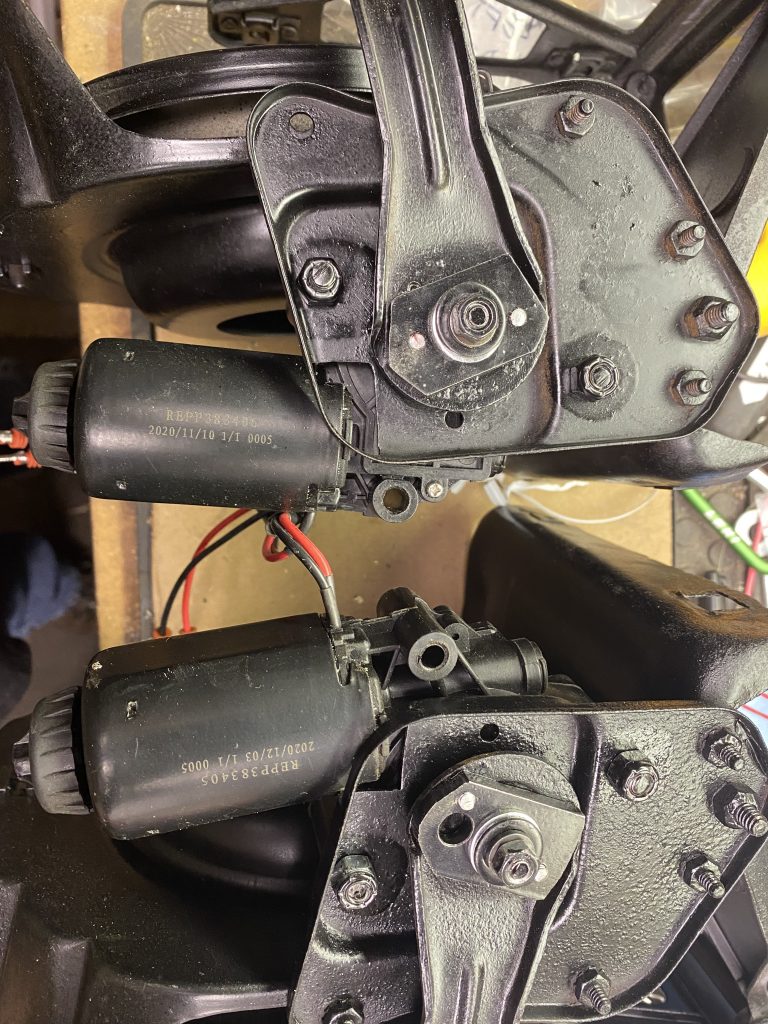
4-position connector #2 labeled ABCD
– A2 – Black lead motor 1
– B2 – Red lead motor 1
– C2 – Red lead motor 2
– D2 – Black lead motor 2
(I’m not sure if the wire colors are consistent on all replacement motors, but if the doors open with the lights off, and close with the lights on, swapping the red and black will fix that.)
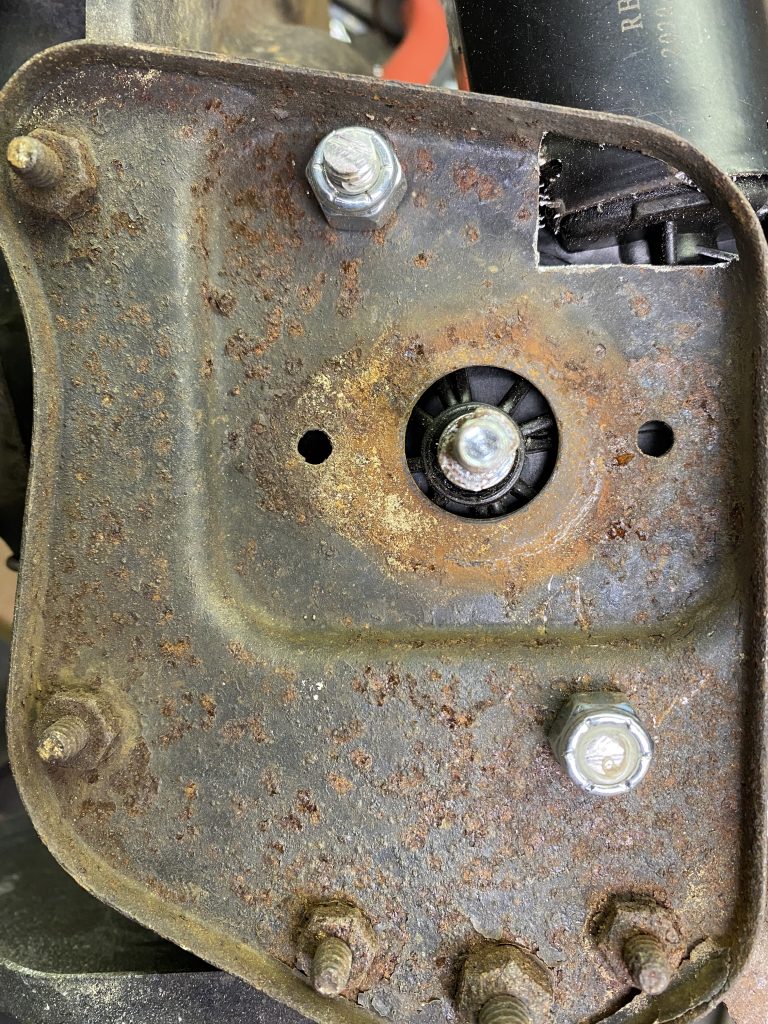
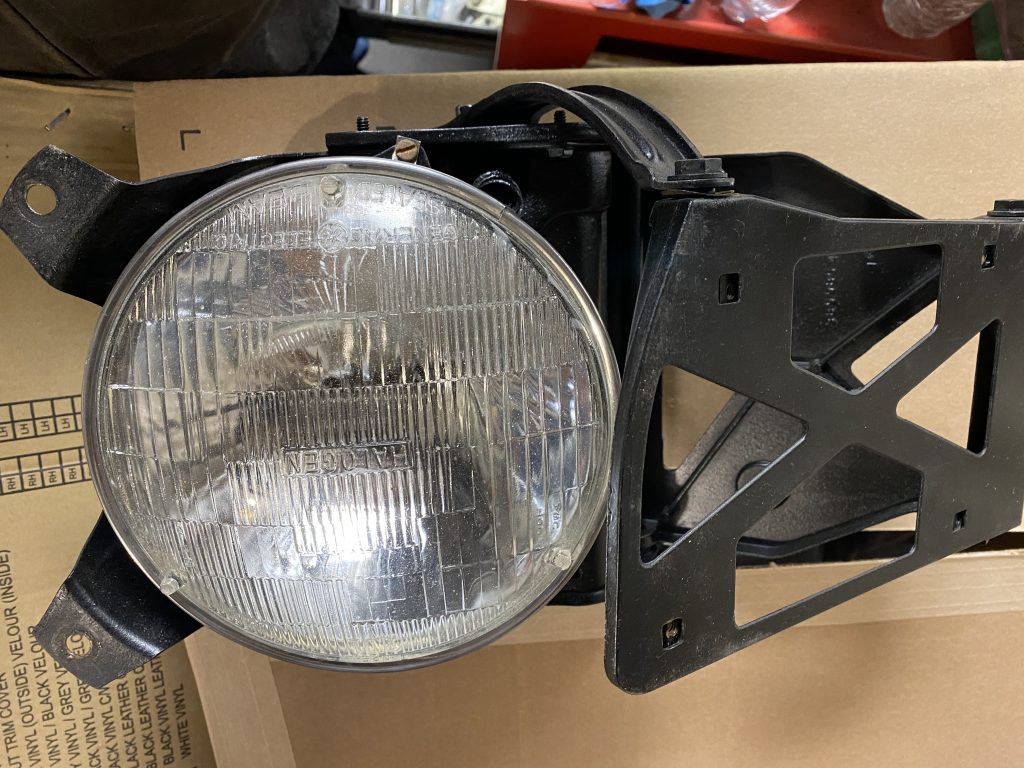
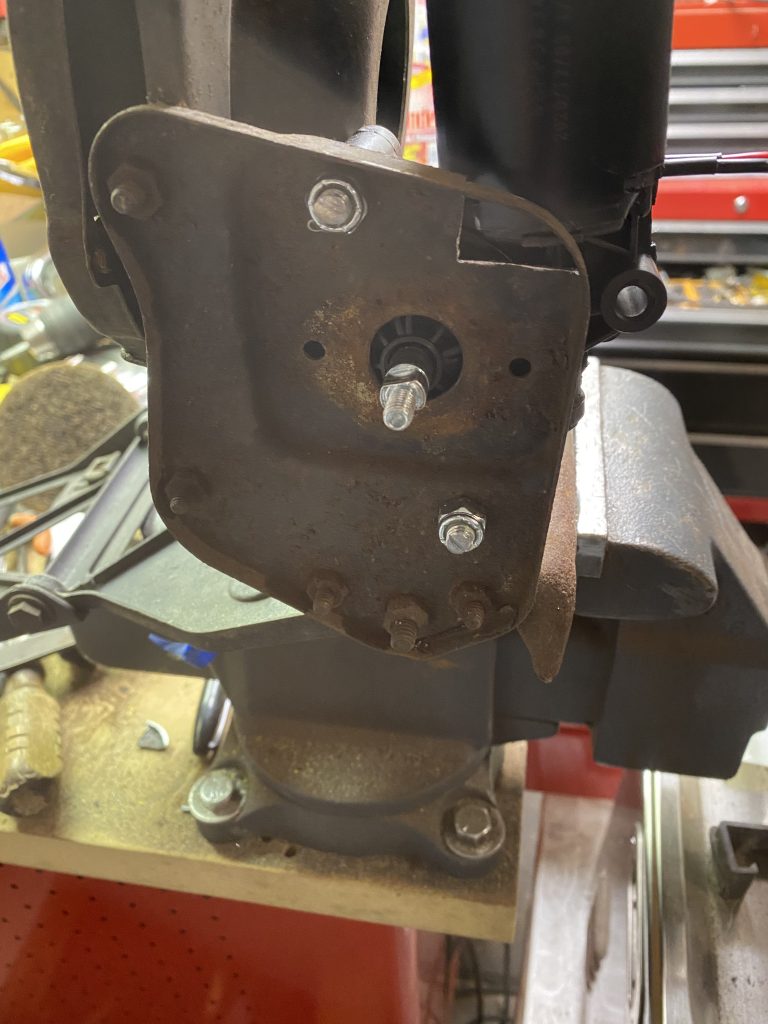
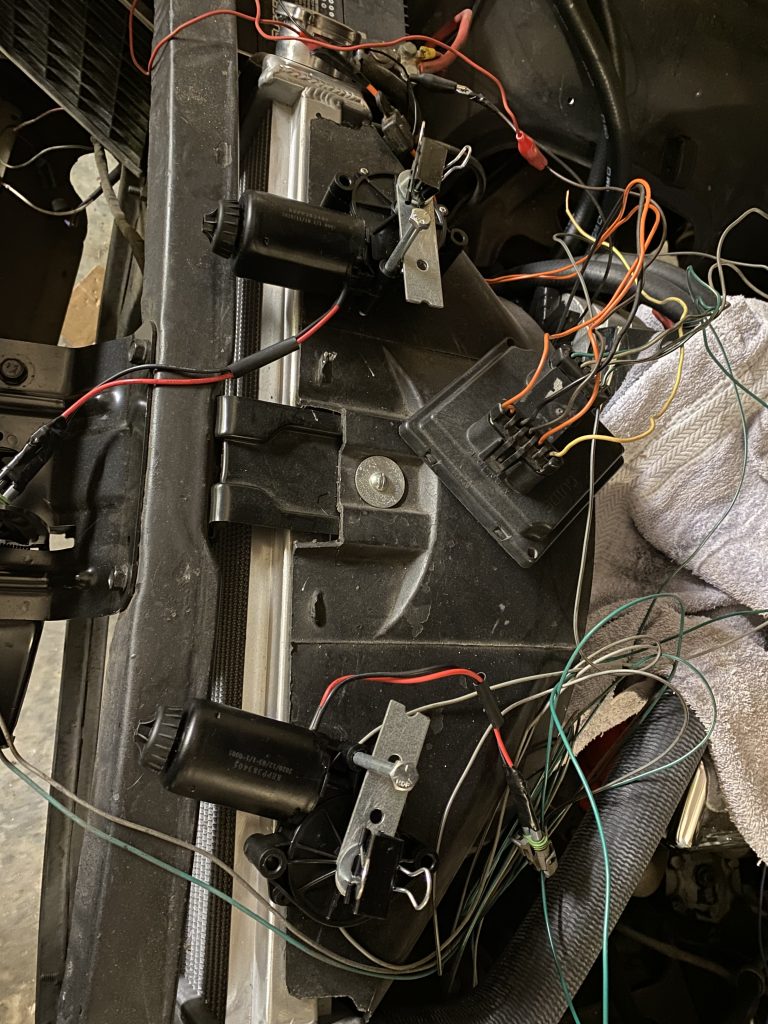
The motor is attached to the headlight housing with two bolts and some spacer washers. The placement is a bit of a compromise between centering the shaft in the hole, and leaving enough clearance for the motor and the gearbox.

With the motor in the right orientation, it hit one corner of the bracket. Cutting a clearance notch allows the motor to sit level.
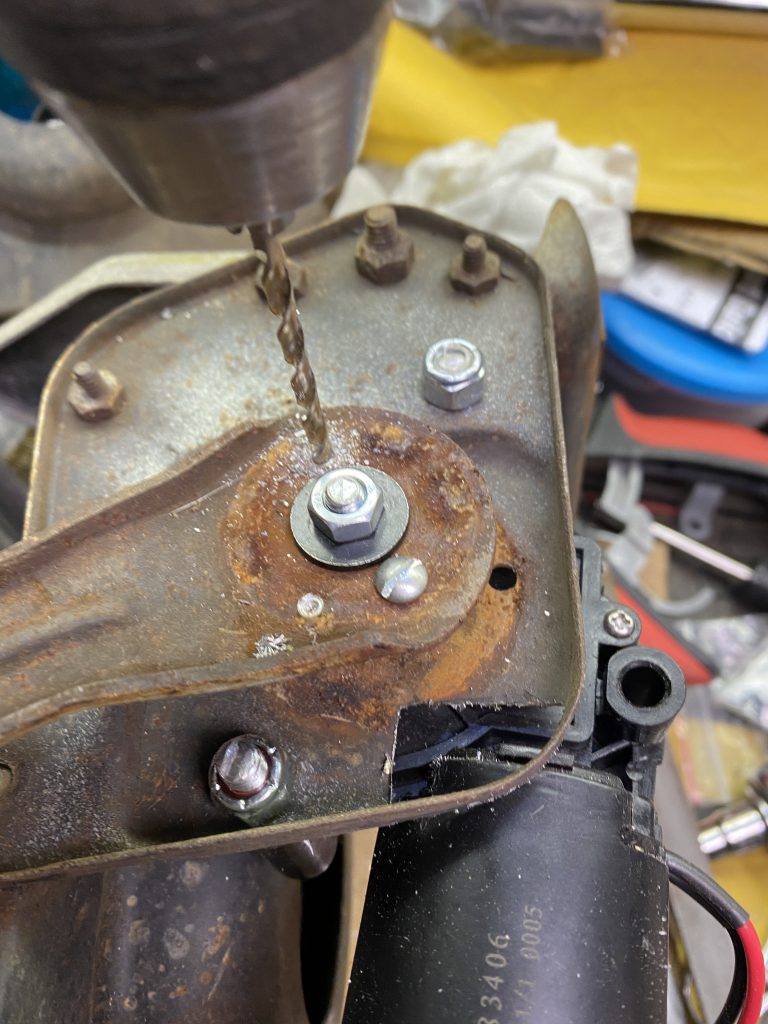
In order to get the holes lined up as accurately as possible, I marked and drilled one hole, then bolted the motor on, and then marked the second hole.
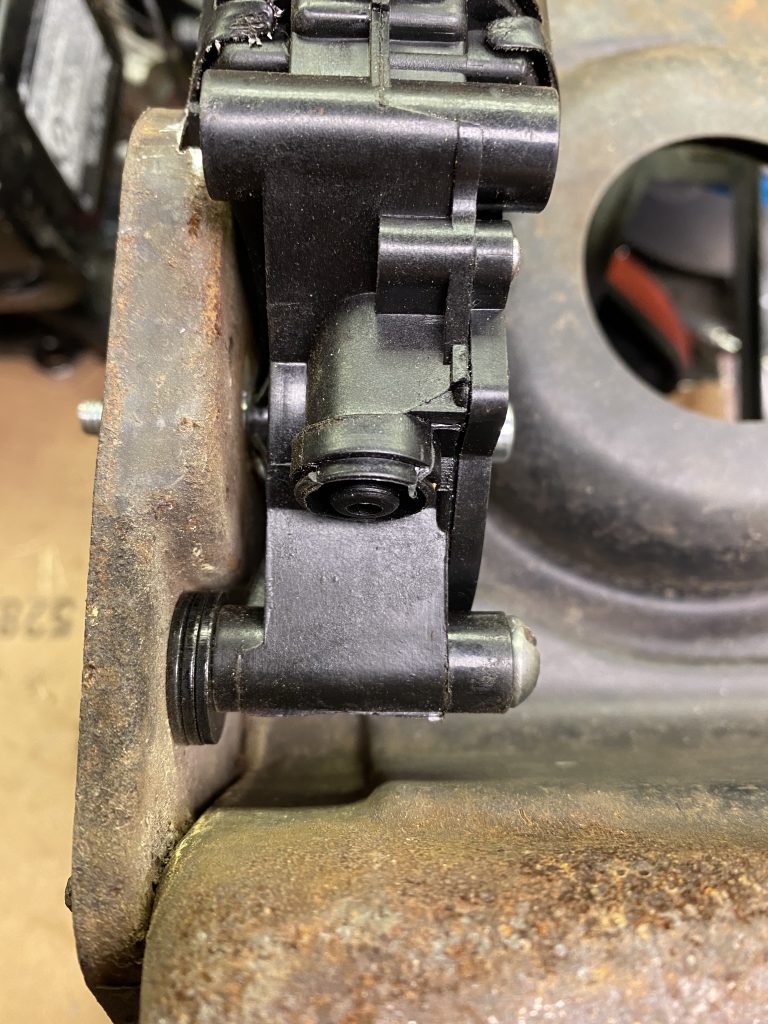
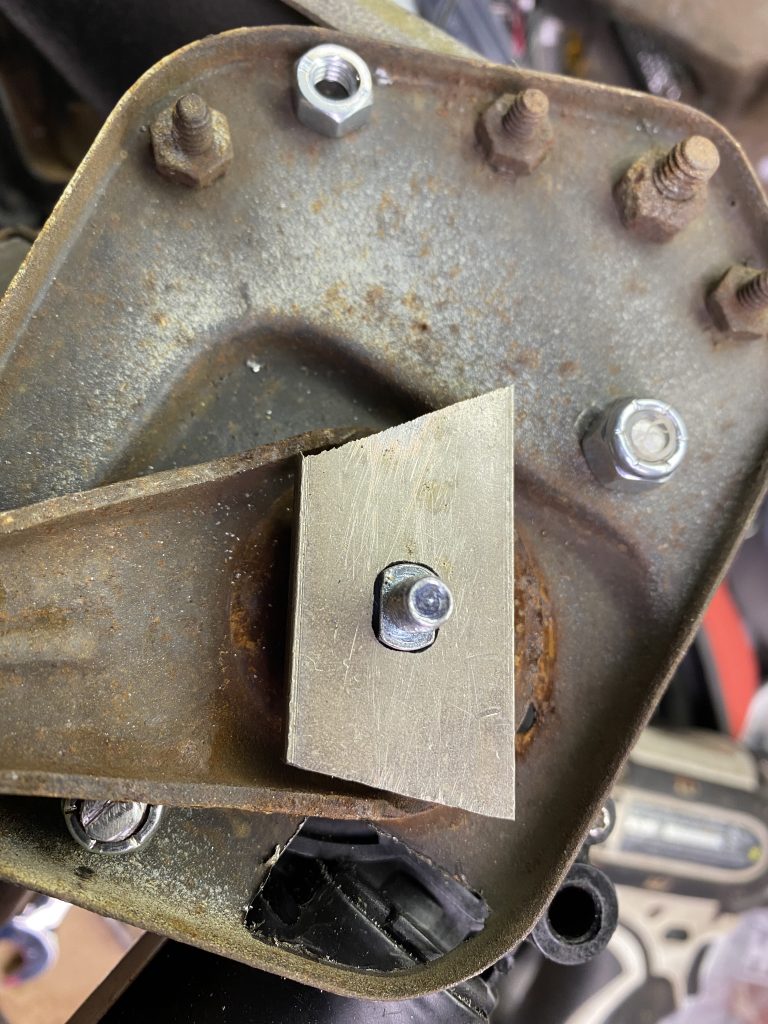
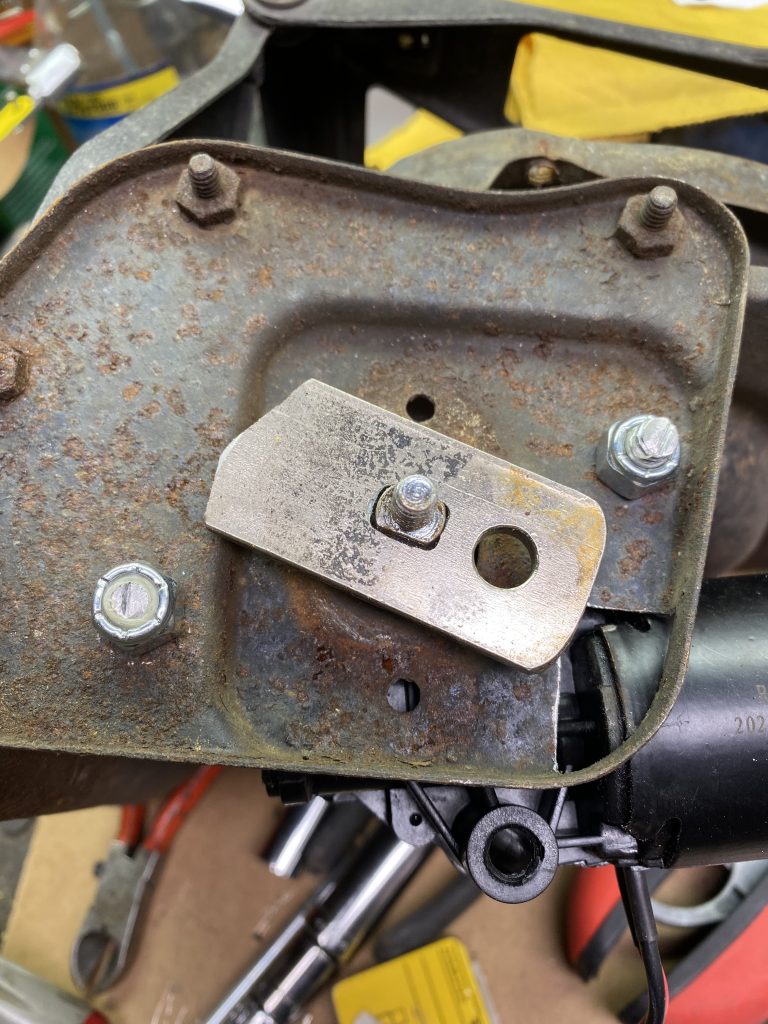
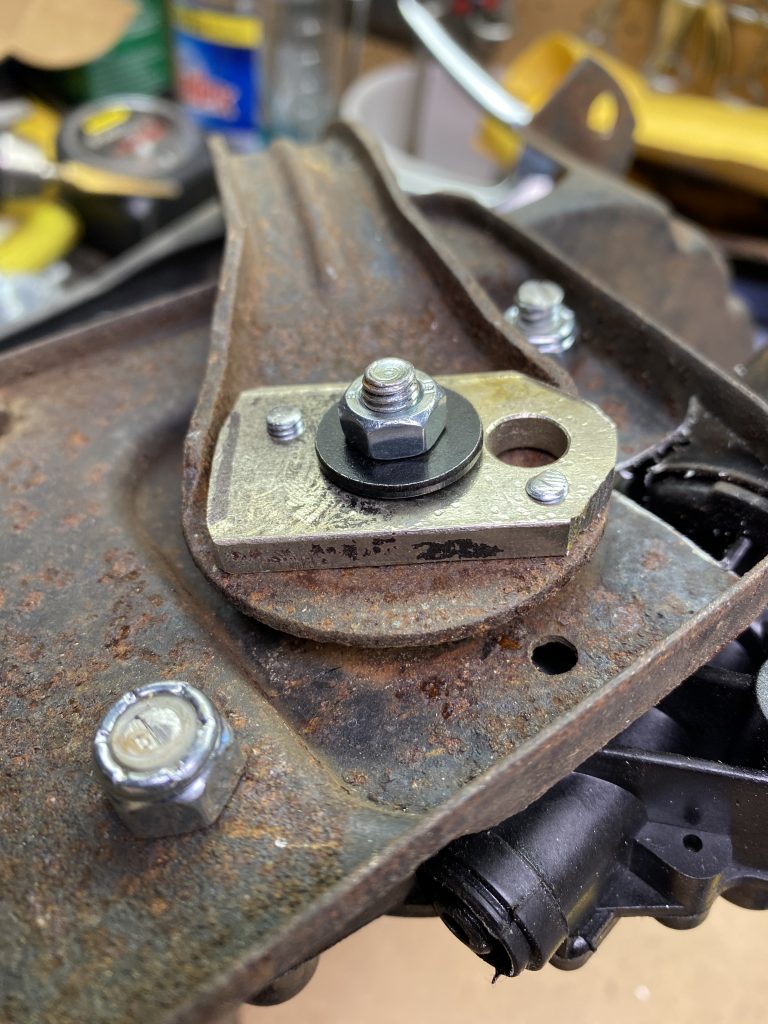
The bellcrank arm has a hole in the center that is almost the same size as the shaft on the motor. The shaft has two flats on it that provide surfaces to turn the arm. Unfortunately, the original bellcrank hole is too big to make a satisfactory matching oval hole out of. I used a piece of 3/16″ scrap to make a plate that had the oval hole in it, and then attached that to the bellcrank with a couple of screws. This spreads out the load and also allows it to sit lower on the shaft, which is closer to the stock location relative to the bracket.
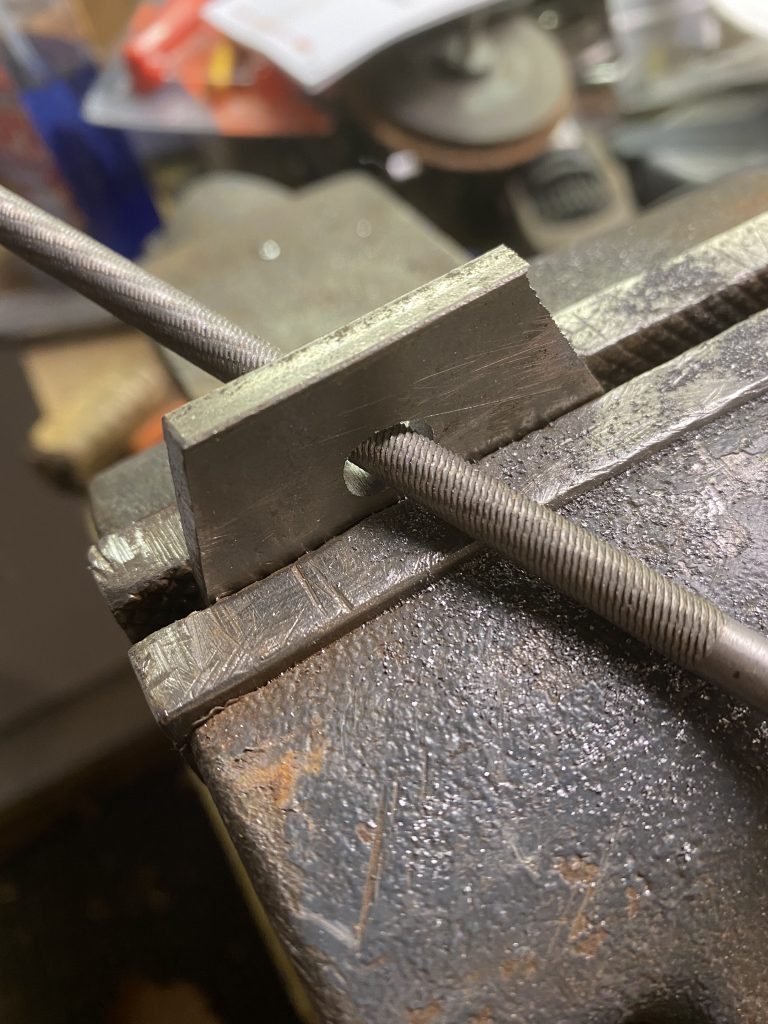
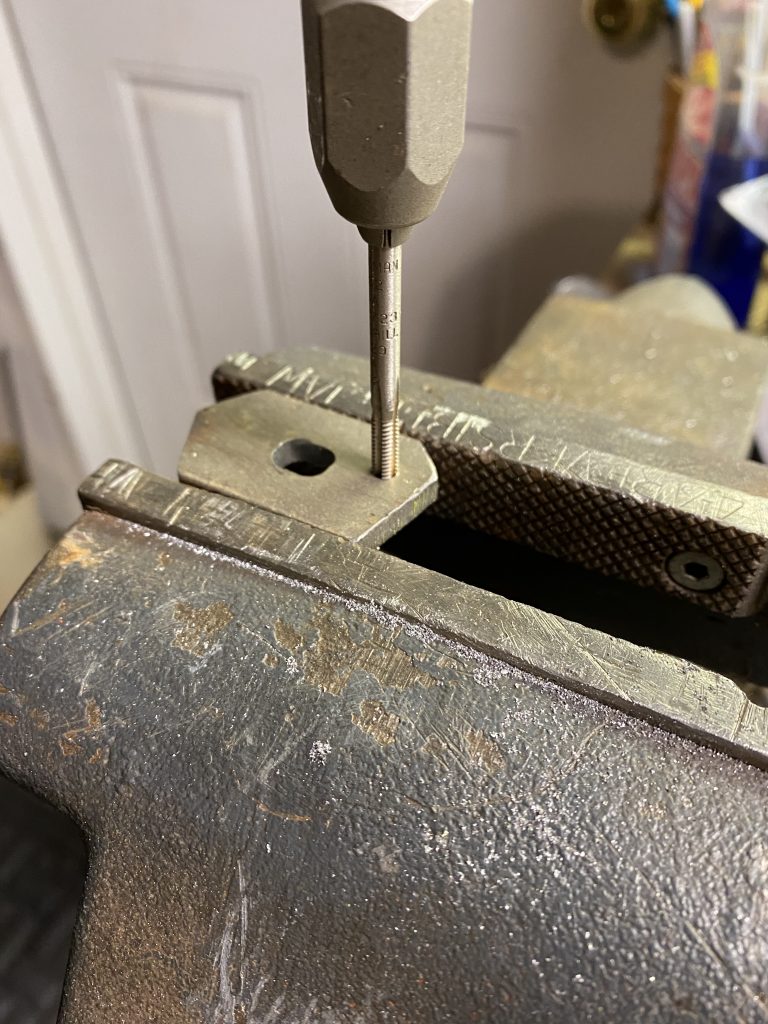
To add the holes to the plate, I drilled and tapped one hole, then assembled it temporarily and drilled the second hole.
After the holes are drilled and tapped, I screwed the plate to the bellcrank arm from the back side so it would sit closer to the housing. Assembling it in that order leaves some room underneath that prevents the arm from hitting the inner fender support structures.
I used a couple of sheet metal screws to attach the controller to the radiator support just next to the regulator
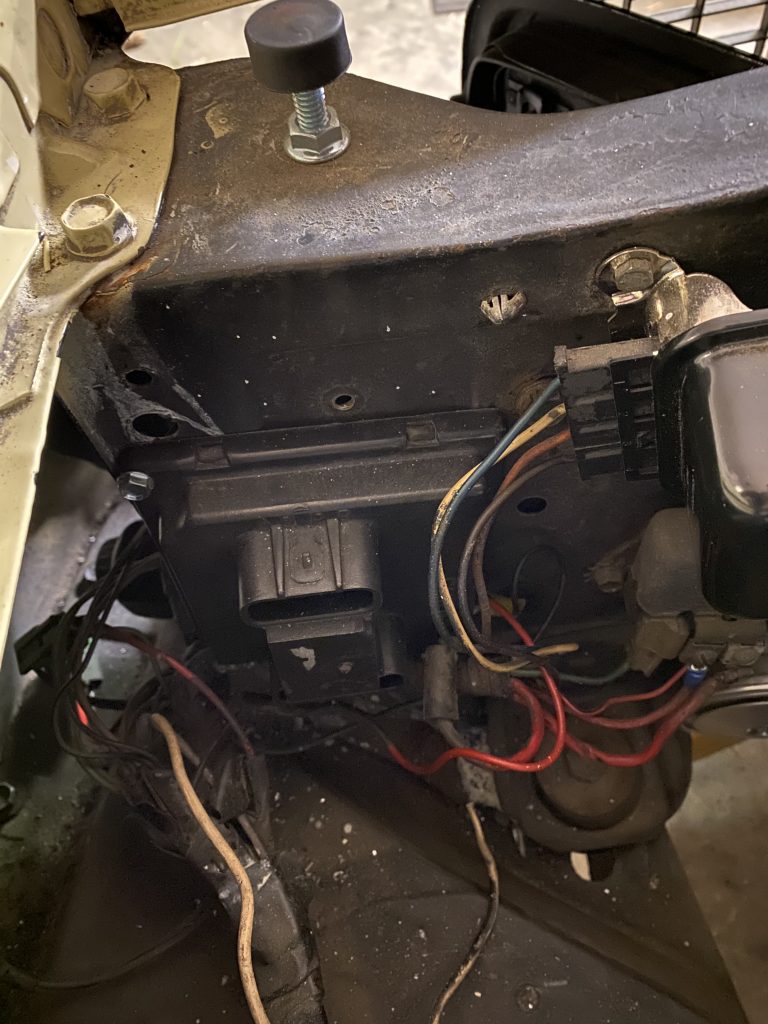
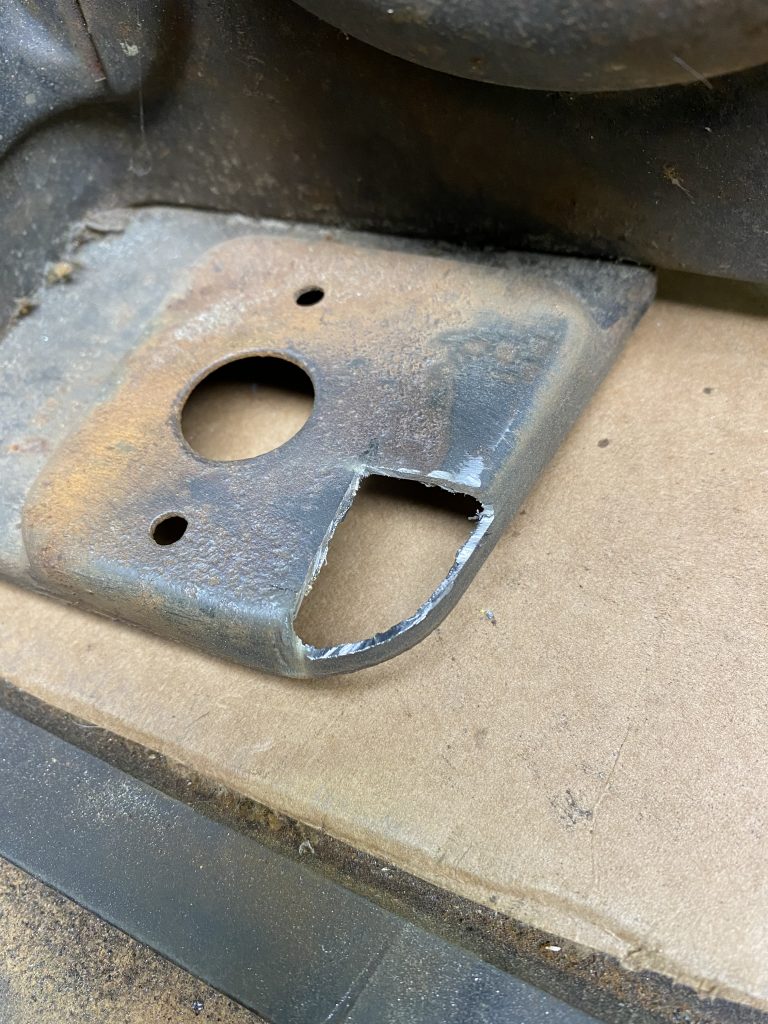
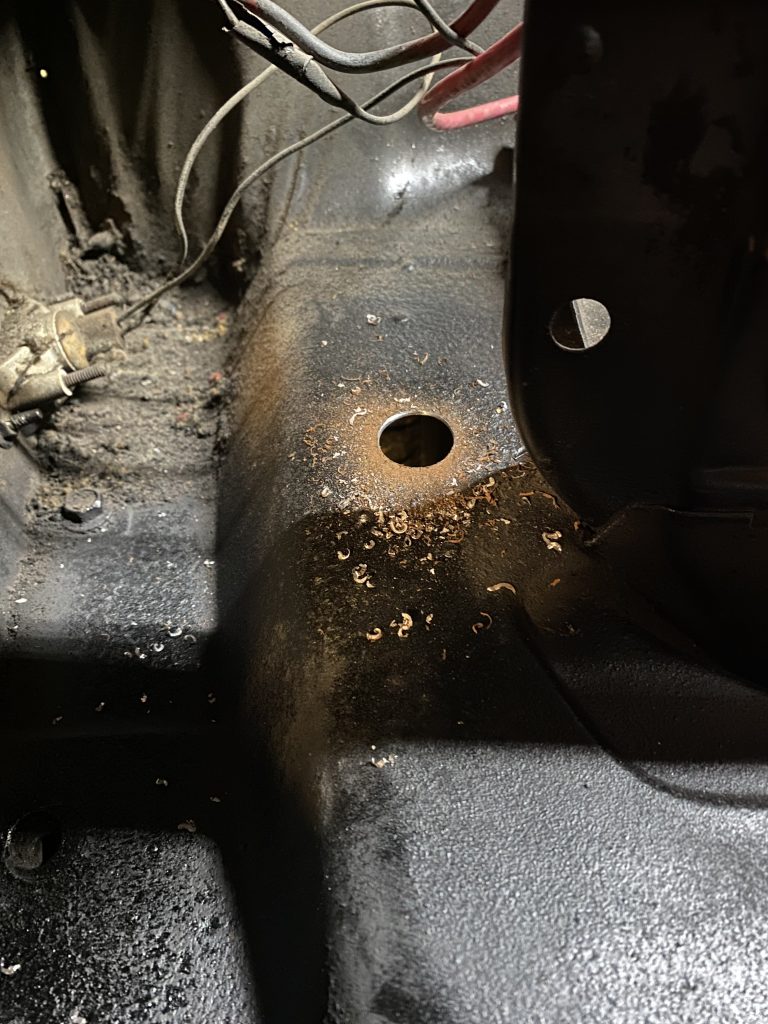
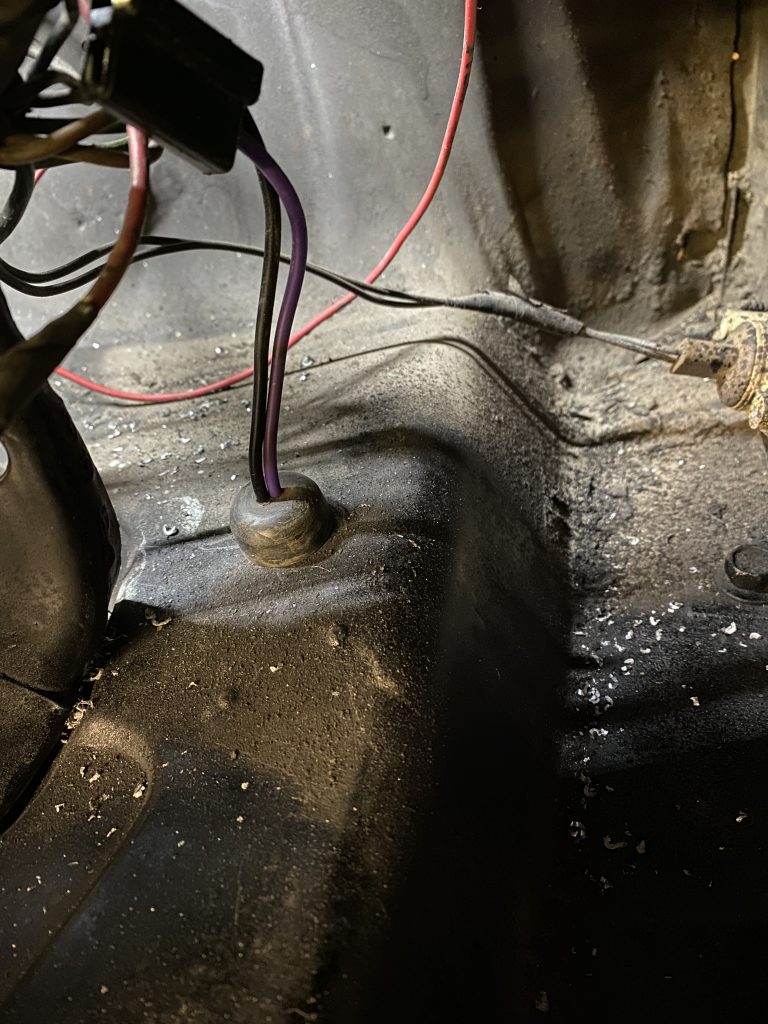
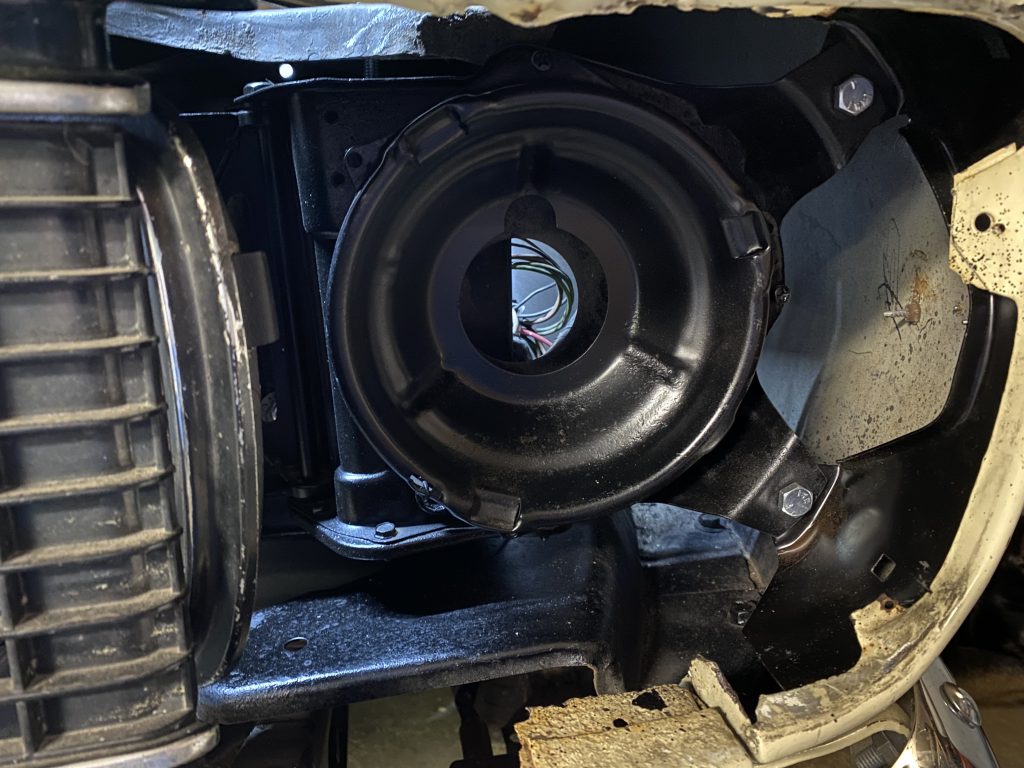
One last detail was moving the RS turn signal wiring. The wiring had been run through the area where the headlight doors move, and would interfere. The stock wiring harness goes through a hole in the inner fender. I drilled the holes and rerouted the wiring.
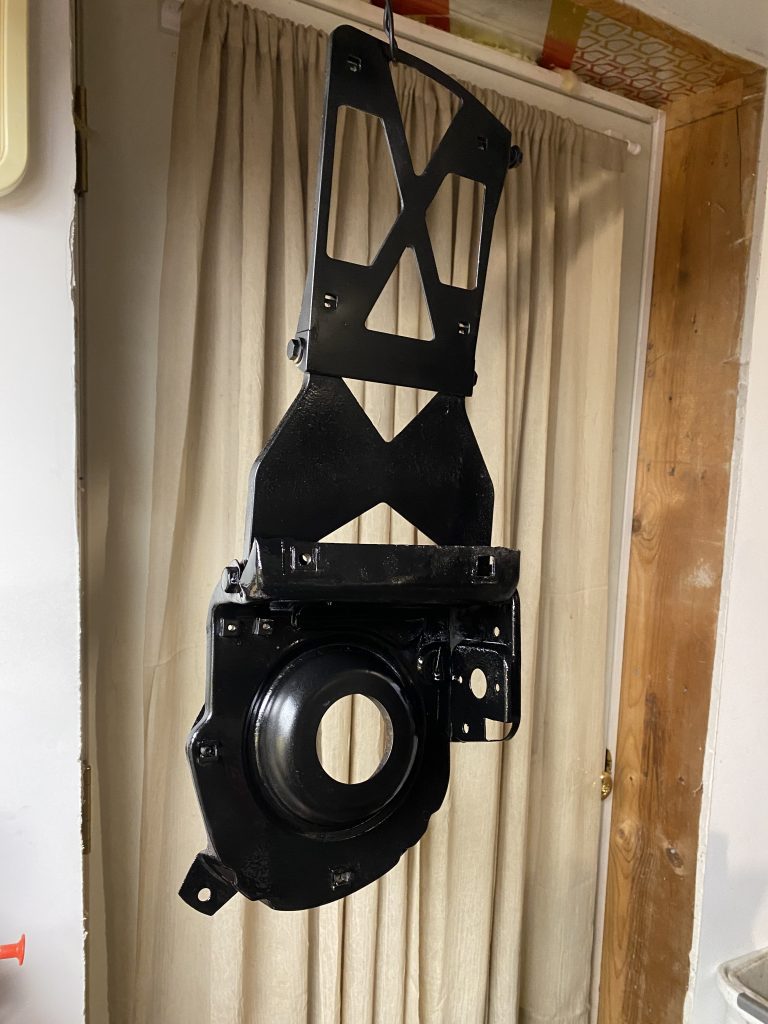
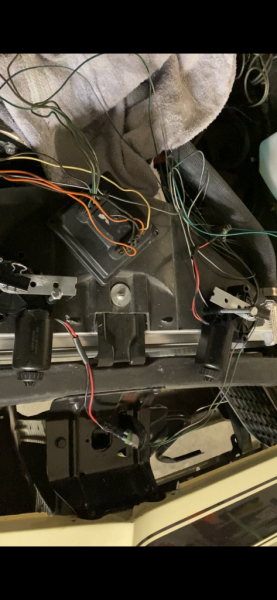
I did all of the modifications and test assembly using the original rusty dirty parts. I did clean things up and paint them before installing them on the car for the final time.
I still need to take care of a bunch of details, but the basics are working!
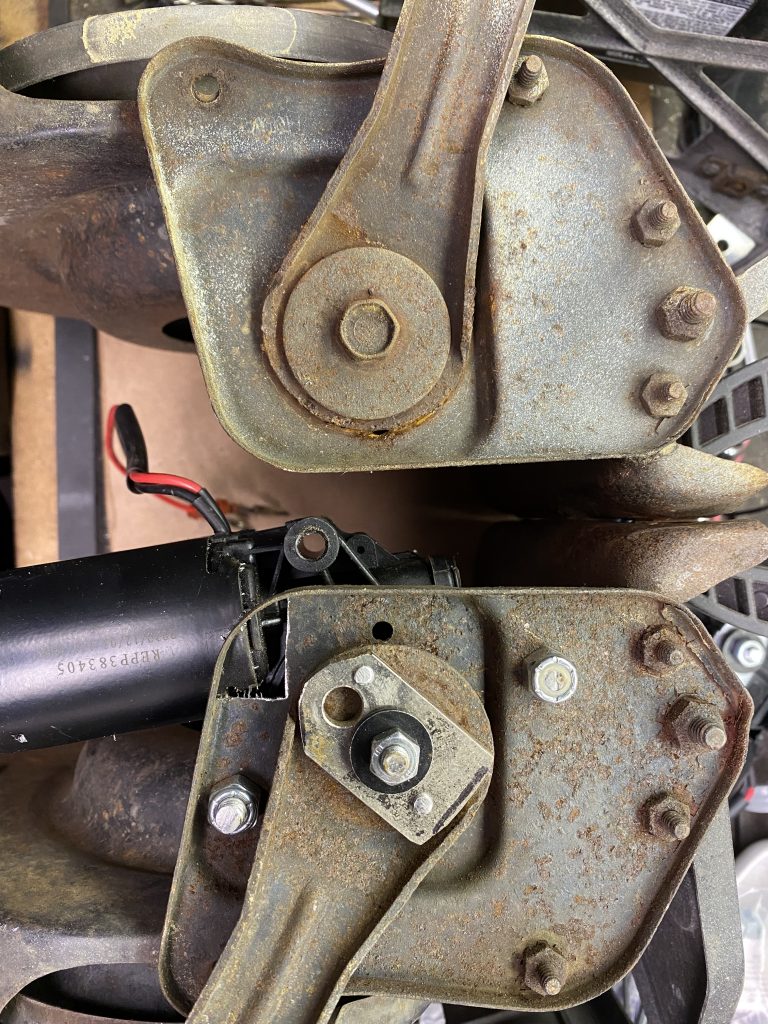
After playing around with the motors and the headlight bucket and door brackets, I decided the simples solution was to drive the original arm directly from the motor. I drilled holes in the bracket, mounted the motor, then made a D-shaped hole in a scrap 3/16” metal plate, and bolted it together.
From what i can tell, this car was originally a base model (manual transmission) car. The RS pieces are OEM, probably from a wrecked car. The headlight doors did swing on their brackets, but none of the mechanism or wiring to open and close them were on the car when we got it.
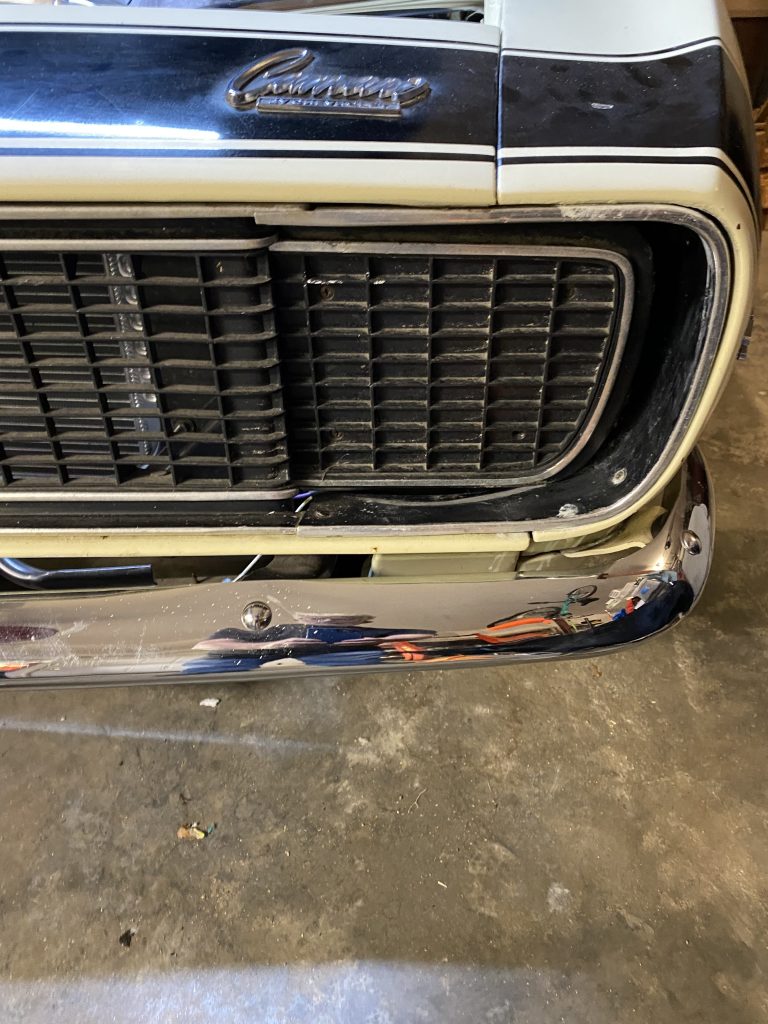
The original 67 setup had electric motors and a bunch of relays and switches. The 68-69 setup Used vacuum actuators. Getting the original stuff was going to be difficult and expensive, so I decided to go with something simpler.
After doing some research, I found that other people had used early 90’s Firebird headlight system components successfully. I hit eBay and got a set of left and right replacement motors, a controller module, and a wiring harness.
1990-2002 Pontiac Firebird
– Headlight controller
– Headlight wiring harness
– Headlight motors
After stripping the unnecessary wiring out of the harness, I was left with 4 connectors and some wire.
It looks complicated, but it’s really fairly simple:
The controller has two connectors on it.
One connector has four wires, those go to two 2-wire connectors for left and right motor power.
the other connector has five wires on it, the two black ones go to ground, the two orange ones go to +12v (this should go through a 10a fuse), and the yellow one is a signal wire that should be connected to the low beam power wire of one of the headlights.
The nice thing about this setup is there’s nothing to adjust. The controller powers the motor, the motor turns until it hits something, the controller senses the current draw go up because the motor isn’t able to turn, and the controller cuts power. Connect the signal wire to +12 and the controller runs the motors one direction, cut the power to the signal wire and it runs them in the other direction.
for the first test I put an arm on the motor shaft and a bolt for the arm to run into (click picture to see video):
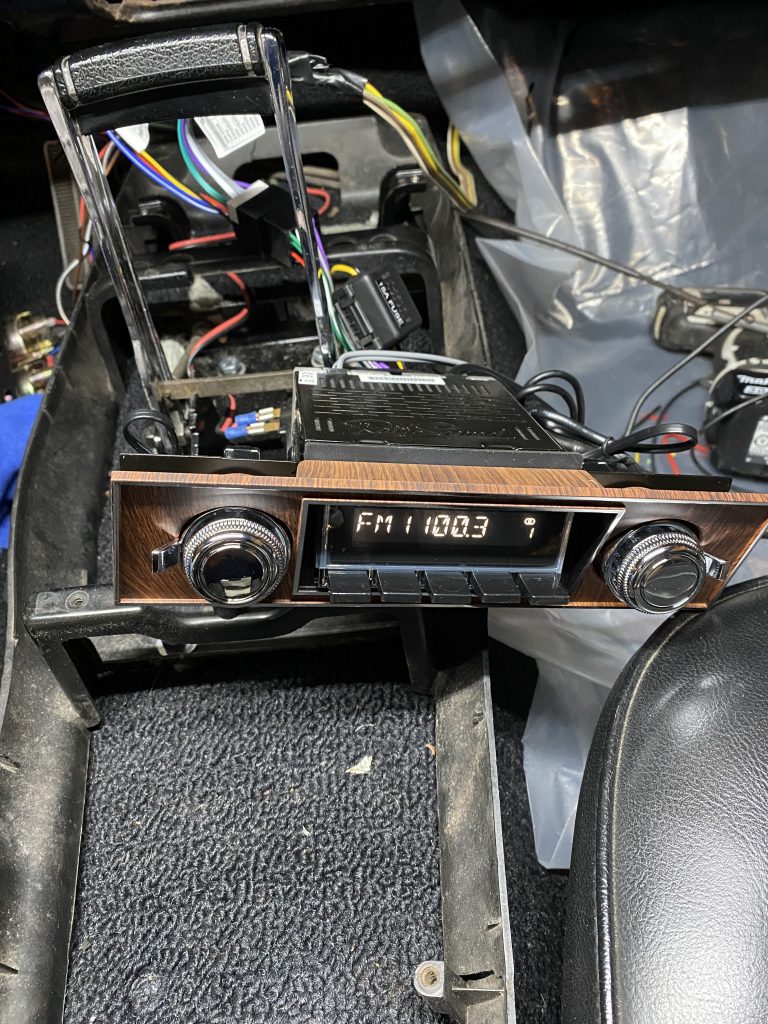
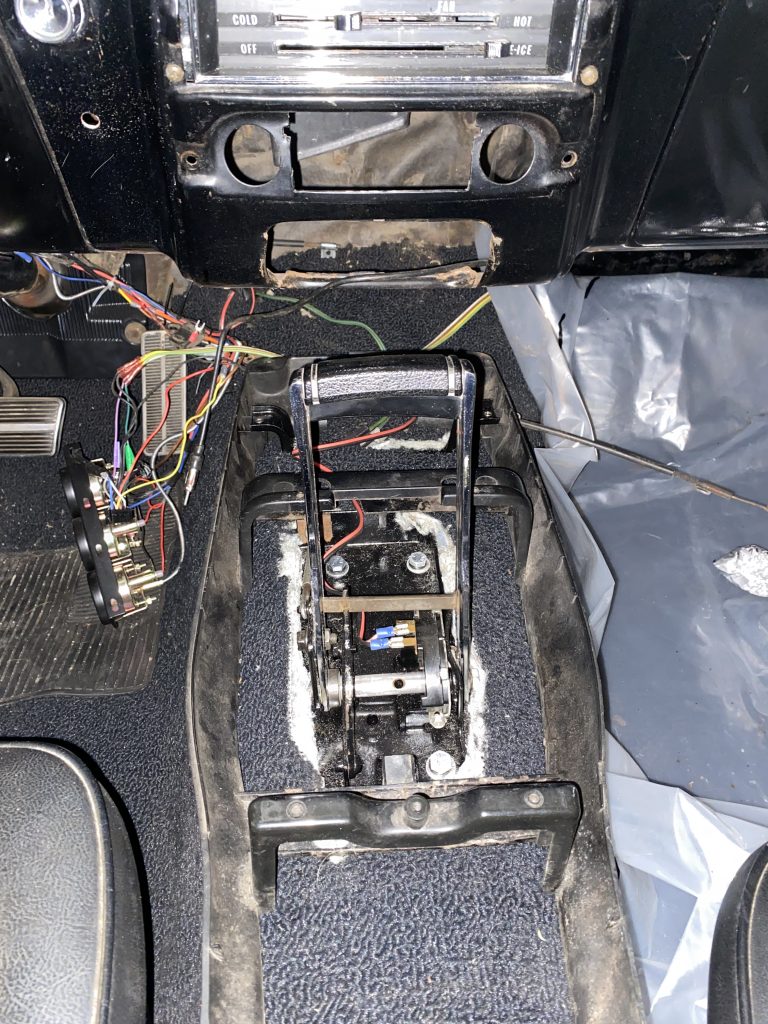
I got a Retrosound stereo for Christmas, so while I had the dash apart, I hooked it up:
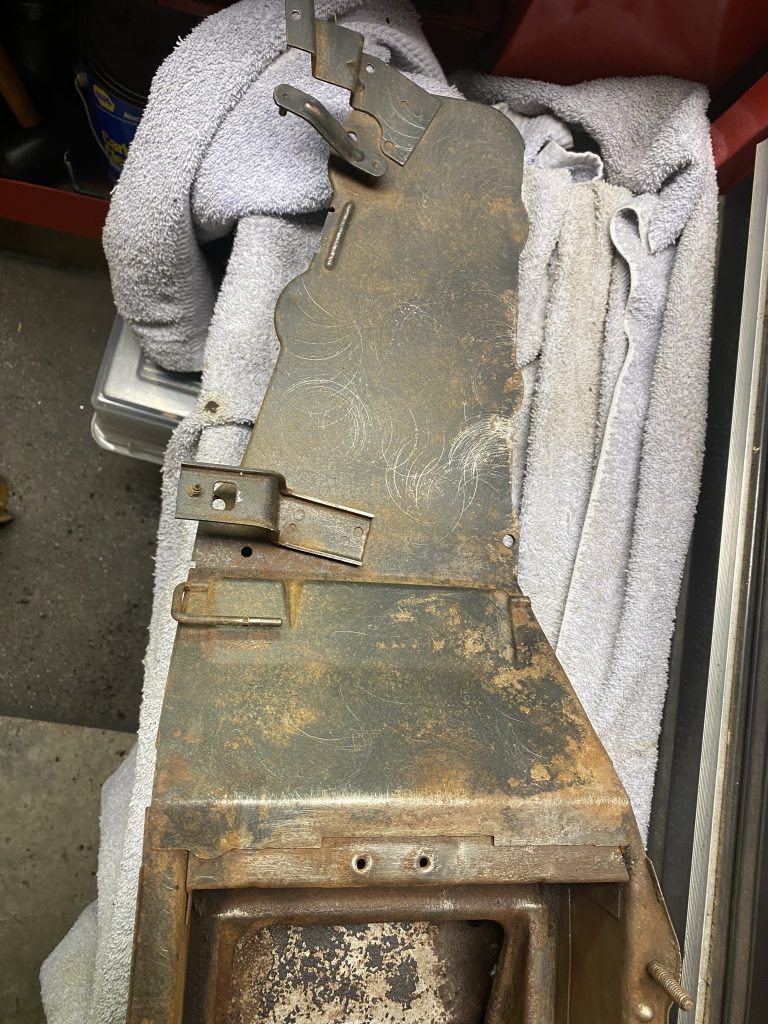
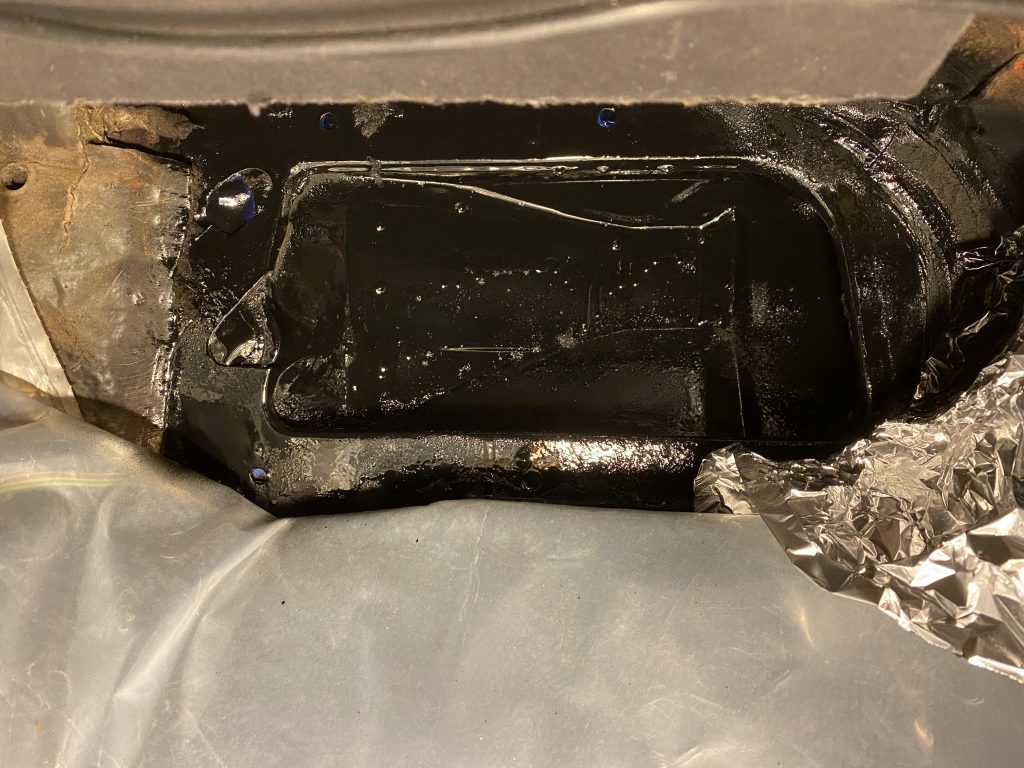
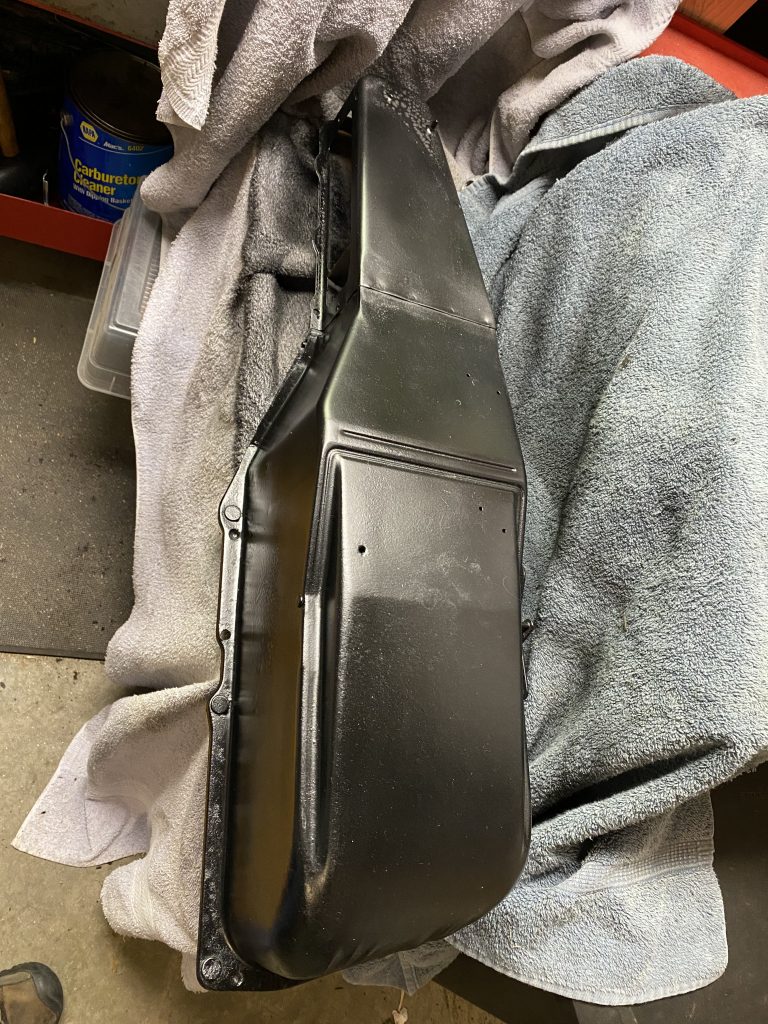
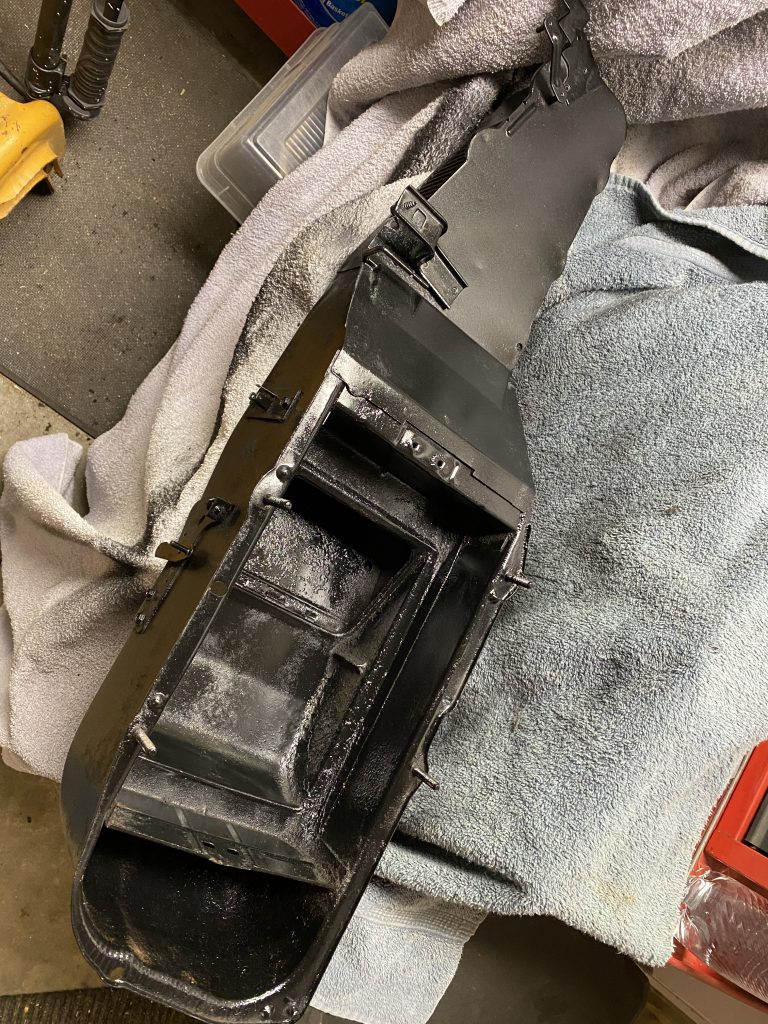
A quick shot of black paint to seal up the rest if the ugly
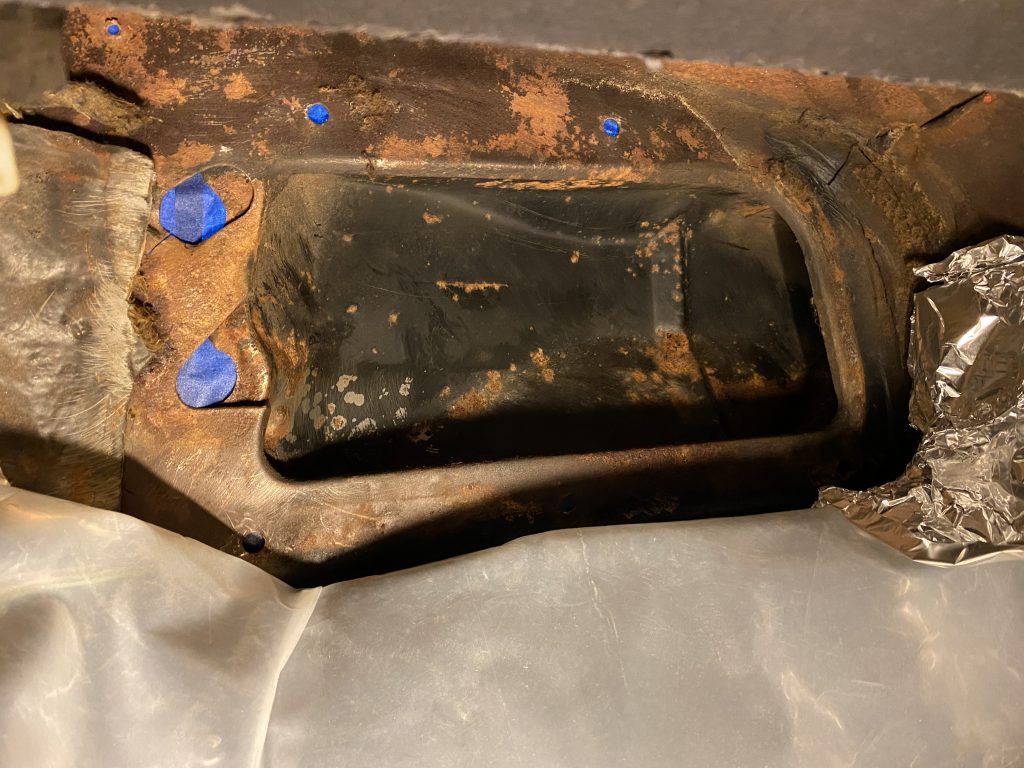
In addition to repairing the core leak, there was a mouse nest to clean up
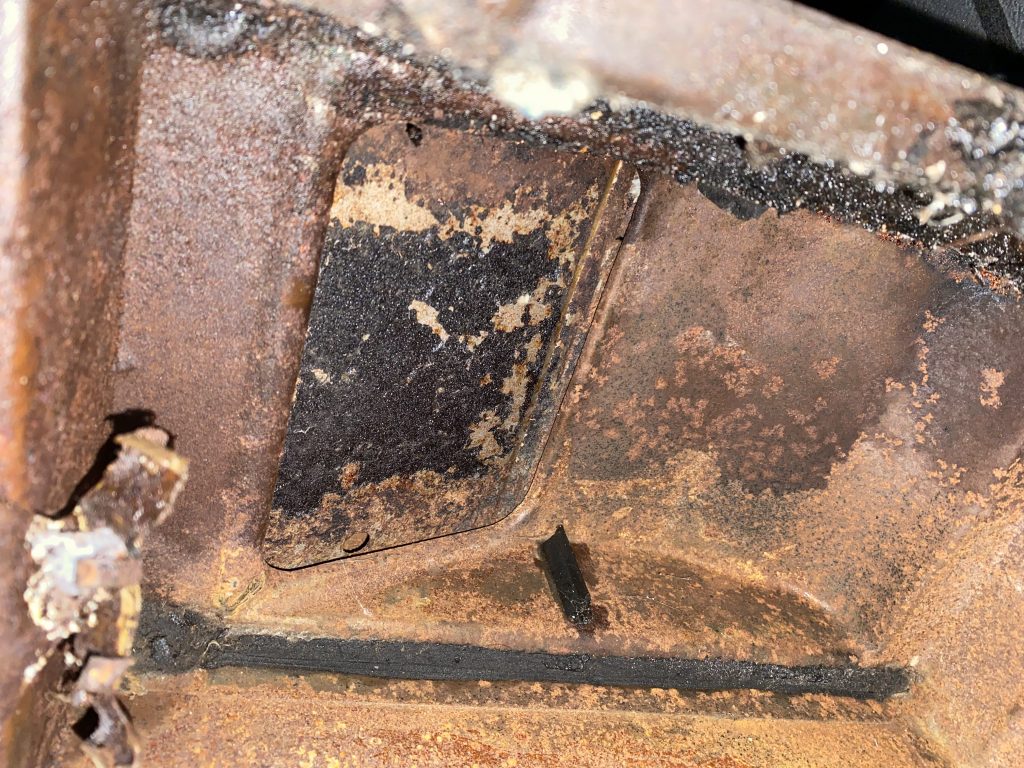

After some wire brushing and scraping: